Designer Series Paper and Snowflake Splendor
All my projects use the gorgeous Snowflake Splendor Designer Series Paper. It is so beautiful with soft muted tones. One side displays a range of beautiful snowflakes and the other side has even more of a watercolour feel with less defined snowflakes.
Project 1: A Set of 3 Boxes
As mentioned, my first project is a set of three boxes. The bases were made with coordinating card-stock and the lids created with three different designs of the Snowflake Splendor DSP. Each base has a depth of 2" (5cm), while the lid has a depth of 1" (2.5cm). These days I usually work in centimetres but with box making I often go back to my early years and work in inches. With the different depths of base and lid, both base and lid can be seen from the side. This also facilitates easy removal of the lid.
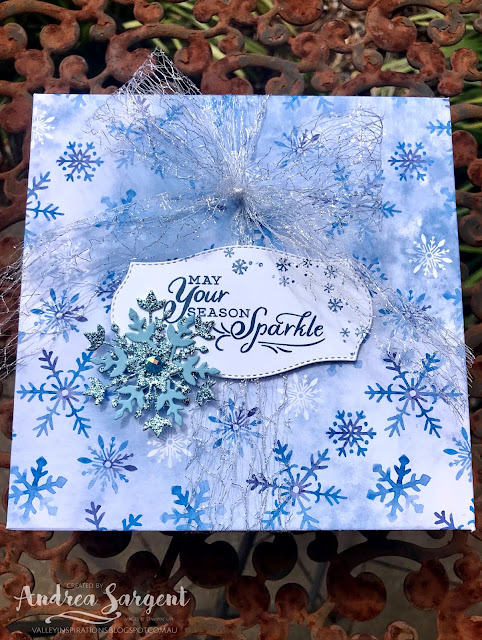
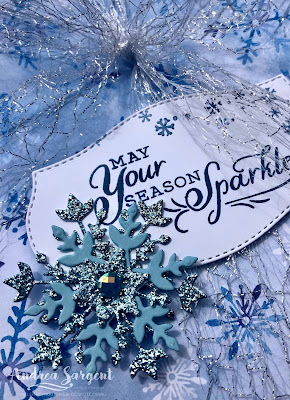
The largest box is 8"x8" (20cmx20cm) square with a depth of 2" (5cm). The base was made from 12"x12" (30cmx30cm) Coastal Cabana card-stock and the lid was cut to 10"x10" (25cmx25cm). When box creating I usually use my Simply Scored Scoring Tool with my Take Your Pick Tool, however, Stampin' Up! has a brilliant Paper Trimmer that includes a scoring blade along with the cutting blade - so this tool can be used instead - it's so versatile. The Snowflake was die cut from the Rainbow Glimmer Paper and Coastal Cabana card-stock using the So Many Snowflake dies. Blue Adhesive-Backed Gems that had been coloured with a Light Bermuda Bay Blend were adhered in the centre.
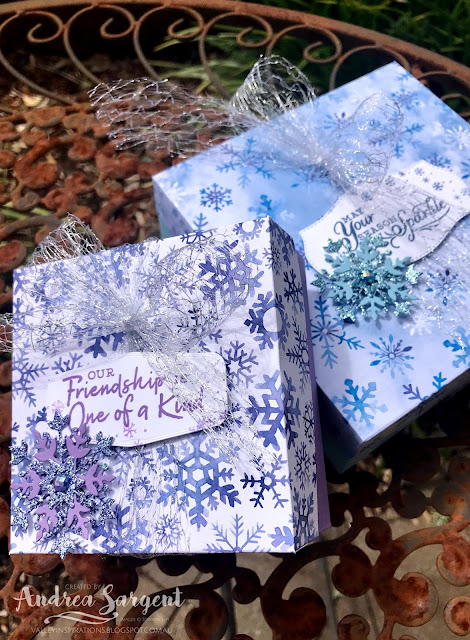
The 2nd box is 6"x6" (15cmx15cm) square with a depth of 2" (5cm). The base was made from 10"x10" (25cmx25cm) Balmy Blue card-stock and the lid was cut to 8"x8" (20cmx20cm) from DSP. The Snowflake was cut from Balmy Blue Glimmer Paper and Balmy Blue card-stock using the So Many Snowflake dies with a Blue Adhesive-Backed Gem adhered in the centre.
The 3rd box is 4"x4" (10cmx10cm) square with a depth of 2" (5cm). The base was cut to 8"x8" (20cmx20cm) of Highland Heather card-stock and the lid cut to 6"x6" (15cmx15cm) from DSP. The Snowflake was die cut from Balmy Blue Glimmer Paper (which was then coloured with a Light Highland Heather Blend) and Highland Heather card-stock using the So Many Snowflake dies. A Blue Adhesive-Backed Gem that had been coloured with a Dark Highland Heather Blend was adhered in the centre.
The labels for each of the boxes were cut from Whisper White card-stock using the Tasteful Labels dies. Each was stamped with tiny snowflakes from the Snowflake Wishes stamp set the different sentiments all came from the same stamp set. Aren't they lovely sentiments? The colour of Classic inks to stamp the sentiments were all chosen to coordinate with the particular DSP. Each of the boxes were tied with the luscious Metallic Mesh ribbon. It is so beautiful.
Project 2:
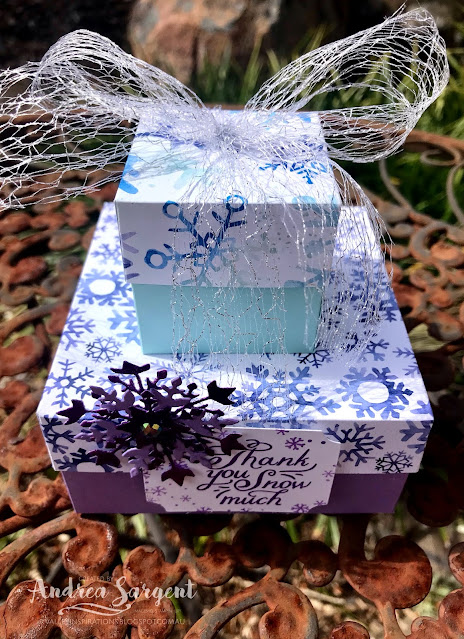
One of the boxes in this box stack is the same as the 3rd box shown above. In fact, it was this box that inspired me to make a stack as a hostess gift, as the DSP for the lid was cut to 6"x6" (15cmx15cm) so I could make a 2nd box from a pre-cut piece of DSP.
The smallest box is 2"x2" (5cmx 5cm) square with a depth of 2" (5cm). The base was cut to 6"x6" (15cmx15cm) of Pool Party card-stock and the lid cut to 4"x4" (10cmx10cm) from DSP.
The two boxes were stacked together and tie with the same Metallic Mesh ribbon. The Snowflake was die cut from Balmy Blue Glimmer Paper and Highland Heather card-stock using the So Many Snowflakes dies. Both a Blue Adhesive-Backed Gem and the Glimmer Paper were coloured with a Dark Pool Party Blend. The "Thank You" sentiment also came from the same stamp set.
Project 3:
A standard card size (in Australia), ie half a A4 piece of Balmy Blue card-stock was scored in half and then the front scored in half again. Two labels were cut from both Balmy Blue and Whisper White card-stocks using the 3rd largest dies from Hippo & Friends dies. Tiny snowflakes were stamped in Balmy Blue Classic ink on the white labels; with one of the labels also being stamped with the sentiment in Misty Moonlight Classic ink. The Balmy Blue labels were both cut in half and adhered to the underneath side of the white labels with a tiny bit of blue showing on either side of the front of the label.
A piece of the DSP was cut so that it would show a small boarder of the card base on the bottom half a card and a 2nd piece was cut to similarly show a boarder and adhere to the top quarter of the card. The label without the sentiment was adhered directly to the middle of the decorated bottom of the card base. The label with the sentiment was adhered on the LHS to the top decorated card front, ensuring it fully covered the label underneath.
In line with the box, Snowflake pieces were die cut from the Balmy Blue Glimmer Paper (1 x large and 2 x small snowflakes); and from Balmy Blue card-stock (2 x mid-size snowflakes). To create the larger snowflake the 3 different size pieces were adhered together and a Blue Adhesive-Backed Gem adhered in the middle. The smaller snowflake was created from the remaining 2 snowflakes. This smaller snowflake was adhered to the side of the top label and the larger snowflake to the side of the bottom label ensuring most of it would be seen when the card was closed.
I am so blessed to be apart of such a talented team. Knowing each of my colleagues in this Creative Showcase, I am sure that they have some amazing DSP projects to share with you. Don't miss checking out each of their blogs. Rachel is our brilliant host of the Art with Heart Monthly Creative Showcase. If you haven't finished visiting all of the team's amazing masculine creations, you can visit/revisit Rachel's page at Handstamped by Rachel, where she hosts all the links to the other Showcase participants. I'm certainly looking forward to checking out everyone's creations. I always find inspiration.
I hope you join us again next month for October's Art With Heart Team Creative Showcase. when we will be showcasing cards that only use 5 products. This is going to be a challenge for me but I am sure my colleagues will inspire you with #simplestamping using the Stampin' Up! products we love.


The cards and boxes are just so pretty. I love this paper and you've really showcased it so well on beautiful boxes. How pretty does that ribbon look with them too.
ReplyDeleteWow Andrea, you have been busy - these projects are all amazing! I especially love the box with the matching card - simply divine!
ReplyDeleteAmazing snowflake projects Andrea, you have been very busy
ReplyDeleteYour projects are beautiful, Andrea, and obviously made with love! Those colours are divine.
ReplyDeleteOh my goodness, Andrea, you have been super busy - your projects are gorgeous as always and total perfection. I bought this paper in the sale and it is so pretty in real life.
ReplyDeleteWow these projects are just gorgeous! I love them and they are going to be loved by the people you gift them to! The boxes are fabulous and I love the cards you made to go with them. GORGEOUS!
ReplyDeleteAndrea, those boxes and card are all so beautiful. So much gorgeous sparkle and colour and ribbon - oh my! I just love them all.
ReplyDeleteWow Andrea you have been busy. Your cards are gorgeous but I am in love with your boxes. What a fabulous way to use the DSP.
ReplyDelete