Art with Heart Wow Tutorials

Wednesday, 28 September 2022

AWHT Colour Creations #22 Garden Green

Garden Green with Sweet Candy Canes

Hello. Welcome to Valley Inspirations with Andrea and the Art with Heart Colour Creations Blog Hop. We are working though the Stampin' Up! colours in alphabetical order and are currently up to “G”. 


This week’s Blog Hop is focussing on a mid green called Garden Green. Garden Green is part of the Regals Family and is, as the name suggests, a great green for garden or nature focused projects. This colour is lovely when used for leaves, at Christmastime (it usually goes with Real Red) and so much more. 


Garden Green is produced in Stampin' Up!'s card-stock, both A4 & 12"x12"Classic Stampin' inks (ink pads re-inkers); Stampin' Write Markers; Watercolor Pencils; Regals Designer Series Paper as well as Sweetest Christmas, Gingham Cottage & Painted Christmas DSPs plus Real Red & Garden Green Ribbon Combo Pack, Adhesive-backed Seasonal Sequins; Cozy & Bright Kit; Today is the Day Memories & More Card Pack and Tea Boutique Cards & Envelopes. 

My cards use Garden Green Classic ink, card-stock, Sweetest Christmas DSP, Real Red and Garden Green Ribbon Combo Pack and Adhesive Backed Seasonal Sequins (they have Garden Green sequins included but the green sequins were not used on this week’s cards). Here are my two cards featuring Garden Green:

Easily create your own Christmas cards using Stampin' Up!s Sweetest Christmas Suite.

As you can see both cards use the same Candy Cane dies and Sweetest Christmas DSP; the coordinating Christmas Banners bundle, the Real Red & Garden Green ribbon combo pack and the Adhesive-backed Seasonal Sequins

CARD 1:

While featuring Garden Green, this card uses a colour combination from the Sweetest Christmas Designer Series Paper and a number of products coordinated within the suite.

Easily create your own Christmas cards using Stampin' Up!s Sweetest Christmas Suite.

The diagonal stripe die from the Candy Cane die set is so gorgeous. It was first used to cut a piece of Basic White card-stock. Another piece of white card-stock was cut to the same size and layered beneath the diagonal die cut piece. A Blending Brush was used to ombré colour both the die cut and the layer beneath in Garden Green Classic Stampin’ ink. The coloured die cut was layered on a piece of Basic White card-stock that had been blended with Pool Party ink in ombré colouring - the darker part of the Pool Party ombré was opposite to the darker section of the Green Green ombré. A piece of Snowflake Speciality Vellum with the felt-ish "snowflake" dots was layered in between.

Easily create your own Christmas cards using Stampin' Up!s Sweetest Christmas Suite.

The coloured top panel was layered onto the Garden Green card base with Dimensionals. The larger and second largest circular Stylish Shapes dies cut vellum and Basic White labels that were added to the centre of the card. The white label had been embossed with the Pine EF from the Wintry 3D Embossing Folders. A swoosh of Real Red ribbon from the Real Red & Garden Green ribbon combo pack was added and then 2 die cut candy canes from the Sweetest Christmas DSP were layered over with the top candy cane added with Dimensionals.

Easily create your own Christmas cards using Stampin' Up!s Sweetest Christmas Suite.

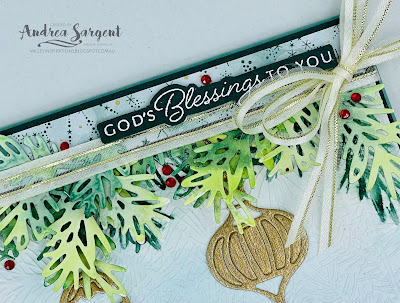
Pine fronds were cut in Soft Sea Foam card-stock using a die from the Christmas Banner die set. Some Garden Green ink was blended over theses die cuts before they were poked in here and there. A banner from the coordinating Christmas Banners stamp set was white heat embossed using White Emboss Powder, Versamark ink and a Heat Tool and a sentiment from the same stamp set was also white embossed. A number of red & white Adhesive-Backed Seasonal Sequins were added as the finishing touch.

Easily create your own Christmas cards using Stampin' Up!s Sweetest Christmas Suite.

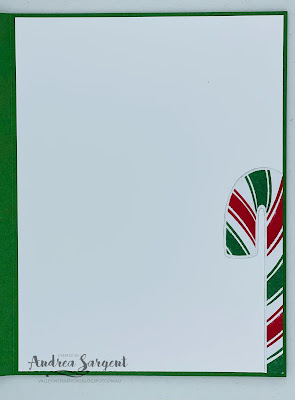
A partial candy cane from the edge of a sheet of the Sweetest Christmas DSP was adhered to a Basic White card inner. The flap of a Basic White C6 envelope had a section of coordinating DSP adhered. This adds a special touch to an envelope.

Easily create your own Christmas cards using Stampin' Up!s Sweetest Christmas Suite.

CARD 2:

The second card uses the panel underneath the diagonal die cut panel that was coloured in an ombré fashion in Garden Green.

Easily create your own Christmas cards using Stampin' Up!s Sweetest Christmas Suite.

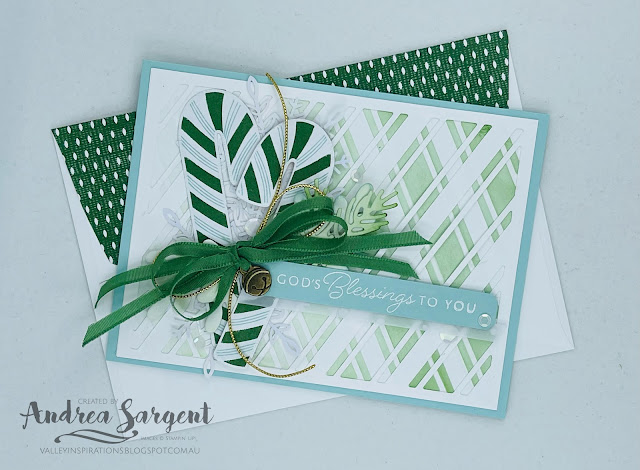
Another piece of Basic White card-stock was cut with the diagonal striped die and this was layered with the stripes going in the opposite directions. I love the effect this created. This panel was then adhered to a Pool Party card base. The colour combination for this second card is Garden Green, Pool Party and Basic White with touches of Gold and Antique Gold.

Easily create your own Christmas cards using Stampin' Up!s Sweetest Christmas Suite.

Two Garden Green & Pool Party candy canes were die cut from the Sweetest Christmas DSP, ensuring the candy canes face in opposite directions. Two Wonderful Snowflakes were adhered directly to the card front and the two candy canes added over, one adhered with Multipurpose Liquid Glue and the other with Dimensionals.

Easily create your own Christmas cards using Stampin' Up!s Sweetest Christmas Suite.

A sentiment from the Hope and Peace stamp set was white heat embossed on a scrap of Pool Party card-stock. It was trimmed with my trusty Trimmer & Scorer and each end cropped with the Lovely Labels Pick A Punch. Bows were tied with a piece of Garden Green ribbon (that had been cut in half lengthwise) and Gold Elegant Trim. A bell trinket was threaded on the ribbon before the bow was tied. A left over pine frond (from the previous card) and a couple of Pool Party die cut mistletoe pieces were poked in near the bows. A little sparkle was added with white Adhesive-backed Seasonal Sequins. They are gorgeous sequins and so simple to use.

Easily create your own Christmas cards using Stampin' Up!s Sweetest Christmas Suite.

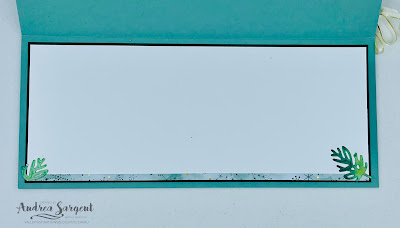
A strip of Garden Green/White DSP was added to a Basic White card inner. The same DSP was adhered to the back flap of a Basic White C6 envelope.

Easily create your own Christmas cards using Stampin' Up!s Sweetest Christmas Suite.

I really enjoyed creating the blended backgrounds, especially as the 2 were inked at the same time. The coordinating Sweetest Christmas DSP is great giving us the ability to die cut candy canes. The DSP is so happy and fun. 

Easily create your own Christmas cards using Stampin' Up!s Sweetest Christmas Suite.

Thank you for spending time with me on my blog. I hope you have started creating your Christmas cards. Christmas will be here before we know it.

There is more Garden Green creativity. To continue with the blog hop, click the  "onto the next" graphic below and be taken to the blog of my friend, the lovely Christine BlainI always look forward to checking out Christine’s creations. I do love seeing everyones' projects - there is always so much inspiration.

I hope to see you next week when we will be featuring Gorgeous Grape, as we continue the weekly 2022-2023 Colour Creations Blog Hops.  Also, don't forget that many of us are joining the Heart of Christmas Blog Hop on Monday evenings to share lovely Christmas projects to give you some ideas to help with your Christmas preparations. 

Stay well, stay safe and be kind to yourself and others. 

Andrea 💕🐾


If you find a broken link or have come to this blog hop from a different entry point, you can view the full list of participants on Catherine Proctor’s blog @ What Cathy Made. Cathy is our  Art With Heart Team Colour Creations Coordinator.  She is a special lady. Check out her delightful creation while you are there.

If you live in Australia, don't already have a Stampin' Up! demonstrator and would like your own copy of Stampin' Up's 2022-2023 Annual Catalogue and or the July - December 2022 Mini Catalogue then let me know and I will be delighted to send them to you.  Please don't hesitate to make contact with any other queries about these projects or Stampin' Up!. 


#colourcreationsbloghop  #stampinup #stampinupaustralia #stampinupsouthpacific #stampinupdemo  #handmadecards #makeacardsendacard #stampinupdemonstrator #papercrafting #artwithheartteam  #papercrafter  #stamper  #valleyinspirations   #sweetestchirstmas, #chirstmasbanners, #hopeandpeace

Monday, 26 September 2022

AWH Heart of Christmas #13

Heart of Christmas Blog Hop: Boughs of Holly and Celebrate Everything

Hello. Welcome to Valley Inspirations with Andrea and the Art with Heart Team Heart of Christmas Blog Hop for 2022. 

So glad you are joining us for our thirteenth 2022 Heart of Christmas Blog Hop

I had fun crafting with a friend on Saturday were we created a pack of Gift Cards. Later I made a stepped up version especially for Christmas. Here is the stepped up Christmas Gift Card Pack using the delightful Boughs of Holly Designer Series Paper:


This project is based on a u-Tube by the Paper Pixie where she created a no glue folded card holder for 3"x3" gift cards. As Julie DiMatteo provides a great tutorial, if you want to create something similar, I suggest you watch her uTube (Episode 252)Here are some brief details & photos to give you a sense of the process.

A sheet of 12x12 Boughs of Holly DSP was cut, scored and burnished. Then the card holder is folded into shape. There is no adhesive holding it together. It can be opened fully as shown here - showing both sides of the opened project.


To shape the ends of the top tags on the holder, the Very Best Trio Punch was used. It was also used to punch the slots for the ribbon that will hold it all together with a bow. The tag dies from the Holly Berry dies cut both tags in Basic White card-stock. The small tag was stamped with sentiments from the Leaves of Holly stamp set in Old Olive Classic Stampin ink. A piece of the muted green "B" side of one of the Boughs of Holly DSP sits behind the larger label.


The above photo shows the inside of the card holder. The photo below shows the No Glue Mini Gift Card Holder with its contents - 8 Christmas Gift Cards.


The gift cards end up as 3"x3" cards and can fit in the small square envelopes available from Stampin' Up!. I thought I had a few packs of these envelopes but couldn't find them so ... either they are put away in a "safe place" or I forgot that they were all used. They will be added to my next order. Back to the gift cards. Each gift card is cut to 3" x 6" and scored at 3". A piece of Basic White card-stock, cut to 2 7/8" x 2 7/8" is added to the inside of each card.


Two cards were made using the same DSP design and 4 different designs were used. The smaller tag from the Holly Berry dies was used with Basic White card-stock. The sentiments from the Leaves of Holly stamp set were stamped in inks coordinating with the colours in the relative DSPs, ie Mossy Meadow, Old Olive, Shade Spruce or Evening Evergreen Classic inks


The die cut holly leaves that are part of the larger label die and were cut from Basic White card-stock and added behind the smaller label. To change the holly leaf arrangement on some of the cards the leaves were cut apart and added in a different way.


A hole was punched in the folded corner of the Christmas Gift Cards using the Label Me Fancy punch and some fine ribbon was looped through the hole. Some retired Stampin' Up! ribbon was used as I couldn't find what I was looking for. The final touch was the addition of some Red Rhinestone Basic Jewels.


Here are some photos of the No Glue Mini Gift Card Holder and Gift Cards that were made when crafting with a friend. We used the Celebrate Everything Designer Series Paper to create the cardholder and gift cards. Stampin' Up!s DSP is fantastic with designs on both sides. It is wonderful for use where both sides of the paper will be seen. Handmade Wishes stamp set was used for the sentiments and some decorative touches.


Below is a photo of the Gift Card Holder and the set of Gift Cards. Of the 8 gift cards, 4 are Christmas specific and the other 4 could also be used at other times as well.


I have been asked as a guest demonstrator at a craft group in a few days time so we will make the Christmas gift cards shown below (together with another project).


Thank you for dropping in and spending some time with me. I do appreciate it.

It is always a delight to see everyone's creations and I am sure there will be gorgeous Christmas projects on show so don't miss checking out each blog. To continue with the blog hop, click on the "onto the next" graphic below to be taken to the blog of my friend, the lovely Christine Blain. I always look forward to checking out Christine's creations as well as everyone else's. 

Don't forget the weekly Colour Creations Blog Hop by the Art with Heart Team that launches every Wednesday at 8.00pm AEST. We will be featuring Garden Green this coming Wednesday.

Stay well, stay safe and be kind to yourself and others.

Andrea XXX


If at any time you find a broken link and the next blog doesn’t come up or you started part way through, please head to the blog of our Heart of Christmas Blog Hop Host, the very special Sharon Davern, and she will have the list of all Art With Heart Team members who are participating in this blog hop. Check out her beautiful creation while you are there.

If you are in Australia, don't already have a Stampin' Up! demonstrator and would like your own copy of Stampin' Up's 2022-2023 Annual Catalogue and or the July - December Mini Catalogue then let me know and I will be delighted to send them to you. Pease don't hesitate to contact me with any other queries about these projects or Stampin' Up!. 

#heartofchristmas #heartofchristmas2022  #awhtheartofchristmas #Stampin'Up! #stampinupaustralia #stampinupsouthpacific #stampinupdemo  #handmadecards #makeacardsendacard #stampinupdemonstrator #papercrafting #artwithheartteam  #papercrafter  #stamper  #valleyinspirations #boughsofholly #celebrateeverything #handmadewishes #leavesofholly

Wednesday, 21 September 2022

AWHT Colour Creations #21 Fresh Freesia

Fresh Freesia with Wisteria Wonder

Hello. Welcome to Valley Inspirations with Andrea and the Art with Heart Colour Creations Blog Hop. We are working though the Stampin' Up! colours in alphabetical order across a 12 month period.


This week’s Blog Hop is focussing on a light purple called Fresh Freesia. Fresh Freesia is part of the 2021-2023 In Colour Family and is a beautiful soft mauve colour. I will miss it when it disappears next June. This colour is lovely when used for flowers; when mixed with pool party, Coastal Cabana, Highland Heather & Balmy Blue it is delightful for snowflakes and it can be used in so many other ways - just check out the range of Designer Series Papers referenced below. 


Fresh Freesia is produced in Stampin' Up!'s card-stock, both A4 & 12"x12"Classic Stampin' inks (ink pads re-inkers); Stampin' Write Markers; Stampin' Blends; In Colours Designer Series Paper as well as Butterfly Kisses, Tea Boutique & Hues of Happiness DSPs plus the Splendid Day Speciality Designer Series Paper; In Colour Open Weave Ribbon, In Colour Opal Rounds, Adhesive-backed Sequins, Loose Flower Flourishes, Fun Flowers Resin Shapes; and Tea Boutique Cards & Envelopes. 

My card uses Fresh Freesia Classic ink, card-stock, Splendid Day SDSP and 2021-2023 In Colour Opal Rounds. Here it is:


But there is more … as the card front panel looks through a circular hole to a seperate middle panel underneath. You just need to open the front flap to see the second panel in full. The scene was created on Basic White card-stock and then mounted on Fresh Freesia card-stock.


The middle panel opens to the right to reveal the inner panel for writing a personal message. The inner panel of Basic White card-stock had 2 con-joined snowy trees adhered and a little Fresh Freesia shading at the base of the trees.


So lets briefly talk about the process. The front panel of Basic White card-stock was adhered to a slightly larger piece of Fresh Freesia Splendid Day Speciality Designer Series Paper. The largest stitched circle from the Stylish Shapes die cut a hole in the centre of the card front and then also in the front flap of the card base.


Some Masking Paper was die cut with the second largest Deckled Rectangles dies and added to a Basic White panel. When using Masking Paper, it is important to reduce the stickiness a little either with an Embossing Buddy or by laying it on your clothes. Fresh Freesia and Rich Razzleberry inks were blended across the masked rectangular hole with one of Stampin’ Up!s delightful Blending Brushes. Before lifting the Masking Paper 2 trees were stamped to the left. The trees were stamped in second generation Soft Succulent and a third generation of Evening Evergreen. Other trees were stamped on a seperate sheet of Basic White card-stock with first generation Soft Succulent and Evening Evergreen inks. All the trees were heat embossed with Versamark ink, White Emboss Powder and a Heat Tool to give a sense of snow. The extra trees were die cut with the coordinating Wisteria dies.


A sentiment from the Brightest Glow stamp set was stamped in Rich Razzleberry ink. As I was adding the sentiment to a panel that had a fair bit of work on it,  I used a Stamparatus to first ensure that the sentiment was straight and then to ink and stamp a couple of times to ensure a clear & well inked sentiment. In stamping the above trees I accidentally smudged the white panel near the sentiment - hence the addition of the little tree.


To finish off the card, the trees were positioned and adhered on the middle panel and the card front. They were initially positioned by looking from the front and then checking the arrangement from the inside. A touch of Fresh Freesia ink was added with a Blender Pen to give the trees some shadowing to ground them. Wink of Stella was flicked over the front and middle panels - although the camera doesn’t pick up the subtle sparkle. I tried a number of ribbons & twine but decided they didn’t add to the overall design. It felt strange, as I do like adding either ribbon or twine. Some In Colour Opal Rounds (in Fresh Freesia) were added for some extra glimmer.


A Basic White C6 Envelope was stamped with the 3 joined “Wisteria” trees in Soft Succulent ink and topped with Evening Evergreen ink. I must add a little shadowing to them as well.


Thank you for spending time with me on my blog. I am off to finish the other Fresh Freesia card that I started to create. It was the project that first came to mind in my planning for this Blog Hop. I then decided to also make a Christmas card so I could add to my card stash. Somehow it was finished first. The other card is finished but rather than adding a photo of it here, after the event, check back on my blog on 1 October for Kathryn’s World Card-making Day’s Blog Hop.

There is more Fresh Freesia creativity. To continue with the blog hop, click the  "onto the next" graphic below to be taken to the blog of the lovely Kate MorganI always look forward to checking out Kate’s creations. I do love seeing all blog hoppers' projects - there is always so much inspiration.

I hope to see you next week when we will be featuring Garden Green as we continue the weekly 2022-2023 Colour Creations Blog Hops.  Also, don't forget that many of us are joining the Heart of Christmas Blog Hop on Monday evenings to share delightful Christmas projects to provide some ideas to help with your Christmas preparations. 

Stay well, stay safe and be kind to yourself and others. 

Andrea 💕🐾


If you find a broken link or have come to this blog hop from a different entry point, you can view the full list of participants on Catherine Proctor’s blog @ What Cathy Made.  Cathy is our  Art With Heart Team Colour Creations Coordinator.  She is an special lady. Check out her delightful creation while you are there.

If you live in Australia, don't already have a Stampin' Up! demonstrator and would like your own copy of Stampin' Up's 2022-2023 Annual Catalogue and or the July - December 2022 Mini Catalogue then let me know and I will be delighted to send them to you.  Please don't hesitate to make contact with any other queries about this project or Stampin' Up!. 

#colourcreationsbloghop  #stampinup #stampinupaustralia #stampinupsouthpacific #stampinupdemo  #handmadecards #makeacardsendacard #stampinupdemonstrator #papercrafting #artwithheartteam  #papercrafter  #stamper  #valleyinspirations   #wisteriawonder, #brightestglow, #hopeandpeace

Monday, 19 September 2022

AWH Heart of Christmas #12

Heart of Christmas Blog Hop: Decorated with Happiness

Hello. Welcome to Valley Inspirations with Andrea and the Art with Heart Team Heart of Christmas Blog Hop for 2022. 

So glad you are joining us for our twelfth 2022 Heart of Christmas Blog Hop. I had fun playing with a new technique to create moving elements on this card:
 
Bless family or friends with this delightful personally created Christmas card using the Decorated with Happiness bundle.

Check out the position of the baubles. You will see that they are in different positions in the various photos. They swing to and fro, each pivoting at points under the pine branches. I recently had seen a video on uTube by Susan Campfield, a US Demonstrator, where she made a card with Santa's feet swinging underneath his body. It got me thinking about how the technique could used. I also wanted to try stamping on misted cardstock so the stamping had a water-colour look. ... And this card came into being. While a little of the stamping can be seen in the photos, sadly much of the stamping has been hidden by the die cut pine boughs.

Bless family or friends with this delightful personally created Christmas card using the Decorated with Happiness bundle.

A panel of Shimmery White card-stock was misted with water in a Stampin' Up! mister and then stamped with the pine boughs that had been coloured with Soft Succulent and Evening Evergreen Classic Stampin' inks. I then water-coloured the lower section with Balmy Blue ink, using the medium Water Painter. The panel was put aside to dry while pine boughs were die cut from Shimmery White card-stock using the coordinating Decorated Pine dies. They were coloured with Evening Evergreen and Parakeet Party inks.

Bless family or friends with this delightful personally created Christmas card using the Decorated with Happiness bundle.

The water-coloured panel was embossed with the pine embossing folder from the Wintry 3D Embossing Folders set. This was mounted to a slightly larger piece of Evening Evergreen card-stock. The baubles were die cut from Gold Metallic Speciality Paper. Some of the pieces within the baubles were pushed out and a strip of the same Speciality paper was adhered to the top loop of each bauble. A hole was punched in this strip using a retired 1/2" punch. The baubles were positioned and a Dimensional was adhered within the hole in the strip, ensuring the bauble was able to move. More Dimensionals were added across the top and a 2cm strip of Evening Evergreen card-stock was adhered on top. The water-coloured pine boughs were positioned and adhered with Multipurpose Liquid Glue over the top strip of card-stock. This enabled the baubles to swing freely.

Bless family or friends with this delightful personally created Christmas card using the Decorated with Happiness bundle.

A piece of Lights Aglow Speciality Designer Series Paper was adhered to a second 2cm strip of Evening Evergreen card-stock which was adhered over the adhered pine bough ends. Vanilla & Gold Satin Edged Ribbon was wrapped around the card front and a bow was tied with ribbon that had been slice in half lengthwise. A sentiment from the Hope and Peace stamp set was heat embossed onto a piece of Evening Evergreen card-stock with Versamark ink, White Stampin' Emboss Powder and a Heat Tool. The sentiment was fussy cut with my trusty Snips and added in place with Mini Dimensionals. Red Rhinestone Basic Jewels were coloured with a Dark Cherry Cobbler Alcohol Blend and they were scattered around.

Bless family or friends with this delightful personally created Christmas card using the Decorated with Happiness bundle.

A piece of Basic White card-stock was mounted to a slightly larger piece of Evening Evergreen cardstock. A fine strip of the SDSP was adhered at the base and a couple of small pine boughs were added. A pine bough was stamped in Soft Succulent ink on the front of a Soft Succulent Slimline envelope.

Bless family or friends with this delightful personally created Christmas card using the Decorated with Happiness bundle.

Thank you for dropping in to check out my Christmas card using the Decorated with Happiness bundle. I do love this bundle.

It is always a delight to see everyone's creations and I am sure there will be gorgeous Christmas projects on show, so don't miss checking out each blog. To continue with the blog hop, click the "onto the next" graphic below to be taken to the blog of the lovely Caroline Manwaring. I always look forward to checking out Caroline's creations together with everyone else's. 

Don't forget the weekly Colour Creations Blog Hop by some members of the Art with Heart Team that launches every Wednesday at 8.00pm AEST. 

Stay well, stay safe and be kind to yourself and others.

Andrea XXX


If at any time you find a broken link and the next blog doesn’t come up or you started part way through, please head to the blog of our Heart of Christmas Blog Hop Host, the special Tina Gillespie, and she will have the list of all Art With Heart Team members who are participating in this blog hop. Check out her beautiful creation while you are there.

If you are in Australia, don't already have a Stampin' Up! demonstrator and would like your own copy of Stampin' Up's 2022-2023 Annual Catalogue and or the July - December Mini Catalogue then let me know and I will be delighted to send them to you. Pease don't hesitate to contact me with any other queries about this project or Stampin' Up!. 

#heartofchristmas #heartofchristmas2022  #awhtheartofchristmas #Stampin'Up! #stampinupaustralia #stampinupsouthpacific #stampinupdemo  #handmadecards #makeacardsendacard #stampinupdemonstrator #papercrafting #artwithheartteam  #papercrafter  #stamper  #valleyinspirations #decoratedwithhappiness #hopeandpeace

Wednesday, 14 September 2022

AWHT Colour Creations #20 Flirty Flamingo

Flirty Flamingo with Heavenly Hollyhocks and Snow Crystal

Hello. Welcome to Valley Inspirations with Andrea and the Art with Heart Colour Creations Blog Hop. We are working though the Stampin' Up! colours in alphabetical order. 


This week’s Blog Hop is focussing on a bright pink called Flirty Flamingo. Flirty Flamingo is part of the Brights Colour Family and is a happy colour. This colour is lovely when used for  flowers, tea cups and so much more. 


Flirty Flamingo is produced in Stampin' Up!'s card-stock, both A4 & 12"x12"Classic Stampin' inks (ink pads, Spots Assortment re-inkers); Stampin' Write Markers; Water-colour Pencils; Stampin' Blends; Regals Designer Series Paper as well as Hues of Happiness DSP; plus Love This Memory Notebook Kits, Kindness Card Kits & Celebrate Today Magnet Board Kits; & For Everything Fancy Sequins. 

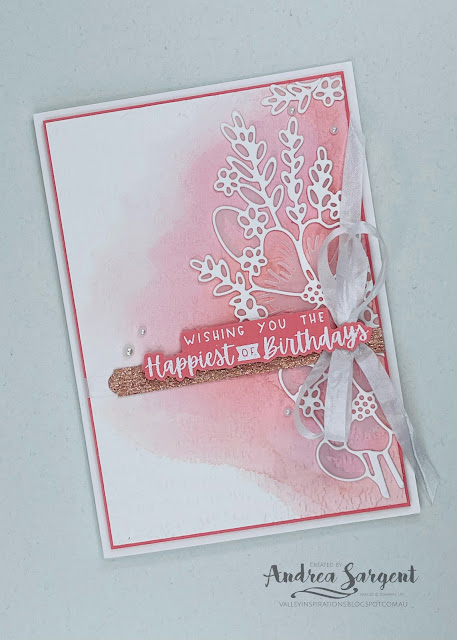
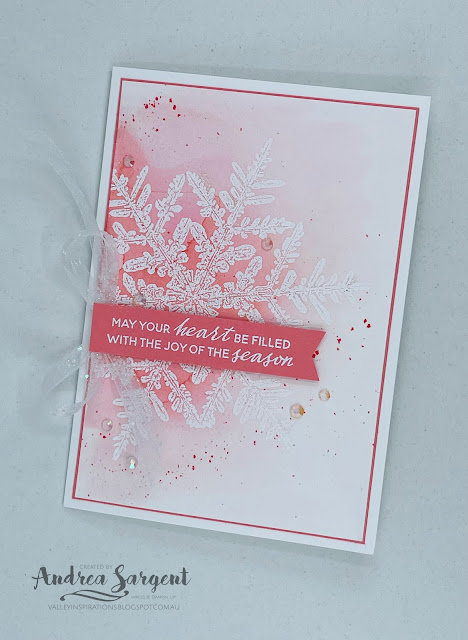
I have created 2 similar but different Flirty Flamingo cards with both having a water-colour background and a Flirty Flamingo and White colour combo:

Creating beautiful cards is a wonderful way to show how much you care.

As mentioned, both cards have a water colour background using Flirty Flamingo Classic ink. One of the backgrounds had a touch of Sweet Sorbet and the other had some Highland Heather added in a few areas, however, the addition of these colours was minimal and when the panels dried it was hard to see their effect. When creating the cards I accidentally used the wrong backgrounds than initially intended to go with the die cuts or stamping. Ah well, I don't think it made a huge difference.

CARD 1:

Creating beautiful cards is a wonderful way to show how much you care.

The water-coloured background on this card used Flirty Flamingo ink with some touches of Highland Heather on Fluid 100 Watercolor Paper. The wide brush Water Painter applied the colours. While subtle, if you look closely (or squint) you can see some mauve (Highland Heather) tinged areas. Once the panel was dry, it was embossed using the Timeworn Type 3D embossing folder and my Cut 'n Emboss Machine. This panel was mounted on a slightly larger piece of Flirty Flamingo card-stock and then added to the Thick Basic White card-base with Dimensionals.

Creating beautiful cards is a wonderful way to show how much you care.

The 2 hollyhock arrangement dies from the Layering Hollyhock dies were used to cut either Vellum card-stock or Basic White card-stock. Some Adhesive Sheet was added to the back of the Basic White die cut piece, so that the White die cut could be easily added over the larger Vellum die cut piece. I love the subtlety of Vellum and Basic White pieces together.

Creating beautiful cards is a wonderful way to show how much you care.

A thin strip of Rose Gold Metallic Speciality paper was trimmed on one end with the Lovely Labels Pick a Punch and adhered down. A sentiment from the Charming Sentiments stamp set was White heat embossed using Versamark ink on Flirty Flamingo card-stock with White Emboss Powder and a Heat Tool. While there are coordinating dies for this sentiment, I didn't see them initially (must have looked straight over them) and so fussy cut around the sentiment and added it with Mini Dimensionals. A double bow using the White Crinkled Seam Binding Ribbon was adhered with Glue Dots and some delightful Iridescent Basic Pearls were added for a finishing touch.

Creating beautiful cards is a wonderful way to show how much you care.

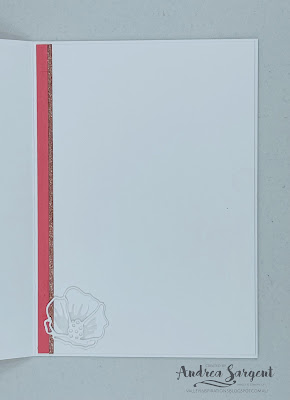
A Basic White card inner was decorated with a thin strip of Flirty Flamingo card-stock and an even thinner strip of the Rose Gold Metallic Speciality Paper. A left over Basic White and Vellum Hollyhock was also added. A Basic White C6 envelope was stamped with some hollyhock flowers in Flirty Flamingo ink.

Creating beautiful cards is a wonderful way to show how much you care.


CARD 2:

Creating beautiful cards is a wonderful way to show how much you care.

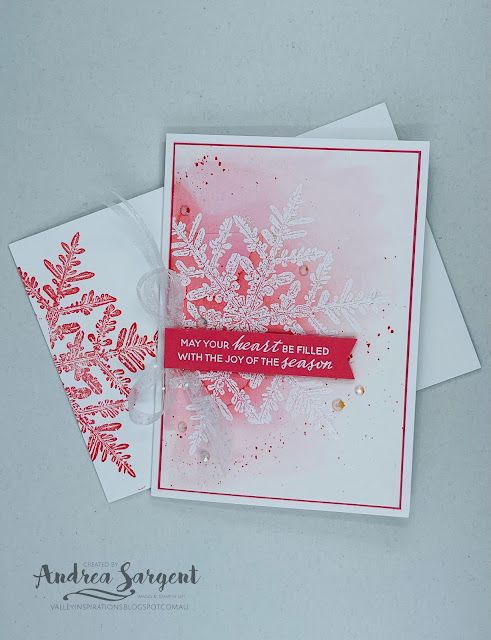
This panel of Fluid 100 Watercolor Paper was water-coloured with Flirty Flamingo ink and a couple of light touches of Sweet Sorbet ink. The latter doesn't really show, especially with the white embossed image. Once fully dry, the panel was white heat embossed with the Snow Crystal stamp using Versamark ink, White Emboss Powder and a Heat Tool. The snow crystal is such a beautiful image. I know we don't have snow in Australia at Christmas time but I do love the beauty of snowflakes/crystals. This is an ideal image for my overseas northern hemisphere cards. I am thinking of making a few similar cards using different colours for the water-colouring. Balmy Blue or Pool Party is an option, perhaps Balmy Blue with Fresh Freesia could be another option, ... any other ideas???

Creating beautiful cards is a wonderful way to show how much you care.

The water-coloured panel was mounted onto a slightly larger piece of Flirty Flamingo card-stock and in turn directly to a Thick Basic White card base. A sentiment from the Mistletoe Magic stamp set was white heat embossed on a strip of Flirty Flamingo card-stock and one end was flagged with a ... Pick A Punch. The sentiment was popped up on Dimensionals

Creating beautiful cards is a wonderful way to show how much you care.

Some Shimmery White Organdy Ribbon was cut in half lengthwise, tied into a bow and tucked under an edge of the sentiment strip with Glue Dots. Some Iridescent Rhinestone Basic Jewels were scattered around. They are a delightful embellishment, adding shimmer and beauty to the project. The final touch was the addition of some Wink of Stella over the white embossing to ensure the snow crystal glistened. It is a pity it doesn't show in the photographs.

Creating beautiful cards is a wonderful way to show how much you care.

A Basic White card inner was stamped with stamped off Flirty Flamingo ink so the personal message could be written over the stamping and still be deciphered. You may think the sentiment isn't stamped in the best position - and I would agree, however, there was an unwanted ink line that has been hidden by the sentiment - so I am OK with it being where it is. A Basic White C6 envelope was also stamped with the snow crystal (this time in fun strength). 

Creating beautiful cards is a wonderful way to show how much you care.

Thank you for spending time with me on my blog. I hope you found something to spark an idea  that will be useful in your crafting.

There is more Flirty Flamingo creativity. To continue with the blog hop, click the  "onto the next" graphic below and be taken to the blog of the lovely and talented Rachel WoodardI always look forward to checking out Rachel's creations. I do love seeing everyones' projects - there is always so much inspiration.

I hope to see you next week when we will be featuring Fresh Freesia, one of the 2021-2023 In Colours as we continue the weekly 2022-2023 Colour Creations Blog Hops.  Also, don't forget that many of us are joining the Heart of Christmas Blog Hop on Monday evenings to share delightful Christmas projects to give you some ideas to help with your Christmas preparations. 

Stay well, stay safe and be kind to yourself and others. 

Andrea 💕🐾


If you find a broken link or have come to this blog hop from a different entry point, you can view the full list of participants on Catherine Proctor’s blog @ What Cathy Made. Cathy is our  Art With Heart Team Colour Creations Coordinator.  She is an wonderful lady. Check out her delightful creation while you are there.

If you live in Australia, don't already have a Stampin' Up! demonstrator and would like your own copy of Stampin' Up's 2022-2023 Annual Catalogue and or the July - December 2022 Mini Catalogue then let me know and I will be delighted to send them to you.  Please don't hesitate to make contact with any other queries about this project or Stampin' Up!. 

#colourcreationsbloghop  #stampinup #stampinupaustralia #stampinupsouthpacific #stampinupdemo  #handmadecards #makeacardsendacard #stampinupdemonstrator #papercrafting #artwithheartteam  #papercrafter  #stamper  #valleyinspirations   #snowcrystal #heavenlyhollyhocks #mistletoemagic #charmingsentiments 


AWH Colour Creations Blog Hop #30 Highland Heather

Highland Heather with One of a Kind & Frozen Edges Hello. Welcome to  Valley Inspirations with Andrea  and the  Art with Heart Colour Cr...