Art with Heart Wow Tutorials

Wednesday, 27 April 2022

AWHT Colour Creations #46 Soft Suede

Soft Suede with Grassy Grove and Happy & Heartfelt

Hello. Welcome to Valley Inspirations with Andrea and the Art with Heart Colour Creations Blog Hop. This Blog Hop is the last in the 2021-2022 series in working though all the Stampin' Up! colours in alphabetical order. But never fear - next week we start afresh for 2022-2023.


This week’s Blog Hop is focussing on a mid brown called Soft Suede. Soft Suede is part of the Neutrals Colour Family and is a mid brown with some red undertones. As a Neutral, this colour can combine with many colours - think of trees ie brown and greens or ground & rocks combining with a range of plants that is many colours. Nature is amazing.


Soft Suede is produced in Stampin' Up!'s card-stock, both A4 & 12"x12"Classic Stampin' inks (ink pads re-inkers); Stampin' Write Markers; Stampin' Blends and Neutrals Designer Series Papers. The card below has used Soft Suede Classic Stampin' ink, Card-stock and a Stampin' Write Marker, plus a range of other non-PP bits and pieces.

Here is my card showcasing Soft Suede:

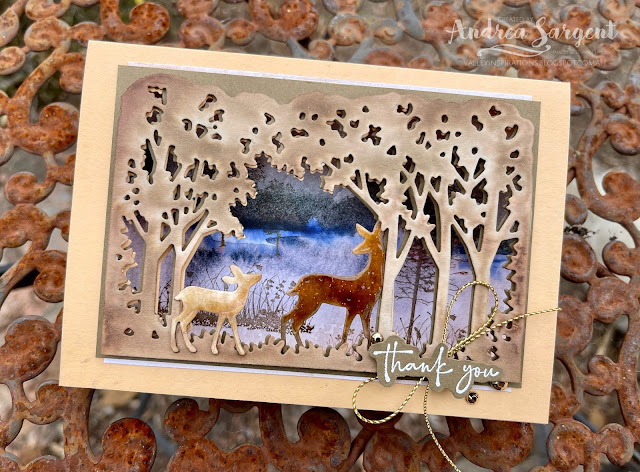
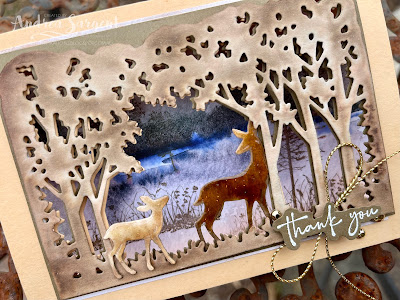
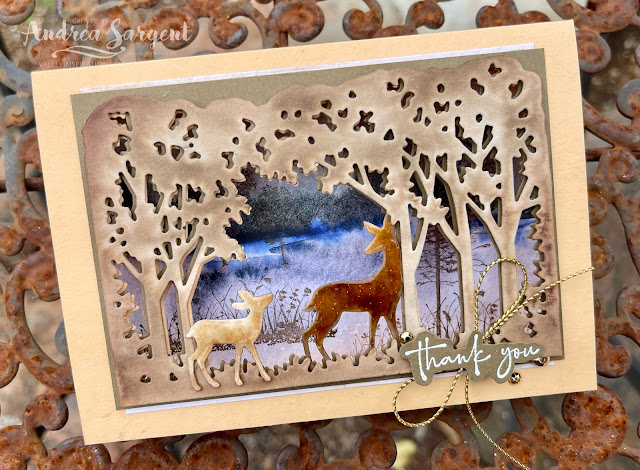
Say "Thank You" with scenic Grassy Grove stamps and dies by Stampin' Up!.

Soft Suede is a great neutral colour. In thinking about what I would do for this Blog Hop, I tossed around different ideas as I wasn't sure how to showcase the colour without the project being overly dark. I decided to use the Grassy Grove bundle complimented with New Horizons DSP for a background scene. I also decided to water-colour the die cut panel to show various tones of Soft Suede. As such I started by die cutting the tree scene from Shimmery White card-stock using the Grove dies. The 2 deers were cut at the same time. The 3 pieces were water-coloured using the wet on wet technique with Soft Suede Classic ink alone. The mother deer was made darker using the ink less diluted.

Say "Thank You" with scenic Grassy Grove stamps and dies by Stampin' Up!.

The tree scene die also cut out the scene in a piece of Soft Suede card-stock and a Pale Papaya card base. One of the designs of the delightful New Horizons DSP was stamped with some grasses and trees in Soft Suede. Some Starry Night Blends and the Colour Lifter coloured over some of the white bits. This panel was adhered directly to the inside back panel of the card. The water-coloured tree scene panel was added over the Soft Suede panel with Mini Dimensionals in-between. The 2 deers were carefully adhered at their hooves. A little of remaining DSP was added to the underneath top and bottom of the panel scene before it was adhered directly to the card base over the die cut scene.

Say "Thank You" with scenic Grassy Grove stamps and dies by Stampin' Up!.

The card front was finished with a sentiment from the Happy & Heartfelt stamp set that was White heat embossed on Soft Suede card-stock and fussy cut. The gorgeous Gold Simply Elegant Trim was tied into a bow and tucked beneath the sentiment. The soon to retire Gilded Gems added sparkle, together with some Shimmery Crystal Effects on the deers.

Say "Thank You" with scenic Grassy Grove stamps and dies by Stampin' Up!.

To ensure the card doesn't slide open when standing up on show, an extra piece of Pale Papaya card-stock was cut to 5cm x the width of the card and then scored at 1cm, 2.5cm and 4cm measuring along the 5cm edges. This piece was folded and burnished into a "W" and then the 1cm sections were adhered to the inside edges of the card. This holds the card open at the base to give the scene perspective without the card sliding flat over time.

Say "Thank You" with scenic Grassy Grove stamps and dies by Stampin' Up!.

As the card stands on its own with the die cut scene showing through to the layer behind, a panel for writing a personal message was mounted to the back of the card. A piece of Basic White card-stock was stamped across the bottom with the grassy stamp using Soft Suede ink, prior to it being mounted onto a slightly larger piece of Soft Suede card-stock. A Basic White C6 Envelope was stamped with trees in Soft Suede ink.

Say "Thank You" with scenic Grassy Grove stamps and dies by Stampin' Up!.

Thank you so much for dropping by. I do value that you spent time with me. I will be using this card to say a big "Thank You" to someone who organised a team to help with my brother's garden. They did an amazing job. I am planning to create more thank you cards from the New Horizons DSP for the others who helped. I so love this DSP and it is especially good to create for fellas.

Say "Thank You" with scenic Grassy Grove stamps and dies by Stampin' Up!.


If you live in Australia, don't already have a Stampin' Up! demonstrator and would like your own copy of the new Stampin' Up 2022-2023 Annual Catalogue and or the January - June 2022 Mini Catalogue then let me know and I will be delighted to send them to you.  Please don't hesitate to make contact with any other queries about this project or Stampin' Up!. 

There is more Soft Suede creativity. To continue with the blog hop, click on the "next" graphic below to be taken to the blog of the very talented, Tina Gillepsie. I always look forward to checking out Tina's creation (I wonder what she has in store this week). I do love seeing everyones' projects - there are always so many ideas and such great inspiration.

Stay well, stay safe and be kind to yourself and others. 

Andrea 💕🐾

If you find a broken link you can view the full list of participants on Catherine Proctor’s blog. Cathy is our wonderful Art With Heart Team Colour Creations Coordinator.  I so appreciate all Cathy does in coordinating this blog hop each week. She is such a special lady. Check out her wonderful creation while you are there.

#colourcreationsbloghop  #colourcreationsbloghop2022  #stampinup #stampinupdemo  #stampinupdemonstrator #artwithheartteam  #handmadecards #makeacardsendacard #papercrafting #grassygrove #happy&heartfelt


Wednesday, 20 April 2022

AWHT Colour Creations #45 Soft Sea Foam

Soft Sea Foam with Daisy Garden

Hello. Welcome to Valley Inspirations with Andrea and the Art with Heart Colour Creations Blog Hop. Having said that I missed the deadline to sign up to be part of the blog hop but do have a link to the Blog Hop's coordinator at the end of this blog, so you can check everyone out.


This week’s Blog Hop is focussing on a soft green called Soft Sea Foam. Soft Sea Foam is part of the Subtles Colour Family and is a delightful pale green. It is another of my favourite Stampin' Up! colours. This colour is delightful when used with other Subtles, including Blushing Bride and or Mint Macaron. 


Soft Sea Foam is produced in Stampin' Up!'s card-stock, both A4 & 12"x12"Classic Stampin' inks (ink pads re-inkers); Stampin' Write Markers; Stampin' Blends and Subtles Designer Series Papers as well as Pansy Petals Designer Series Paper and Sequins for Everything.  The card below has used Soft Sea Foam Classic Stampin' ink and Card-stock, plus a range of other non-PP bits and pieces.

Here is the project using Soft Sea Foam:

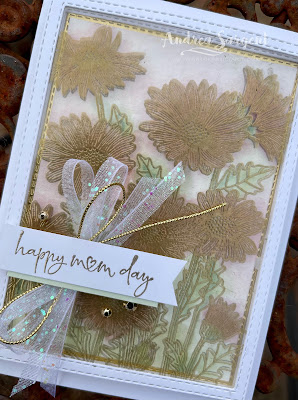
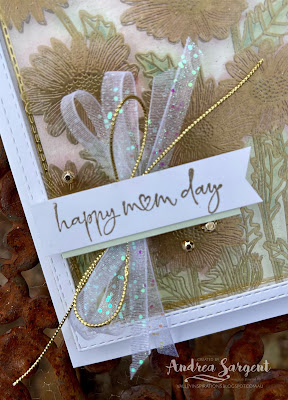
Wish Mom a Happy Day with water-coloured daisies.

I think this is a variation of a Magic Changer card.


CARD 1:

The first glimpse of this card features gold heat embossing on Window Sheet with Soft Sea Foam card-stock sitting beneath.

Wish Mom a Happy Day with water-coloured daisies.

The stitched Basic White card-stock frame was die cut with the Stitched Rectangle dies (using the two largest dies).  A piece of Window Sheet was stamped in Versamark ink using the Daisy Garden stamp set and then gold heat embossed. 

Wish Mom a Happy Day with water-coloured daisies.

The Soft Sea Foam background can be slipped out by pulling the little card-stock arrow near the top of the card. It can be turned over and slipped back underneath the Window Sheet. The other side has a piece of Fluid 100 Watercolor Paper that was abstractly water-coloured with Soft Sea Foam, touches of Mint Macaron and Blushing Bride inks.

Wish Mom a Happy Day with water-coloured daisies.

If the Soft Sea Foam/water-coloured panel is removed completely the embossed Window Sheet sits over and Gold heat embossed and water-coloured panel of daisies. This panel is created with Fluid 100 Watercolor paper that was stamped with the large Daisy Garden stamp in Versamark ink and heat embossed using Gold Stampin' Emboss Powder and a Heat Gun. Then the embossed panel was loose water-coloured using a fine Water Painter and the same ink colours mentioned above. 

Wish Mom a Happy Day with water-coloured daisies.

The sentiment came from the Happy and Heartfelt stamp set (in the Jan-June Mini Catalogue and was Gold heat embossed on Basic White card-stock with a thin strip of Soft Sea Foam card-stock sitting underneath.

Wish Mom a Happy Day with water-coloured daisies.

The card front was finished with a luscious White Glittered Organdy Ribbon that had been cut in half lengthwise, tied into a bow and placed beneath the sentiment together with another bow of Gold Simply Elegant Trim. A few Gilded Gems added an extra touch of gold shine.

Wish Mom a Happy Day with water-coloured daisies.

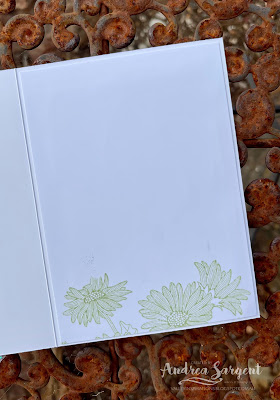
The card inner has a piece of Basic White card-stock that was stamped in Soft Sea Foam ink with a few daisies near the base, mounted inside the card.  Similarly, a Basic White C6 Envelope was stamped with the Daisy Garden stamp in Soft Sea Foam ink on the LHS edge. As you know I love to coordinate the envelope with the card inner, and both coordinating in some way with the card front design.

Wish Mom a Happy Day with water-coloured daisies.


Thank you so much for dropping by. I do value that you spent time with me.

If you live in Australia, don't already have a Stampin' Up! demonstrator and would like your own copy of the new Stampin' Up's 2022-2023 Annual Catalogue and or the new January - June 2022 Mini Catalogue then let me know and I will be delighted to send them to you.  Please don't hesitate to make contact with any other queries about this project or Stampin' Up!. 

There is more Soft Sea Foam creativity. To be taken to the blog hop, click on the "next" graphic below to head over to the blog of the lovely, Catherine Proctor. I always look forward to checking out Cathy's creation (I wonder what she has in store this week). I do love seeing everyones' projects - so many ideas and such great inspiration so will be taking the hop myself.

Hope to see you next week when we will be featuring Soft Suede as we conclude the weekly 2021-2022 Colour Creations blog hops.

Stay well, stay safe and be kind to yourself and others. 

Andrea 💕🐾

You can view the full list of participants on Catherine Proctor’s blog, our wonderful Art With Heart Team Colour Creations Coordinator.  I so appreciate all Cathy does in coordinating this blog hop each week. She is such a special lady. Check out her wonderful creation while you are there.

#colourcreationsbloghop  #colourcreationsbloghop2022  #stampinup #stampinupdemo  #artwithheartteam  #handmadecards #makeacardsendacard #stampinupdemonstrator #stampinupaustralia #daisygarden


Wednesday, 13 April 2022

AWHT Colour Creations #44 So Saffron

So Saffron with Welcoming Window. 

Hello. Welcome to Valley Inspirations with Andrea and the Art with Heart Colour Creations Blog Hop. We are continuing to work though all the Stampin' Up! colours in alphabetical order and are currently at "S".


This week’s Blog Hop is focussing on a soft yellow called So Saffron. So Saffron is part of the Subtles Colour Family and is a delightful light yellow. This colour is delightful when used with blues or greys. So Saffron goes well with numerous colour combinations including with Mint Macaron and Blushing Bride, as used in my card. 


So Saffron is produced in Stampin' Up!'s card-stock, both A4 & 12"x12"Classic Stampin' inks (ink pads re-inkers); Stampin' Write Markers; Stampin' Blends and Subtles Designer Series Papers as well as Sweet Talk and Flowering Fields DSPs. The card below has used So Saffron Classic Stampin' ink and card-stock, plus a range of other non-SS bits and pieces.

As I totally ran out of time I only created one more simple card to showcase So Saffron. Here tit is:

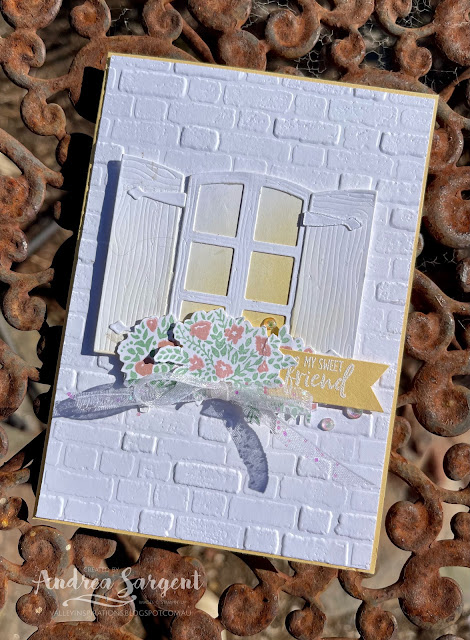
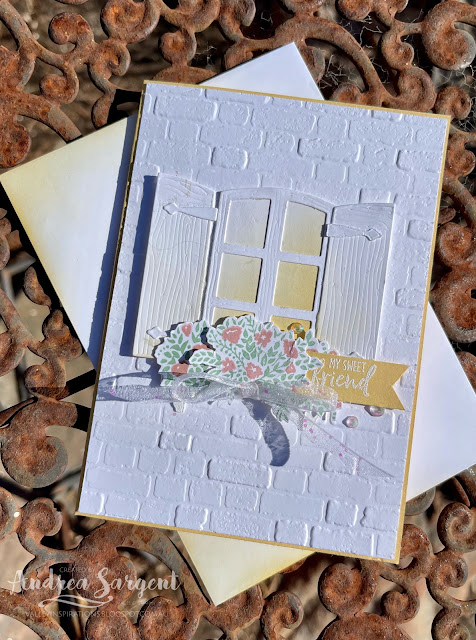
Wish a friend Happy Birthday with Welcoming Windows by Stampin' Up!.

As you can see, So Saffron is a delightful colour. 

CARD 1:

The soon to retire Welcoming Window bundle is featured along with So Saffron. I do love this bundle and am sad to see it go. Having said that, I won't be getting rid of it from my stash (especially the dies) as windows can be handy to coordinate with certain designs.
 
Wish a friend Happy Birthday with Welcoming Windows by Stampin' Up!.

So Saffron is a great colour to indicate light or sun rays and so I started by blending some So Saffron Classic Stampin' ink on a piece of Basic White card-stock. The window frame, window shutters, hinges and the window sill from the Window Flowerbox dies were cut from Basic White card-stock. The window shutters had a little So Saffron blended over them to indicate some reflected light from inside.

Wish a friend Happy Birthday with Welcoming Windows by Stampin' Up!.

A Basic White card front was dry embossed with the Brick and Mortar 3D embossing folder. This was adhered directly to a So Saffron card base. As I was attempting to form the window I kept changing the way I adhered the hinges to the window shutters - I think I must have had a brain spasm. I Googled window shutters to check which way they should go and cut a 2nd set of shutters and hinges so I could start afresh.

Wish a friend Happy Birthday with Welcoming Windows by Stampin' Up!.

Plants for the window box were stamped in Mint Macaron and Blushing Bride Classic ink on Basic White card-stock. The Welcoming Windows flowering plants have coordinating dies, however, as my mind wasn't functioning properly, I fussy cut them out with one of the bunches also being cut in half. The centre flowering plant was popped up on Mini Dimensionals with the 2 halves of a plant was adhered on each side. A sentiment from the same stamp set was White heat embossed onto So Saffron card-stock.

Wish a friend Happy Birthday with Welcoming Windows by Stampin' Up!.

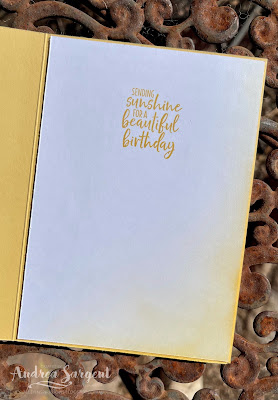
A piece of Basic White card-stock had some So Saffron ink blending along the outer edge and a birthday sentiment was stamped also in So Saffron ink. A Basic White C6 Envelope had some So Saffron ink blended over some edges. This is a simple and quick addition to coordinate the envelope to the card.

Wish a friend Happy Birthday with Welcoming Windows by Stampin' Up!.


Thank you so much for dropping by. I do value the time you spent with me.

If you live in Australia, don't already have a Stampin' Up! demonstrator and would like your own copy of the new Stampin' Up 2022-2023 Annual Catalogue and or the continuing January - June 2022 Mini Catalogue then let me know and I will be delighted to send them to you.  Please don't hesitate to make contact with any other queries about these projects or Stampin' Up!. 

There is more So Saffron creativity. To continue with the blog hop, click on the "next" graphic below to be taken to the blog of the lovely, Christine Blain. I always look forward to checking out Christine's creation (I wonder what she has in store this week). I do love seeing everyones' projects - so many ideas and such great inspiration.

Hope to see you next week when we will be featuring another versatile colour Soft Sea Foam as we continue the weekly 2021-2022 Colour Creations blog hops.

Stay well, stay safe and be kind to yourself and others. 

Andrea 💕🐾

If you find a broken link or have come to this blog hop from a different entry point, you can view the full list of participants on Catherine Proctor’s blog, our wonderful Art With Heart Team Colour Creations Coordinator.  I so appreciate all Cathy does in coordinating this blog hop each week. She is such a special lady. Check out her wonderful creation while you are there.

#colourcreationsbloghop  #colourcreationsbloghop2022  #stampinup #stampinupdemo  #artwithheartteam  #handmadecards #makeacardsendacard #welcomingwindow #stampinupdemonstrator


Wednesday, 6 April 2022

AWHT Colour Creations #43 Smoky Slate

Smoky Slate with Crane of Fortune and a Bowl Gatefold

Hello. Welcome to Valley Inspirations with Andrea and the Art with Heart Colour Creations Blog Hop. We are continuing to work though all the Stampin' Up! colours in alphabetical order. 


This week’s Blog Hop is focussing on a soft grey called Smoky Slate. Smoky Slate is part of the Neutrals Colour Family and is a very versatile grey. It is another of my favourite Stampin' Up! colours. The colour is delightful when used with pinks such as Petal Pink or Blushing Bride or yellows, including Daffodil Delight or Mango Melody.  Smoky Slate goes well with so many colour combinations and I have paired it with Soft Succulent and Gold. A second card was planned and started but I ran out of time to complete it. 


Smoky Slate is produced in Stampin' Up!'s card-stock, both A4 & 12"x12"Classic Stampin' inks (ink pads re-inkers); Stampin' Write Markers; Stampin' Blends, Textured Ribbon, Slimline Envelopes and Neutrals Designer Series Papers as well as the Symbols of Fortune and In Good Taste Designer Series Papers. The card below has used Smoky Slate Classic Stampin' ink, and the Symbols of Fortune DSP, plus a range of other non-SS bits and pieces.

Here is my card to showcase Smoky Slate:

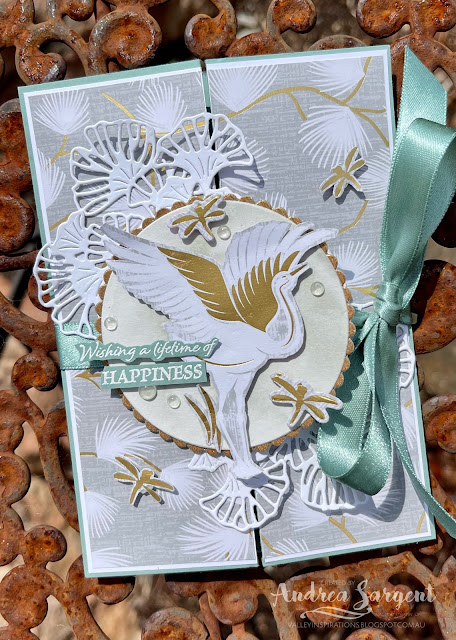
Send happiness to that special someone with a Crane of Fortune Bowl Gatefold card.

As a neutral, Smoky Slate is a great colour to use in a range of ways. 

CARD 1:

This card features the beauty of the Symbols of Fortune Speciality Designer Series Paper. I  wanted to use this SDSP and also to try out a recently seen fancy fold, so this card came into being. 

Send happiness to that special someone with a Crane of Fortune Bowl Gatefold card.

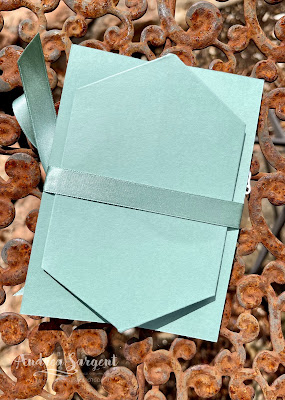
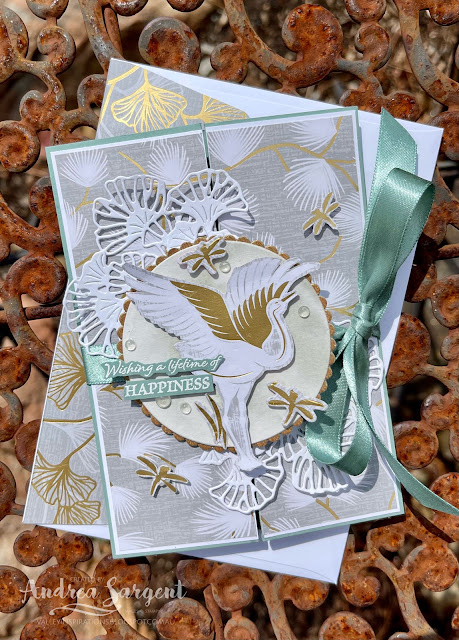
A piece of Soft Succulent card-stock was cut to size, scored and burnished; then folded into a bowl gate fold card. A piece of Symbols of Fortune SDSP was cut in half and both halves were mounted onto a slightly larger piece of Basic White card-stock. The mounted SDSP was adhered directly to the front sections of the card base. Here is a photo of the back of the folded card.

Send happiness to that special someone with a Crane of Fortune Bowl Gatefold card.

A piece of Shimmery White card-stock was water-coloured with Smoky Slate ink and partially dried with a Heat Gun to maintain variations in shading. As I was working on the creamy Shimmery White card-stock the final effect was a different grey to the DSP. Ah well, I hadn't factored the creamy card-stock in. Once it was fully dried the card-stock was cut with the second largest circle from the Layering Circles dies. The coordinating and very slightly larger scalloped die was used to cut a piece of Gold Metallic Speciality Paper

Send happiness to that special someone with a Crane of Fortune Bowl Gatefold card.

The Ginkgo die from the coordinating Good Fortune dies cut a couple of sprays from Basic White card-stock. The sprays were snipped into 3 sections. The luscious Soft Succulent Satin Shimmer Ribbon was wrapped around the gatefold card and tied in a bow. The water-coloured circular piece was added with Dimensionals to the left side of the gatefold card over the ribbon.

Send happiness to that special someone with a Crane of Fortune Bowl Gatefold card.

A fussy cut crane (cut from the SDSP) was popped up on Dimensionals. A mix of die-cut and fussy cut dragonflies were added with Mini Dimensionals. A sentiment from the Crane of Fortune stamp set was White heat embossed on Soft Succulent card-stock. Some Polished Dots added some shimmer.

Send happiness to that special someone with a Crane of Fortune Bowl Gatefold card.

The card inner is yet to be added (sorry, but I ran out of time). A piece of Basic White card-stock will be fitted into the centre inner panel and stamped with some dragonflies in Smoky Slate ink. A Basic White C6 Envelope had a piece of the SDSP adhered to the back flap.

Send happiness to that special someone with a Crane of Fortune Bowl Gatefold card.

I had fun creating this fold after seeing it demonstrated on uTube. Next time I create this fold, I hope to have some extra time so I can convert the inches to centimetres and our standard card size.

CARD 2:

As mentioned, I had plans to create another card and made a start, but this is as far as I got. This was actually started first but then I became excited to create the Bowl Gatefold and it was put aside.


Thank you so much for dropping by. I do value the time you spent with me.

If you live in Australia, don't already have a Stampin' Up! demonstrator and would like your own copy of Stampin' Up's 2021-2022 Annual Catalogue or the coming 2022-2023 Annual Catalogue and or the January - June 2022 Mini Catalogue then let me know and I will be delighted to send them to you.  Please don't hesitate to make contact with any other queries about these projects or Stampin' Up!. 

There is more Smoky Slate creativity. To continue with the blog hop, click on the "next" graphic below to be taken to the blog of the lovely, Rachel Woolard. I always look forward to checking out Rachel's creations (I wonder what she has in store this week). I do love seeing everyones' projects - so many ideas and such great inspiration.

Hope to see you next week when we will be featuring another versatile colour So Saffron as we continue the weekly 2021-2022 Colour Creations blog hops.

Stay well, stay safe and be kind to yourself and others. 

Andrea 💕🐾

If you find a broken link or have come to this blog hop from a different entry point, you can view the full list of participants on Catherine Proctor’s blog, our wonderful Art With Heart Team Colour Creations Coordinator.  I so appreciate all Cathy does in coordinating this blog hop each week. She is such a special lady. Check out her wonderful creation while you are there.

#colourcreationsbloghop  #colourcreationsbloghop2022  #stampinup #stampinupdemo  #stampinupdemonstrator #artwithheartteam  #handmadecards #makeacardsendacard #papercrafting #craneoffortune


Sunday, 3 April 2022

Brons Birthday Blog Hop #1

#1 Theme: An Inspiration Picture

We're a group of stamping friends that are celebrating Bron's 60th Birthday in 2022 with six blog hops, over six months, with six fun themes! We have an inspiration pic for tonight's hop (ie its Bron's Blog Header). 

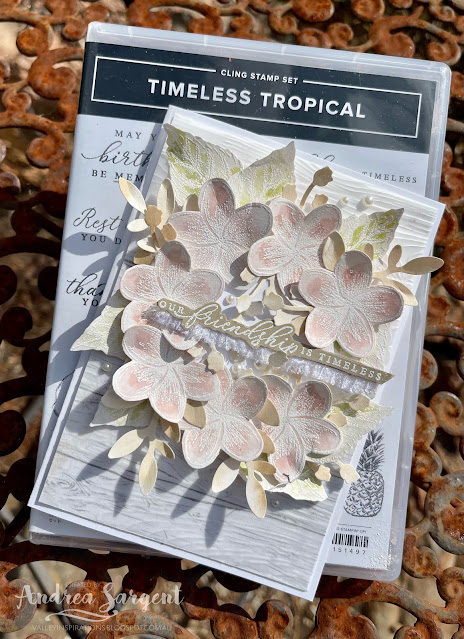
Isn't it a lovely picture. For me, the picture speaks of tropical and of holiday. I love the colour scheme, the delicate pink flowers and shawl, the off-white wooden boards, the roundness of the coconuts and the curve of the straw bag handles. All these things inspired my card:

A card is perfect for letting a friend know how much you value their friendship.

As I was writing the blog I realised the card looked rather washed out. It looked fine in real life but the camera didn't seem to pick up some of the subtleties. I couldn't let it rest so added some watercolour pencil colouring and blended it with a Blender Pen. Which do you prefer - the card above or the one below with extra colouring. 


I chose the retiring Timeless Tropical stamp set and white heat embossed flowers and leaves on Shimmery White card-stock. 


Flowers and leaves were water-coloured using Blushing Bride & Pear Pizzazz Classic Stampin' ink, and a leftover piece of Shimmery White card-stock was water-coloured with Crumb Cake ink. Once dry, leaves were punched out with the gorgeous Bough Punch.


A piece of the B side of Heart and Home Designer Series Paper was used for the background to replicate white planks. As the flowers were so delicate in colour the wood grain did dominate a little so I embossed a piece of Vellum card-stock with the now retired 3D Plank Embossing Folder - it was perfect to maintain the wooden plank theme. This was layered over the DSP.


A die cut circle (cut using the Layering Circles die set) was popped up on Dimensionals. The water-coloured flowers were positioned around the edge of the circle and the water-coloured leaves were tucked underneath. The punched Crumb Cake leaves also were tucked in and around. A sentiment from the Timeless Tropical stamp set was white heat embossed onto Crumb Cake card-stock and fussy cut. A piece of Frayed White Ribbon was further frayed and tucked under the sentiment. Several Pearl Basic Jewels were scattered around. I'm sure the clam shell in the picture would have produced a pearl.


I love to decorate the card inner to coordinate with the front design. A thin left over strip of the same DSP as adhered at the bottom and an extra water-coloured flower and leaf were added. It's also important not to have a naked envelope so a few flowers were stamped in Blushing Bride ink on a C6 Basic White envelope.


As mentioned, I added some extra colour to the flowers with a Melon Mambo Watercolour Pencil and softened the colour with a Blender Pen and re-photographed. Which version do you prefer?


Thank you so much for dropping in and helping to celebrate Bron's coming birthday. It is such a pity that Bron wasn't able to celebrate with an overseas holiday, but it is going to be so much fun to celebrate with monthly blog hops over the coming 5 months. We will be here again on the Tuesday 3rd of May, launching the hop at 7.00pm EST where we will have a Retro theme.

Hop over to the next blog, by the amazing Lou Kitzelman and check out her gorgeous creation. Just click on the graphic below to be taken to her Blog.

Apart from the Blog Hop there is also an Instagram Hop starting with Bron at @addinktivedesigns. Check it out too - there is more creativity to find.

#bronsbdaybloghops #stampinup #stampinupdemo  #handmadecards #makeacardsendacard #timelesstropical #stampinupdemonstrator #papercrafting


AWH Colour Creations Blog Hop #34 Melon Mambo

Melon Mambo with Memorable Blooms Hello. Welcome to  Valley Inspirations with Andrea  and the  Art with Heart Colour Creations Blog Hop.  We...