Art with Heart Wow Tutorials

Showing posts with label Snow Crystal. Show all posts

Monday, 23 October 2023

AWH Heart of Christmas #12

Christmas with Snow Crystal

Hello. Welcome to Valley Inspirations with Andrea and the Art with Heart Heart of Christmas Blog Hop.


This week I am showcasing the Snow Crystal stamp set and have created a couple of Christmas cards to share with you. This stamp has carried over from last year and can be found in the Annual Catalogue. It is easy to be carried away with the wonderful products in the Mini Catalogue and forget the treasures in Stampin’ Up!s Annual Catalogue.  I had numerous ideas to show this beautiful image, but daily hospital visiting sapped so much time. Perhaps I will be able to showcase this stamp again before we finish for the coming season. Here are my cards:


CARD 1

The first card has a blended background with Boho Blue Classic Stampin’ ink in the centre blending into Starry Sky and then into Night of Navy inks. A piece of Basic White card-stock was the base and the colours were blended over with Blending Brushes. Some water was sprinkled over the panel to give that delightful bleaching effect.


The Snow Crystal stamp was silver heat embossed with Versamark ink, Silver Emboss Powder, the Embossing Additions Tool kit and a Heat Tool. More splattering was added using White Craft ink, a tad of water and a Water Painter. Some Wink of Stella was added to give some Christmas sparkle.


The coloured and stamped panel was mounted to a slightly larger piece of Silver Foil (from the Silver Foil pack available as an On-line Exclusive from my Stampin’ Up! shop). A piece of Basic White card-stock was mounted onto a Foam Adhesive Sheet and the Alphabet A La Mode dies were used to cut out letters to spell “Joyful”. The foam self adhesive letters were laid onto a strip of Vellum card-stock before the strip being wrapped around the mounted snowflake panel. The card front was then directly adhered to a Night of Navy card base.


A sentiment from the Joy To You stamp set was White heat embossed onto Starry Sky card-stock and then the word “Christmas” was cut away using the Stampin’ Trimmer. This second part of the sentiment was laid over some of the die cut letters. The final touch of extra sparkle was added with the oh so gorgeous Adhesive-backed Glitter Sequins.


A Basic White card-stock panel had a couple of thin strips that had been trimmed off the blended background were adhered to one edge. A sentiment from the Festive & Fun stamp set was still sitting on my work-station and it seemed perfect for the inside of this card so it was stamped in Starry Sky Classic Stampin’ ink. Also on my table were 2 left over glittery snowflakes that were die cut with Chic dies from Silver Glitter paper (Gold and Silver Glitter Speciality Paper pack is available as an Online Only Exclusive.) A C6 Basic White envelope was partially stamped in Starry Sky ink and the Snow Crystal stamp.


CARD 2

The second card has some Loose Water-colouring. I love this technique as it seems to have a relaxed feel. The Snow Crystal stamp was inked with Starry Sky Classic ink and added to a piece of Fluid 100 Water-color Paper. The broad flat bushed Water Painter was used to spread the colour of the stamped image. To add interest and life some Azure Afternoon ink was dabbed around. The water-coloured panel was left to dry naturally. 


With the blue snow crystal panel fully dry, it was silver heat embossed with another stamping of the Snow Crystal stamp. A splattering of Wink of Stella was added. This panel was trimmed down and the top and bottom edges torn around the snow crystal. It was adhered directly to a Boho Blue card front.


Silver and White Sheer Ribbon was cut in half lengthwise and wrapped around the card front before being tied into a bow. The card front was adhered directly to a Starry Sky card base. A delightful sentiment from the Magical Meadow stamp set was white heat embossed onto some Starry Sky card-stock, then fussy cut and added with Mini Dimensionals.


The Boho Blue layer needed something so some White Craft ink was splattered over the exposed sections. The scattering of a number of silver-ish Adhesive-backed Glittered Sequins finished the card front. 


An off-cut of Boho Blue card-stock was torn and added to the bottom of a Basic White card inner. When heat embossing sentiments I often double up on preparing the sentiment in case one doesn’t come out well.  I had this sentiment left over from crafting the other card, so trimmed it down and adhered it directly inside the card.


As with the first card, the Snow Crystal was stamped in Starry Sky ink onto a Basic White C6 envelope. As you know, I love to ensure the envelope links to the card that it will carry.


Thank you so much for calling in to check out my Snow Crystal Christmas cards. I know we don’t have much snow in Australia, and certainly not at Christmas time, but I do love snowflake images and the cards will be perfect for my northern hemisphere friends.


There is more Christmas creativity so do continue with the blog hop. Just click the "next" graphic below to be taken to the blog of the lovely Kate MorganI am looking forward to checking out Kate’s creation(s). I do love seeing everyones' projects - there is always so much inspiration.

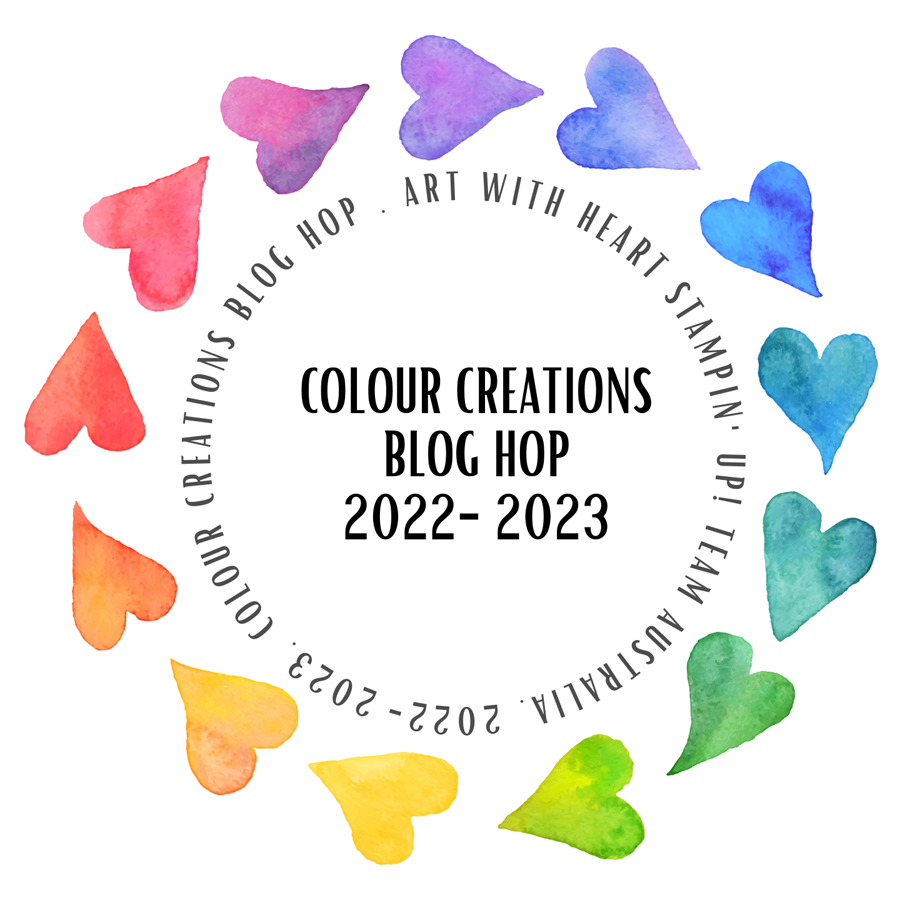
I hope to see you next week as we continue the weekly Heart of Christmas 2023 Blog Hop series. Also, many of us will be part of the Colour Creations Blog Hop which will be going live in a couple of days, that is, this coming Wednesday evening. We would love you to join us for our Gorgeous Grape creations.

Stay well, stay safe and be kind to yourself and others.

Andrea 💕🐾


If you find a broken link or would like to view the full list of participants go to Sharon Davern’s blog @ Rhapsody in Craft.  Sharon is our wonderful Art With Heart Team Heart of Christmas Coordinator.  She is a special lady. Check out her delightful creation while you are there.

If you live in Australia, don't already have a Stampin' Up! demonstrator and would like your own copy of the Stampin' Up 2023-2024 Annual Catalogue and or the September-December 2023 Mini Catalogue, then let me know and I will be delighted to send them to you.  Please don't hesitate to make contact with any other queries about these projects or Stampin' Up!. 

#heartofchristmas  #heartofchristmas2023  #stampinup #stampinupaustralia #stampinupsouthpacific #stampinupdemo  #handmadecards #makeacardsendacard #stampinupdemonstrator #papercrafting #artwithheartteam  #papercrafter  #valleyinspirations   #snowcrystal  #magicalmeadow  #joytoyou  #festive&fun

Wednesday, 26 July 2023

AWH Colour Creations Blog Hop #13 Blackberry Bliss

Blackberry Bliss with Hey Chuck and a Christmas Bonus

Hello. Welcome to Valley Inspirations with Andrea and the Art with Heart Colour Creations Blog Hop. We are working though the Stampin' Up! colours in alphabetical order, focussing on one colour each week.


This week’s Blog Hop is focussing on a rich deep berry colour called Blackberry Bliss. Blackberry Bliss is part of the Neutrals Colour Family and is a warm red purple. This colour would be a lovely when used for flowers, berries and chickens (wink).


Blackberry Bliss is produced in Stampin' Up!'s card-stock, both A4 & 12"x12"Classic Stampin' inks (ink pads re-inkers); Stampin' Write Marker; Stampin' Blends Combo; Neutrals Designer Series Paper as well as the Stargazing DSP. 

Have a friend who loves her chickens? Why not create a Blackberry Bliss card with the Hey Chuck Stampin’ Up! bundle.

Blackberry Bliss
 card-stock, ink, Stampin’ Write Marker and Stampin’ Blends combo have been used in the creation of this and the Christmas project below plus a range of non-Blackberry Bliss bits and pieces.

Have a friend who loves her chickens? Why not create a Blackberry Bliss card with the Hey Chuck Stampin’ Up! bundle.

A friend of mine is celebrating her birthday tomorrow but we enjoyed a lunch together yesterday. This friend loves her chooks, so when I saw the Hey Chuck bundle I knew I needed to buy this set. Even though I created this card for her, I hasten to add that her ‘girls’ aren’t Fresh Freesia & Blackberry Bliss - but I think my chook looks cute. I did start by water-colouring a background panel but as the design developed a different background was needed.

Have a friend who loves her chickens? Why not create a Blackberry Bliss card with the Hey Chuck Stampin’ Up! bundle.

This background was created by randomly stamping the chosen sentiment in Fresh Freesia Classic Stampin’ ink down the left side of a piece of Basic White card-stock. Fresh Freesia and Blackberry Bliss Classic inks were applied with a Blending Brush over the stamping. A Blackberry Bliss Stampin’ Write Marker was used to add splatter. The background panel was mounted onto a slightly larger piece of Blackberry Bliss card-stock and then onto the Basic White Thick card base.

Have a friend who loves her chickens? Why not create a Blackberry Bliss card with the Hey Chuck Stampin’ Up! bundle.

One of the Hey Chuck chickens was stamped onto a piece of Fluid 100 Water-colour Paper in Versamark ink and then gold heat embossed with Gold Emboss Powder, the Embossing Additions Tool Kit and a Heat Gun. The fence, cake and skate board were also gold embossed. The sun and wind direction arrow were die cut from Fluid 100 Watercolor Paper. The stamped and die cut pieces were all water-coloured - the chook with Fresh Freesia & Blackberry Bliss inks; the skate-board in Misty Moonlight ink; the arrow with Pretty Peacock ink; the sun with Lemon Lolly ink; and the fence with both Pretty Peacock & Misty Moonlight inks. When the chicken had dried I wanted some extra depth so added touches with Blackberry Bliss Stampin’ Blends and to the fence with Pretty Peacock Blends. It’s OK to mix media.

Have a friend who loves her chickens? Why not create a Blackberry Bliss card with the Hey Chuck Stampin’ Up! bundle.

A label from the Nested Essentials dies was cut from Basic White card-stock and then embossed with stripes from the Stripes and Splatters 3D Embossing Folders. It was added with Dimensionals. All of the water-coloured pieces were arranged with either Multipurpose Liquid Glue or Dimensionals. A Linen Twine bow was tied around the arrow. The sentiment was white heat embossed onto Blackberry Bliss card-stock and some Versamark ink was added with a Blender Pen and then a little gold Emboss Powder was heat embossed - to link the sentiment with the gold embossed images. The final touch - the addition of some Iridescent Basic Rhinestone Jewels. I love adding a touch of glimmer. 

Have a friend who loves her chickens? Why not create a Blackberry Bliss card with the Hey Chuck Stampin’ Up! bundle.

Another chook had been coloured with Stampin’ Blends, ie Blackberry Bliss, Pretty Peacock & Fresh Freesia Blends combos. Initially I had been playing with colours for the chicken, but decided it wasn’t the preferred colour combo for the chicken on the card front - however, she was perfect for inside the card. I couldn’t waste her. Basic White card-stock was mounted onto a slightly larger piece of Blackberry Bliss card-stock. The same chicken image was gold heat embossed onto a C6 Basic White envelope.

Have a friend who loves her chickens? Why not create a Blackberry Bliss card with the Hey Chuck Stampin’ Up! bundle.


Christmas Card:

I know it seems so so early, but I needed to start creating Christmas cards to build my card stash for Christmas. The Heart of Christmas Blog Hop is coming soon but before we start blog hopping I am hoping to create a Christmas card as well for the Colour Creations Blog Hops.

Like non-traditional twists in Christmas cards then create a Blackberry Bliss Snow Crystal card with watercolouring.

As mentioned, I had created a water-colour background but then decided it wasn’t right for the card above so in creating a Christmas card I started with the piece of Fluid 100 Watercolor Paper that had been coloured with Blackberry Bliss and Misty Moonlight inks.

Like non-traditional twists in Christmas cards then create a Blackberry Bliss Snow Crystal card with watercolouring.

It was stamped with the Snow Crystal stamp in Versamark ink and then heat embossed with Gold Emboss Powder. The water-colouring wasn’t quite right so I added more Blackberry Bliss ink using the wet on wet water colour technique and the emboss resist technique. Once dry White Pigment Craft ink was splattered over to add extra highlights.

Like non-traditional twists in Christmas cards then create a Blackberry Bliss Snow Crystal card with watercolouring.

The dried water-colour panel was trimmed down with a Deckled Rectangle die and then mounted onto Distressed Gold Speciality Paper. Three snowflakes from the Chic dies cut snowflakes from Gold Foil.

Like non-traditional twists in Christmas cards then create a Blackberry Bliss Snow Crystal card with watercolouring.

A sentiment from Hope & Peace stamp set (currently an Online Exclusive) was white heat embossed onto Blackberry Bliss card-stock and some of the words were fussy cut out. They were added with Mini Dimensionals. The Gold Foil snowflakes were arranged and adhered with Liquid Glue or a Dimensional. A number of Adhesive-backed Sparkle Gems and a double bow of the Gold Elegant Trim were added.

Like non-traditional twists in Christmas cards then create a Blackberry Bliss Snow Crystal card with watercolouring.

A Basic White card-stock inner was stamped with part of the Snow Crystal Stamp in Blackberry Bliss ink as was a C6 Basic White envelope.

Like non-traditional twists in Christmas cards then create a Blackberry Bliss Snow Crystal card with watercolouring.

Thank you so much for calling in to check out my Blackberry Bliss projects. x

Have a friend who loves her chickens? Why not create a Blackberry Bliss card with the Hey Chuck Stampin’ Up! bundle.


There is more Blackberry Bliss creativity so continue with the blog hop. Just click the "next" graphic below to be taken to the blog of the very special Kate MorganI am looking forward to checking out Kate’s creation(s). I do love seeing everyones' projects - there is always so much inspiration.

I do hope to see you next week when we will be featuring Blueberry Bushel as we continue the weekly 2023-2024 Colour Creations Blog Hop series

Stay well, stay safe and be kind to yourself and others.

Andrea 💕🐾

If you find a broken link or would like to view the full list of participants go to Catherine Proctor’s blog @ What Cathy Made. Cathy is our brilliant Art With Heart Team Colour Creations Coordinator.  She is a wonderful lady. Check out her delightful creation while you are there.

If you live in Australia, don't already have a Stampin' Up! demonstrator and would like your own copy of the new Stampin' Up 2023-2024 Annual Catalogue, then let me know and I will be delighted to send it to you.  Please don't hesitate to make contact with any other queries about these projects or Stampin' Up!. 


#colourcreationsbloghop  #stampinup #stampinupaustralia #stampinupsouthpacific #stampinupdemo  #handmadecards #makeacardsendacard #stampinupdemonstrator #papercrafting #artwithheartteam  #papercrafter  #valleyinspirations   #heychuck  #snowcrystal #hope&peace

Wednesday, 14 September 2022

AWHT Colour Creations #20 Flirty Flamingo

Flirty Flamingo with Heavenly Hollyhocks and Snow Crystal

Hello. Welcome to Valley Inspirations with Andrea and the Art with Heart Colour Creations Blog Hop. We are working though the Stampin' Up! colours in alphabetical order. 


This week’s Blog Hop is focussing on a bright pink called Flirty Flamingo. Flirty Flamingo is part of the Brights Colour Family and is a happy colour. This colour is lovely when used for  flowers, tea cups and so much more. 


Flirty Flamingo is produced in Stampin' Up!'s card-stock, both A4 & 12"x12"Classic Stampin' inks (ink pads, Spots Assortment re-inkers); Stampin' Write Markers; Water-colour Pencils; Stampin' Blends; Regals Designer Series Paper as well as Hues of Happiness DSP; plus Love This Memory Notebook Kits, Kindness Card Kits & Celebrate Today Magnet Board Kits; & For Everything Fancy Sequins. 

I have created 2 similar but different Flirty Flamingo cards with both having a water-colour background and a Flirty Flamingo and White colour combo:

Creating beautiful cards is a wonderful way to show how much you care.

As mentioned, both cards have a water colour background using Flirty Flamingo Classic ink. One of the backgrounds had a touch of Sweet Sorbet and the other had some Highland Heather added in a few areas, however, the addition of these colours was minimal and when the panels dried it was hard to see their effect. When creating the cards I accidentally used the wrong backgrounds than initially intended to go with the die cuts or stamping. Ah well, I don't think it made a huge difference.

CARD 1:

Creating beautiful cards is a wonderful way to show how much you care.

The water-coloured background on this card used Flirty Flamingo ink with some touches of Highland Heather on Fluid 100 Watercolor Paper. The wide brush Water Painter applied the colours. While subtle, if you look closely (or squint) you can see some mauve (Highland Heather) tinged areas. Once the panel was dry, it was embossed using the Timeworn Type 3D embossing folder and my Cut 'n Emboss Machine. This panel was mounted on a slightly larger piece of Flirty Flamingo card-stock and then added to the Thick Basic White card-base with Dimensionals.

Creating beautiful cards is a wonderful way to show how much you care.

The 2 hollyhock arrangement dies from the Layering Hollyhock dies were used to cut either Vellum card-stock or Basic White card-stock. Some Adhesive Sheet was added to the back of the Basic White die cut piece, so that the White die cut could be easily added over the larger Vellum die cut piece. I love the subtlety of Vellum and Basic White pieces together.

Creating beautiful cards is a wonderful way to show how much you care.

A thin strip of Rose Gold Metallic Speciality paper was trimmed on one end with the Lovely Labels Pick a Punch and adhered down. A sentiment from the Charming Sentiments stamp set was White heat embossed using Versamark ink on Flirty Flamingo card-stock with White Emboss Powder and a Heat Tool. While there are coordinating dies for this sentiment, I didn't see them initially (must have looked straight over them) and so fussy cut around the sentiment and added it with Mini Dimensionals. A double bow using the White Crinkled Seam Binding Ribbon was adhered with Glue Dots and some delightful Iridescent Basic Pearls were added for a finishing touch.

Creating beautiful cards is a wonderful way to show how much you care.

A Basic White card inner was decorated with a thin strip of Flirty Flamingo card-stock and an even thinner strip of the Rose Gold Metallic Speciality Paper. A left over Basic White and Vellum Hollyhock was also added. A Basic White C6 envelope was stamped with some hollyhock flowers in Flirty Flamingo ink.

Creating beautiful cards is a wonderful way to show how much you care.


CARD 2:

Creating beautiful cards is a wonderful way to show how much you care.

This panel of Fluid 100 Watercolor Paper was water-coloured with Flirty Flamingo ink and a couple of light touches of Sweet Sorbet ink. The latter doesn't really show, especially with the white embossed image. Once fully dry, the panel was white heat embossed with the Snow Crystal stamp using Versamark ink, White Emboss Powder and a Heat Tool. The snow crystal is such a beautiful image. I know we don't have snow in Australia at Christmas time but I do love the beauty of snowflakes/crystals. This is an ideal image for my overseas northern hemisphere cards. I am thinking of making a few similar cards using different colours for the water-colouring. Balmy Blue or Pool Party is an option, perhaps Balmy Blue with Fresh Freesia could be another option, ... any other ideas???

Creating beautiful cards is a wonderful way to show how much you care.

The water-coloured panel was mounted onto a slightly larger piece of Flirty Flamingo card-stock and in turn directly to a Thick Basic White card base. A sentiment from the Mistletoe Magic stamp set was white heat embossed on a strip of Flirty Flamingo card-stock and one end was flagged with a ... Pick A Punch. The sentiment was popped up on Dimensionals

Creating beautiful cards is a wonderful way to show how much you care.

Some Shimmery White Organdy Ribbon was cut in half lengthwise, tied into a bow and tucked under an edge of the sentiment strip with Glue Dots. Some Iridescent Rhinestone Basic Jewels were scattered around. They are a delightful embellishment, adding shimmer and beauty to the project. The final touch was the addition of some Wink of Stella over the white embossing to ensure the snow crystal glistened. It is a pity it doesn't show in the photographs.

Creating beautiful cards is a wonderful way to show how much you care.

A Basic White card inner was stamped with stamped off Flirty Flamingo ink so the personal message could be written over the stamping and still be deciphered. You may think the sentiment isn't stamped in the best position - and I would agree, however, there was an unwanted ink line that has been hidden by the sentiment - so I am OK with it being where it is. A Basic White C6 envelope was also stamped with the snow crystal (this time in fun strength). 

Creating beautiful cards is a wonderful way to show how much you care.

Thank you for spending time with me on my blog. I hope you found something to spark an idea  that will be useful in your crafting.

There is more Flirty Flamingo creativity. To continue with the blog hop, click the  "onto the next" graphic below and be taken to the blog of the lovely and talented Rachel WoodardI always look forward to checking out Rachel's creations. I do love seeing everyones' projects - there is always so much inspiration.

I hope to see you next week when we will be featuring Fresh Freesia, one of the 2021-2023 In Colours as we continue the weekly 2022-2023 Colour Creations Blog Hops.  Also, don't forget that many of us are joining the Heart of Christmas Blog Hop on Monday evenings to share delightful Christmas projects to give you some ideas to help with your Christmas preparations. 

Stay well, stay safe and be kind to yourself and others. 

Andrea 💕🐾


If you find a broken link or have come to this blog hop from a different entry point, you can view the full list of participants on Catherine Proctor’s blog @ What Cathy Made. Cathy is our  Art With Heart Team Colour Creations Coordinator.  She is an wonderful lady. Check out her delightful creation while you are there.

If you live in Australia, don't already have a Stampin' Up! demonstrator and would like your own copy of Stampin' Up's 2022-2023 Annual Catalogue and or the July - December 2022 Mini Catalogue then let me know and I will be delighted to send them to you.  Please don't hesitate to make contact with any other queries about this project or Stampin' Up!. 

#colourcreationsbloghop  #stampinup #stampinupaustralia #stampinupsouthpacific #stampinupdemo  #handmadecards #makeacardsendacard #stampinupdemonstrator #papercrafting #artwithheartteam  #papercrafter  #stamper  #valleyinspirations   #snowcrystal #heavenlyhollyhocks #mistletoemagic #charmingsentiments 


AWH Heart of Christmas Blog Hop # 1

Christmas with the Modern Christmas suite Hello. Welcome to  Valley Inspirations with Andrea  and the first  Art with Heart Team Heart of Ch...