Art with Heart Wow Tutorials

Showing posts with label Sale-a-bration. Show all posts

Sunday, 23 February 2025

CASEing the Catty #508 - CASE Sale-abration Brochure

CASE Saleabration Brochure meets Thankful Garden


Hello, Welcome to Valley Inspirations with Andrea and #508 Challenge with CASEing the Catty.


I am so glad you have dropped by. You may have come from Julia Quinn, as you take this week’s Blog Hop or perhaps arrived directly here; either way I am delighted you are here. At the end of my blog, I have linked to Peta Stephen so you can continue with the Blog Hop.

At CASEing the Catty we love to use the samples from the Stampin' Up! Catalogues and the official Stampin’ Up! site, as inspiration and each week we have a different theme to guide our CASEing. To CASE is to "Copy And Selectively Edit" or some say "Copy And Share Everything". This week we are CASE-ing the Sale-a-bration Brochure. Sale-a-bration is a wonderful time when free products are available where specified conditions are met.


My eye has been captured when I browse the Sale-a-bration Brochure by page 3 which displays a fun scrapbook page. Cardstock / papers are arranged to fan out in rays stemming from behind an off-centred photo/label. I converted this concept to a card and used one of the designs from the Full of Life Designer Series Paper as the background.


As I was designing this card, I found some Crushed Curry roses on my workstation that had been created using the gorgeous Thankful Garden masks and dies. As one of the colours in the DSP was Crushed Curry I thought they would be lovely sitting on a Spotlight on Nature die cut, as the centre piece for my card. As mentioned, the flowers were created with 3 layers of Crushed Curry Classic Stampin’ ink and the Thankful Garden Masks. The leaves were coloured with the masks and 2 layers of Garden Green ink.


A trimmed panel of the radiating Full of Life DSP was stamped in Versamark ink and either the tiny leaf or flower centre dots on some of the radiating colours. The panel was then sprinkled with Wow Clear Emboss powder and heat set using my Heat Tool. I love the subtle texture this adds.


Other texture that was added to the background were tiny die cut leaves - cut using small dies from the Thankful Garden dies. The leaves were cut from offcuts of the DSP and a little extra colour was added with Blending Brushes.


The Crushed Curry flowers and light Garden Green leaves were arranged with a couple of leaf stems over one of the largest Spotlight on Nature Basic White card-stock disc. A couple of the flowers were popped up on Dimensionals. The sentiment was cut from a longer sentiment that had been white heat embossed on Basic Black card-stock. Don’t forget to look at the sentiments in your stamp sets and think about different ways you can use the words, eg I have just used “for you” from a sentiment that says “thankful for you friend”.


A triple White Bakers Twine bow was tucked under a corner of the sentiment. This twine comes from the Bakers Twine Essentials pack. A number of gems from the Tinsel Gems Four Pack were scattered around.


Both the Basic White card-stock inner and the Basic White C6 envelope were decorated with strips of DSP and some left over tiny leaves. Just some simple touches to coordinate the inside of the card and the envelope with the card front design.


Thank you so much for dropping in on your way around #508 CASEing the Catty Challenge Blog Hop. I so appreciate it.


Don’t miss any of the inspiration from this creative CASEing The Catty Crew. The next blog in the hop is by the lovely Peta Stephen. Just click on the "next" graphic below to be taken to her blog. I wonder which project she has CASEd - I am sure her project will be something special.


Join In The Challenge: We would love you to share a project that you have created for this Challenge which has been inspired by the 2025 Sale-a-bration Brochure. To share, all you need to do is go to the CASEing The Catty Challenge Group on Facebook. If you aren't a member, it’s easy to request to join and once anpproved all you need to do is upload a photo of your project to the main section. You can click on the graphic below to be taken to the group on Facebook. We would so love to see your creation.
 

#ctc508 #stampinup #stampinupaustralia #stampinupsouthpacific #stampinupdemo  #handmadecards #makeacardsendacard #stampinupdemonstrator #papercrafting #papercrafter  #valleyinspirations  #thankfulgarden  #fulloflife #spotlightonnature  #caseingthecatty #artisandesignteam2025  #artisandesignteam


Wednesday, 22 February 2023

AWHT Colour Creations #41 Pumpkin Pie

Pumpkin Pie with Pick a Bunch & Enjoy the Rhythm

Hello. Welcome to Valley Inspirations with Andrea and the Art with Heart Colour Creations Blog Hop. We are working though the Stampin' Up! colours in alphabetical order, focussing on one colour each week.


This week’s Blog Hop is focussing on a strong orange called Pumpkin Pie. Pumpkin Pie is part of the Regals Colour Family and is good basic orange. This colour is lovely when used for autumn leaves, bright sunsets, pumpkins, carrots or oranges - really, anything orange. It also is a good colour for fellas’ cards.


Pumpkin Pie is produced in Stampin' Up!'s card-stock, both A4 & 12"x12"Classic Stampin' inks (ink pads re-inkers); Stampin' Write Markers; Stampin' Blends Combo; Watercolor Pencils; Regals Designer Series Paper as well as Enjoy the Journey, Ready to Ride Speciality DSPs; plus Love This Memory Book Kit, Cosy & Bright Kit, Robot Buddies Kids Card Kit and Three Twine Combo Pack. In the Clearance Rack - Regals, Flowering Fields, Abstract Beauty Speciality DSPs with Abstract Beauty Ephemera Pack, Cute Stars Adhesive-backed Sequins and Sequins for Everything.

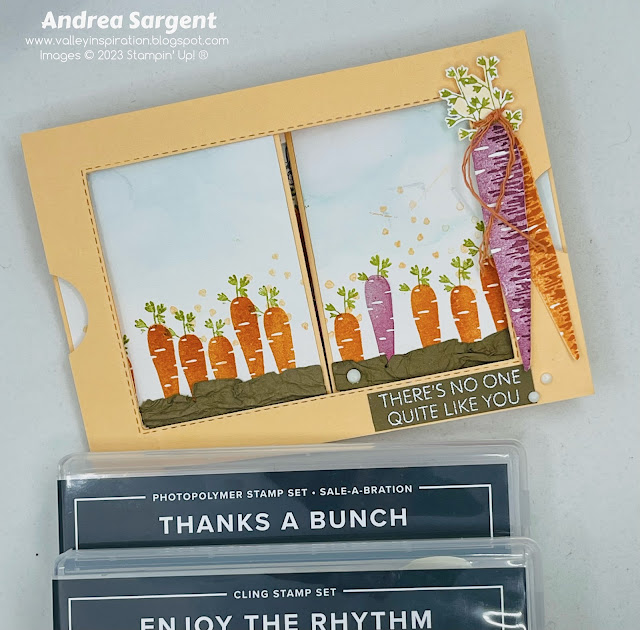
Pumpkin Pie ink, Stampin' Blends and Three Twine Combo Pack have been used in this project plus a range of non-Pumpkin Pie bits and pieces. Here is my card (closed):

Personalise a fun card for a friend’s birthday with a range of products from Stampin’ Up!.

Pumpkin Pie is a great colour, yet it is not one of my go to colours unless I am wanting to create Autumn leaves. It is a brilliant colour to use with one of the current Sale-abration stamp sets, “Thanks A Bunch”.  By the way, the current 2023 Sale-abration is finishing in less than a week. If there is something you are still wanting - don’t delay in placing your order.

Personalise a fun card for a friend’s birthday with a range of products from Stampin’ Up!.

I created this card for a male friend. He grows many things in the garden that they pick and eat, so carrots growing in the ground were relevant for him. I also discovered that he used to play the guitar. As soon as I heard that, my mind went to a very clever card a UK Demonstrator friend, Karen Mackley, had created with carrots playing a guitar and the drums. My mind started whirring of how I would incorporate the different ideas. This is what I ended up with.

Personalise a fun card for a friend’s birthday with a range of products from Stampin’ Up!.

I started by creating the Theatre card base in Pale Papaya card-stock. Big thanks to Emma Goddard, a UK Demonstrator and past Artisan, for the dimensions of a Theatre card. The next step was to water-colour the sky background on a few pieces of Shimmery White card-stock using Balmy Blue Classic Stampin’ ink and the wide Water Painter. Once dry, I added a little White Craft ink to give a sense of clouds.

Personalise a fun card for a friend’s birthday with a range of products from Stampin’ Up!.

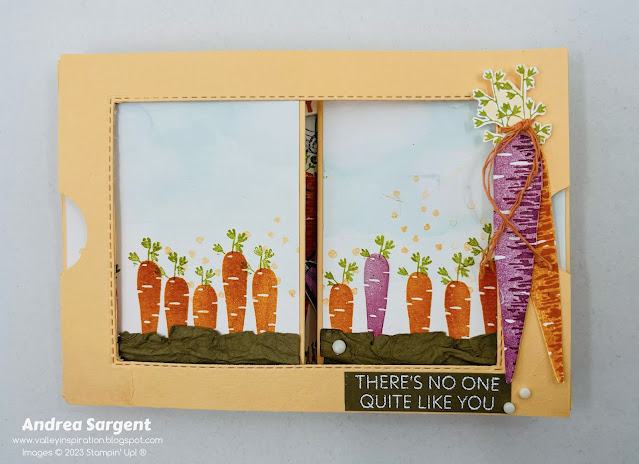
The mid-sized carrot from the Pick a Bunch stamp set was stamped near the bottom of 2 of the water-coloured panels using Pumpkin Pie Classic ink. The full carrot stamp was stamped off then stamped on the panel; then the extra carrot shading stamp was stamped over the carrots in full strength Pumpkin Pie ink. One “heritage” carrot was stamped in Blackberry Bliss ink as I wanted to use the sentiment “There’s no one quite like you”. The recipient is a special fella. Each of the carrots had some little leaves added using Pear Pizzazz ink. The carrots were masked so the greenery just showed from the top of the carrots. The Pick a Bunch stamp set included a little stamp with tiny dots or hearts. I thought this could indicate numerous little butterflies flying in the garden - it was stamped in Pale Papaya ink. It was also used to distract from a couple of unwanted marks. The earth was created by crumpling a strip of Soft Suede card-stock and continuing to crumple until I was able to seperate the card-stock into 2. Each piece was adhered in place ensuring there were crumples showing. There panels were adhered directly to the “curtain panels” of the theatre card base.

Personalise a fun card for a friend’s birthday with a range of products from Stampin’ Up!.

Working on the larger water-coloured panel, the carrot shading stamp was used with Pear Pizzazz ink to create some grass. Three Pumpkin Pie large carrots and two Blackberry Bliss heritage large carrots were stamped on a seperate piece of Basic White card-stock; together with 2 guitars and the set of drums from the Enjoy the Rhythm stamp set in Momento ink. The guitars and drums were coloured with Stampin’ Up! Blends Combos, ie Pumpkin Pie, Pale Papaya, Blackberry Bliss, Crumb Cake, Smoky Slate and the Colour Lifter. The carrots and musical instruments were all fussy cut. Some music notes were directly stamped on the background in Momento ink.

Personalise a fun card for a friend’s birthday with a range of products from Stampin’ Up!.

The 3 carrots had simple faces drawn using the Basic Black Stampin’ Write Marker. Three carrots and the musical instruments were positioned with either Multipurpose Liquid Glue or Mini Dimensionals. Part of the drum set was trimmed away to help it fit in place. Some Pear Pizzazz ‘hair’ was stamped on the background before the carrots were added. The recipient of the card is bald, so the Blackberry Bliss carrot didn’t receive any hair. I had a chuckle at this point.  The panel was adhered directly to the “back section of the theatre”.

Personalise a fun card for a friend’s birthday with a range of products from Stampin’ Up!.

The two remaining carrots were added to the “Theatre” front with some extra fussy cut foliage. Some deconstructed Pumpkin Pie twine (from the Three Twine Combo Pack) was tied around the foliage at the top of the carrots. A sentiment from the Pick a Bunch stamp set was white heat embossed on Soft Suede card-stock and added near the front carrots. Two other sentiments were stamped in Pumpkin Pie ink on Basic White card-stock and then “Birthday” and “Rock” were cut away and added with Mini Dimensionals. A few Vanilla Basic Matte Dots were added as the final touch.

Personalise a fun card for a friend’s birthday with a range of products from Stampin’ Up!.

The back of the card was prepared for writing a personal message with an extra fussy cut carrot and foliage added to a Basic White panel. As usual, I also decorated the envelope but forgot to take a photo before the card was given. The photo below shows a top view of this theatre card.

Personalise a fun card for a friend’s birthday with a range of products from Stampin’ Up!.

Thank you so much for dropping in. I hope this fun card gave you a smile. I certainly enjoyed creating it.

Personalise a fun card for a friend’s birthday with a range of products from Stampin’ Up!.

There is more Pumpkin Pie creativity. To continue with the blog hop, click the  "onto the next" graphic below and be taken to the blog of the lovely Fiona RyanI am looking forward to checking out Fiona’s creations. I do love seeing everyones' projects - there is always inspiration.

I hope to see you next week when we will be featuring Real Red, another of the Regals Colour family as we continue our weekly 2022-2023 Colour Creations Blog Hops.  

Stay well, stay safe and be kind to yourself and others.

Andrea 💕🐾


If you find a broken link or have come to this blog hop from a different entry point, you can view the full list of participants on Catherine Proctor’s blog @ What Cathy Made. Cathy is our  Art With Heart Team Colour Creations Coordinator.  She is an wonderful lady. Check out her delightful creation while you are there.

If you live in Australia, don't already have a Stampin' Up! demonstrator and would like your own copy of Stampin' Up's 2022-2023 Annual Catalogue and or the January - April 2023 Mini Catalogue then let me know and I will be delighted to send them to you.  Please don't hesitate to make contact with any other queries about this project or Stampin' Up!. 

#colourcreationsbloghop  #stampinup #stampinupaustralia #stampinupsouthpacific #stampinupdemo  #handmadecards #makeacardsendacard #stampinupdemonstrator #papercrafting #artwithheartteam  #papercrafter  #stamper  #valleyinspirations   #naturesprints #pickabunch #enjoytherhythm

Wednesday, 25 January 2023

AWHT Colour Creations #37 Petal Pink

Petal Pink with Fragrant Flowers Fancy Fold

Hello. Welcome to Valley Inspirations with Andrea and the Art with Heart Colour Creations Blog Hop. We are working though the Stampin' Up! colours in alphabetical order, focussing on one colour each week.


This week’s Blog Hop is focussing on a pale pink called Petal Pink. Petal Pink is part of the Subtles Colour Family and is a gorgeous colour. I know Petal Pink is not some of my colleagues favourite, however, I love this pink that is a bit peachy & muted. This colour is lovely when used for a range of flowers, baby cards, and the like. 


Petal Pink is produced in Stampin' Up!'s card-stock, both A4 & 12"x12"Classic Stampin' inks (ink pads re-inkers); Stampin' Write Markers; Stampin' Blends Combo; Subtles Designer Series Paper as well as Country Floral Lane, Country Gingham, Favored Flowers (Sale-a-bration), Regency Park, Delicate Desert, Dandy Designs, Abigail Rose, Tea Boutique, Pretty Prints, Design a Daydream Host, Sweet Talk (Clearance), Flowering Fields, Subtles DSPs; plus By the Bay, Texture Chic, Dry Brushed Metallic Speciality Designer Series Paper, Love Treats Kits, Enjoy the Adventure  & Texture Chic Memories & More Cards & Envelopes; Tea Boutique Cards & Envelopes, Enjoy the Adventure Memories & More card pack; Petal Pink Soft Polyester Ribbon, Cotton Ribbon Combo and Adhesive-Backed Milky Dots, Pastel Adhesive-Backed Sequins, Solid Faceted Gems, Elegant Faceted Gems, For Everything Fancy Sequins. Wow oh Wow, what a solid list demonstrating the colour's versatility.

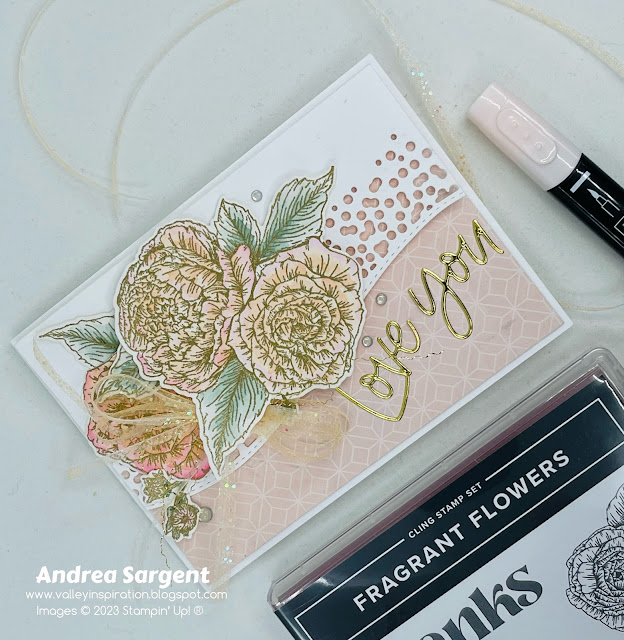
Petal Pink card-stock, ink, Stampin' Blends, Favored Flowers DSP and Adhesive-Backed Milky Dots have been used in this project plus a range of non-Petal Pink bits and pieces. Here is my card:


I had a few ideas when starting out, but the card morphed into something quite different.  However, water-colouring some flowers was an initial idea that eventuated. Just before starting work on this project I noticed a rose that had been knocked from one of my bushes - this inspired my flower colouring.


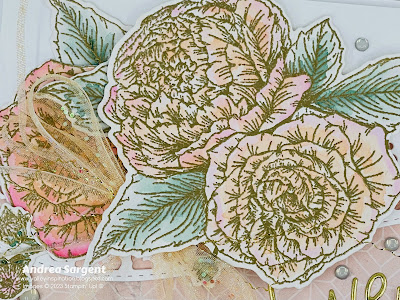
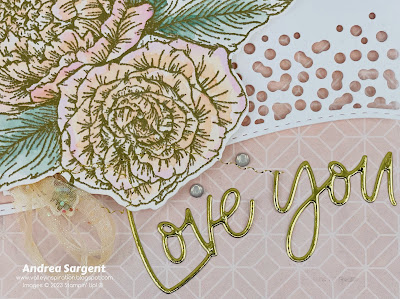
I love the rose above with the beauty of the pale pinky orange with brighter pink edges plus. While my rose is different I water-coloured 2 floral arrangements from the Fragrant Flowers stamp set. They were stamped in Versamark ink on Shimmery White card-stock and heat embossed with Gold Emboss Powder and a Heat Tool. A number of the small flower & leaves were also gold heat embossed. All the images were coloured with Petal Pink, Melon Mambo, Soft Succulent & Evening Evergreen Inks. Some were coloured more strongly and others were more subtlety coloured. Once dry, the images were die cut with coordinating Dies from the Fragrant Flowers dies.


A Basic White card-stock card front was die cut with a curvy Around the Bend dies. The die used also cuts out a curvy strip of holes - its gorgeous. A side B piece of the delightful Favoured Flowers Sale-a-bration DSP was used as the background panel that was adhered to a Thick Basic White card base. The white die cut card front was popped up on Dimensionals.


The buds were fussy cut away and the darker water-coloured floral spray was cut apart so the flowers could be separated when rearranged. I ended up using only one darker flower. The floral arrangement was adhered in place with either Dimensionals or Multipurpose Liquid Glue.


The Love for You dies were used to cut out some words in Gold Metallic Foil. Some Adhesive sheet was added to the back of the foil to make adhering the words in place so easy. Some White Glittered Organdy ribbon was coloured with the Light Petal Pink Blend before being cut into 3 pieces length-wise. Only 2 strips were used to tie a double bow. A strand of gold that had been retained from some deconstructed Gold Elegant Trim, was also tied into a bow. The bows were positioned with Glue Dots. Some Petal Pink Adhesive-backed Milky Dots were scattered around to finish the card front.


The card inner is the fancy fold section. As the card opens the sentiment labels pop up to highlight the sentiment itself. It is called a Sliding Pop Up fold. The Something Fancy labels were used to die cut labels from Basic White card-stock and the same Favored Flowers DSP. I saw this fancy fold demonstrated by Susan Campfield. She is a demo in the United States so I needed to convert her dimensions to suit our A4 sizing. I created the fold without rewatching Susan's uTube so didn't create it perfectly. I needed to undo a couple of sections so will try this fold again to refine sizing and process. The card inner was also decorated with pieces of DSP mounted on some Gold Metallic foil. Some small water-coloured flowers were also added.


A Basic White C6 envelope was stamped with the larger floral stamp using Petal Pink Classic Stampin' ink. I stamped on the front of the envelope and also on the back flap.

I designed this card for a special friend's birthday, however, it could also be used for a Valentines Day card or a Friendaversary. 

Thank you so much for dropping in. I so appreciate it.


There is more Petal Pink creativity. To continue with the blog hop, click the  "onto the next" graphic below and be taken to the blog of Amie McIllroyI always look forward to checking out Amie’s creations. I do love seeing everyones' projects - there is always inspiration.

I hope to see you next week when we will be featuring Polished Pink, one of the 2021-2023 In Colour family as we continue the weekly 2022-2023 Colour Creations Blog Hops.  

Stay well, stay safe and be kind to yourself and others. 

Andrea 💕🐾


If you find a broken link or have come to this blog hop from a different entry point, you can view the full list of participants on Catherine Proctor’s blog @ What Cathy Made. Cathy is our  Art With Heart Team Colour Creations Coordinator.  She is an wonderful lady. Check out her delightful creation while you are there.

If you live in Australia, don't already have a Stampin' Up! demonstrator and would like your own copy of Stampin' Up's 2022-2023 Annual Catalogue and or the January - April 2023 Mini Catalogue & Sale-a-bration Brochure then let me know and I will be delighted to send them to you.  Please don't hesitate to make contact with any other queries about this project or Stampin' Up!. 

#colourcreationsbloghop  #stampinup #stampinupaustralia #stampinupsouthpacific #stampinupdemo  #handmadecards #makeacardsendacard #stampinupdemonstrator #papercrafting #artwithheartteam  #papercrafter  #stamper  #valleyinspirations   #loveforyou #aroundthebend #fragrantflowers #somethingfancy 

Wednesday, 12 January 2022

AWHT Colour Creations #31 Night of Navy

Night of Navy with Awesome Otters 

Hello. Welcome to Valley Inspirations with Andrea and the 2021-2022 Art with Heart Colour Creations Blog Hop


This week’s Blog Hop is focussing on a beautiful deep navy blue called Night of Navy. Night of Navy is part of the Neutrals Colour Family and is a delightful versatile blue. I so love this blue which works beautifully with various colours including Bermuda Bay and Daffodil Delight


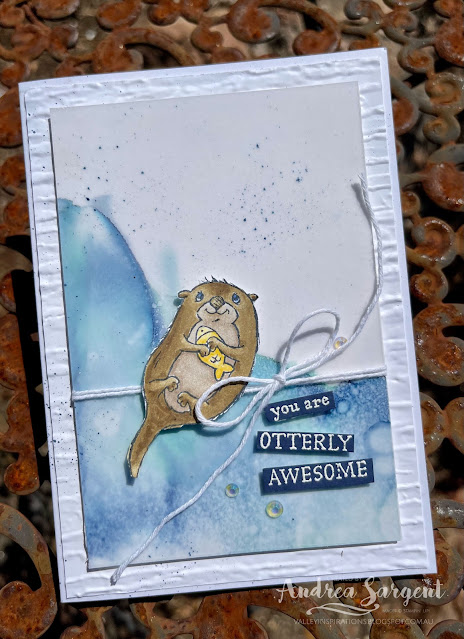
Night of Navy is produced in Stampin' Up!'s card-stock, both A4 & 12"x12"Classic Stampin' inks (ink pads re-inkers); Stampin' Write Markers; Stampin' Blends, Watercolor Pencils, Soft Pastels Assortment and the 2020-2022 Neutrals Designer Series Papers as well as Beauty of the Earth, Sweet Symmetry, Abstract Beauty, In Good Taste Designer Series Papers & the Ombre Speciality Paper, Abstract Beauty Ephemera Pack, Abstract Beauty Cards & Envelopes & the Love, Santa Tag Kit. There is also Night of Navy twine as part of the Fan Bakers Twine, Resin Stars Embellishments, the Holiday Rhinestone Basic Jewels & Blue Adhesive Backed Gems. The range of products available underscores the versatility of this colour. The cards below have used Night of Navy Classic Stampin' ink, Cardstock, Stampin' Blends Combo and a Stampin' Write Marker plus a range of other non-NoN bits and pieces.

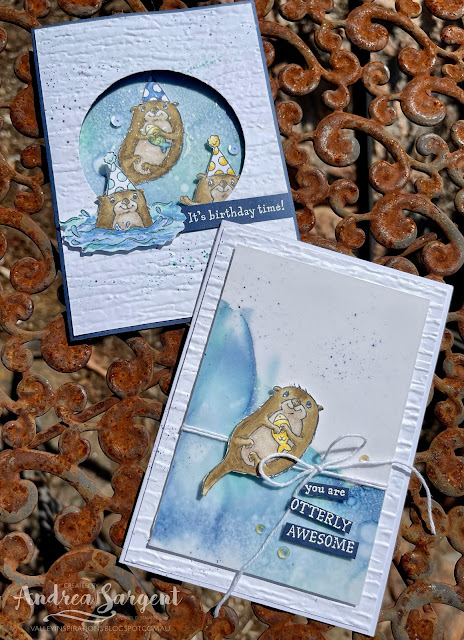
Here are my cards showcasing Night of Navy:

A custom made card says so much more than the sentiments alone communicate as they are made with love.

As you can see the cards are same, same, but different. I had a number of ideas of how I would showcase Night of Navy. It is such a versatile colour. I wonder how everyone else are using this fantastic colour.

CARD 1:

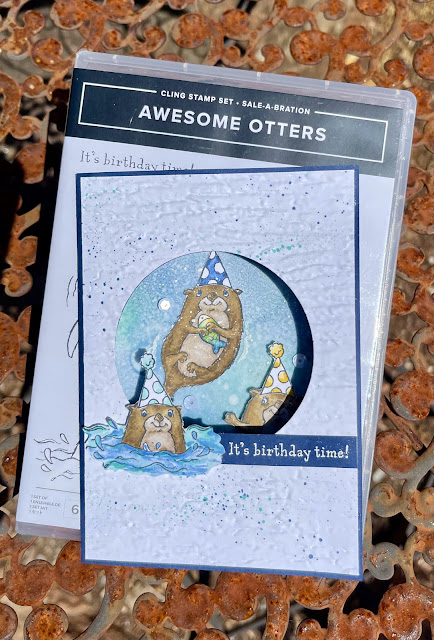
Night of Navy, as a deep blue made me think of water. From there I thought of the new Sale-a-bration stamp set "Awesome Otters".

A custom made card says so much more than the sentiments alone communicate as they are made with love.

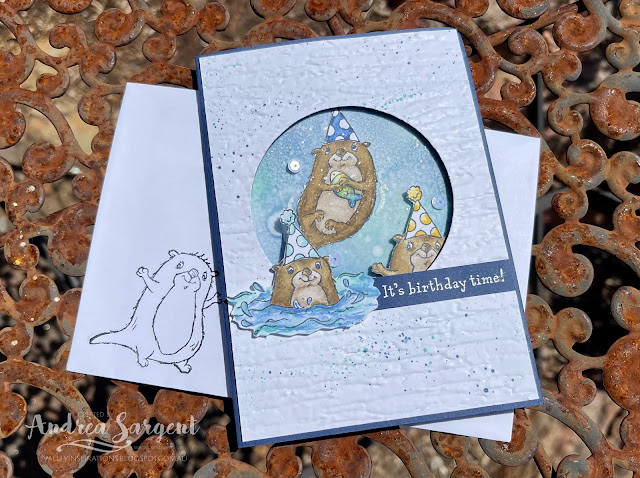
This card is a simple fancy fold, with flaps folding in from either side. I took advantage of this fold by die cutting a circular hole in the front panel to showcase part of the design on the second flap as it peeps through the hole to combine with the little otter and sentiment on the front panel. A piece of Basic White card-stock was dry embossed with the 3D Bark Embossing Folder before layering on the front. The largest circle from the Layering Circles die set was used to cut a central hole.
A custom made card says so much more than the sentiments alone communicate as they are made with love.

The second panel has a piece of Vellum card-stock that was coloured with Stampin' Blends and Isopropyl Alcohol. The Blends were Night of Navy and Bermuda Bay combo packs, ie Light and Dark in both colours. The Blends were scribbled over the centre of the Vellum. The Isopropyl Alcohol was spritzed over with a Stampin' Spritzer.  Then the colour design was formed through blowing. While you could blow through a straw, in our COVID safe world I used a manual bulbous blow tool (not sure what they are called). Once dry, a little more alcohol was spritzed to create a look of bubbles.

A custom made card says so much more than the sentiments alone communicate as they are made with love.

The otters were stamped in Momento ink on to Basic White card-stock and coloured with Stampin' Blends, ie Soft Suede, Crumb Cake combos, a touch of Light Night of Navy for the eyes and part of the fish and Daffodil Delight & Night of Navy for the fish and the party hats. Of course I also used the Colour Lifter to add more shading & highlights. The otters & hats were all fussy cut. A little Wink of Stella was added to the fish.

A custom made card says so much more than the sentiments alone communicate as they are made with love.

Some extra white squiggles were added by White heat embossing. The front sentiment was White heat embossed on Night of Navy card-stock, where as the inner sentiment was stamped in Night of Navy Classic ink. Adhesive Backed Sequins add a little shimmer. It is amazing how they adapt to the colours around them. The final touch was some splattering - the card front with Light Night of Navy and Bermuda Bay Blends, where as the 2nd flap's splatters were added with some White Craft ink mixed with a little Wink of Stella and flicked using the medium Water Painter over the inner design and the Night of Navy inside flap.

A custom made card says so much more than the sentiments alone communicate as they are made with love.

The card inner was splattered with both Night of Navy and Bermuda Bay Dark Stampin' Blends. The navy came out strongly an ended up more dominant than planned. You know how it is - you flick and flick again and can hardly see anything for your efforts and then with a third flick it goes everywhere in solid splotches. Sigh!. A little otter was also stamped in Momento ink. A C6 Basic White envelope was stamped with one of the otters in Momento ink.

A custom made card says so much more than the sentiments alone communicate as they are made with love.

CARD 2:

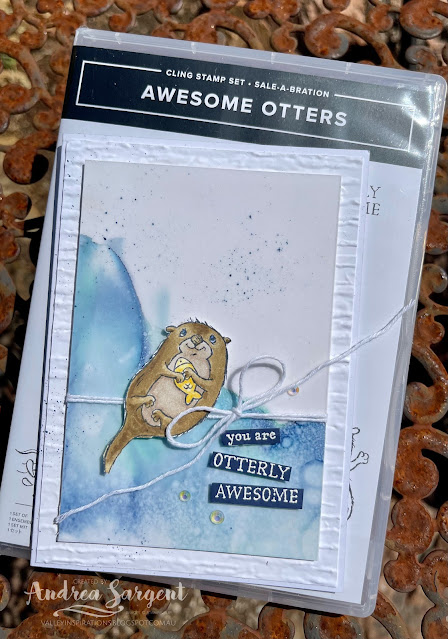
The second card also has aVellum panel with the same type of Stampin' Blends colouring with Isopropyl Alcohol. This was attached to a piece of Basic White card-stock with Adhesive Sheet. This was much easier that attaching the Vellum with Tombow Multipurpose Liquid Glue as I did with the previous card.

A custom made card says so much more than the sentiments alone communicate as they are made with love.

The Thick Basic White card front had a Bark 3D Embossed panel of Basic White card-stock adhered. Some White Bakers Twine from the Essentials Bakers Twine pack was wrapped around twice and tied in a bow. Dimensionals were added to the centre panel to pop it up.

A custom made card says so much more than the sentiments alone communicate as they are made with love.

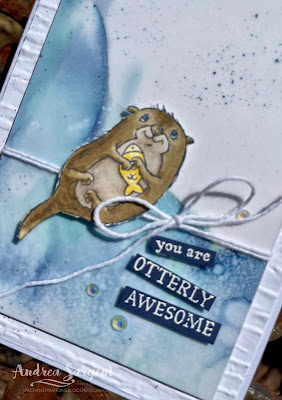
One of the otters was stamped, coloured and fussy cut in the same way as the first card. It was added with Dimensionals. The sentiment from the same stamp set was heat embossed in White on to Night of Navy card-stock and then cut into strips that also were popped up on Mini Dimensionals.

A custom made card says so much more than the sentiments alone communicate as they are made with love.

A little splattering was added with Night of Navy and Bermuda Bay Stampin' Write Markers. After my earlier experience I thought I would play it safe with the Markers. A few of the oh so gorgeous Iridescent Rhinestone Basic Jewels were added for a delicate touch of sparkle.

A custom made card says so much more than the sentiments alone communicate as they are made with love.

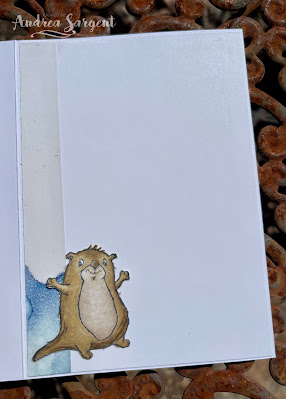
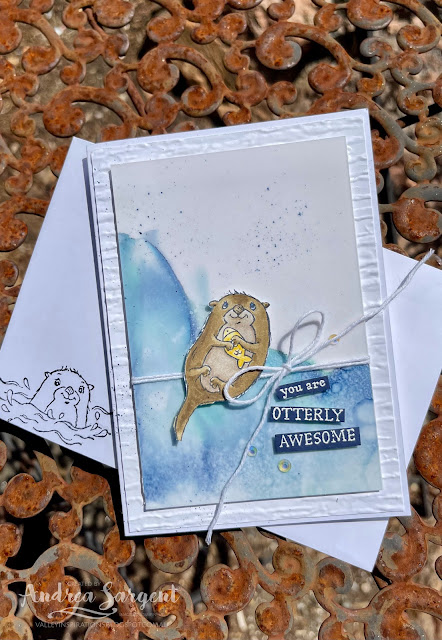
The Basic White card inner was decorated with an off-cut of coloured Vellum and an extra coloured otter. A Basic White C6 envelope was also stamped with another otter in Momento.

A custom made card says so much more than the sentiments alone communicate as they are made with love.

I did enjoy creating these cards to share. Hmm, well, I enjoyed most of the creative process. It was one of those sessions where I regularly muffed up, including adhering the Vellum upside down and as I tried to take it back up and re-adhere - glue went everywhere; mis-stamping on occasion, splattering issues, dropping things, loosing things ... the list could go on. Have you ever had one of those days - or is it just me???


Thank you so much for dropping by. I do value that you spent time with me.

If you live in Australia, don't already have a Stampin' Up! demonstrator and would like your own copy of Stampin' Up's 2021-2022 Annual Catalogue and or the new January - June 2022 Mini Catalogue & Saleabration Catalogue then let me know and I will be delighted to send them to you.  Please don't hesitate to make contact with any other queries about these projects or Stampin' Up!. 

There is more Night of Navy creativity. To continue with the blog hop, click on the "next" graphic below to be taken to the blog of the lovely Kate Morgan. As always, I am looking forward to checking out Kate's creations and everyone else's.

Hope to see you next week when we will be featuring another versatile colour, Old Olive, as we continue the weekly 2021-2022 Colour Creations blog hops.

Stay well, stay safe and be kind to yourself and others. 

Andrea 💕🐾

If you find a broken link or have come to this blog hop from a different entry point, you can view the full list of participants on Catherine Proctor’s blog, our amazing AWHT Colour Creations Coordinator.  I so appreciate all Cathy has done and continues to do to coordinate this blog hop each week. She is such a special lady. Check out her delightful creation while you are there.

#colourcreationsbloghop  #colourcreationsbloghop2022  #stampinup  #artwithheartteam #awesomeotters #stampinblends 

AWH Heart of Christmas Blog Hop #3

Christmas with the Road to Christmas Kit + Alternatives Hello. Welcome to  Valley Inspirations with Andrea  and the third  Art with Heart Te...