Art with Heart Wow Tutorials

Showing posts with label Designer Series Paper. Show all posts

Wednesday, 3 August 2022

AWHT Colour Creations #14 Coastal Cabana

Coastal Cabana with Hues of Happiness

Hello. Welcome to Valley Inspirations with Andrea and the Art with Heart Colour Creations Blog Hop. We are working though the Stampin' Up! colours in alphabetical order. 


This week’s Blog Hop is focussing on a bright tourquise called Coastal Cabana. Coastal Cabana is part of the Brights Colour Family and is a pretty happy colour. This colour is lovely when used with other bright colours and is a similar hue to Pool Party & Bermuda Bay. It is also lovely with Pool Party & Sahara Sand, which is the colour combo I have selected for my project with the inclusion of Pear Pizzazz leaves. 


Coastal Cabana is produced in Stampin' Up!'s card-stock, both A4 & 12"x12"Classic Stampin' inks (ink pads, ink spots re-inkers); Stampin' Write Markers; Water-colour Pencils; Soft Pastels; Brights Designer Series Paper as well as Hues of Happiness and Sun Prints DSPs; Adhesive-backed Sequins & Gems; and Light the Candles Card Kit 


I ran out of time this week given various commitments of late so I only had time for a simpler Coastal Cabana card. Here it is:

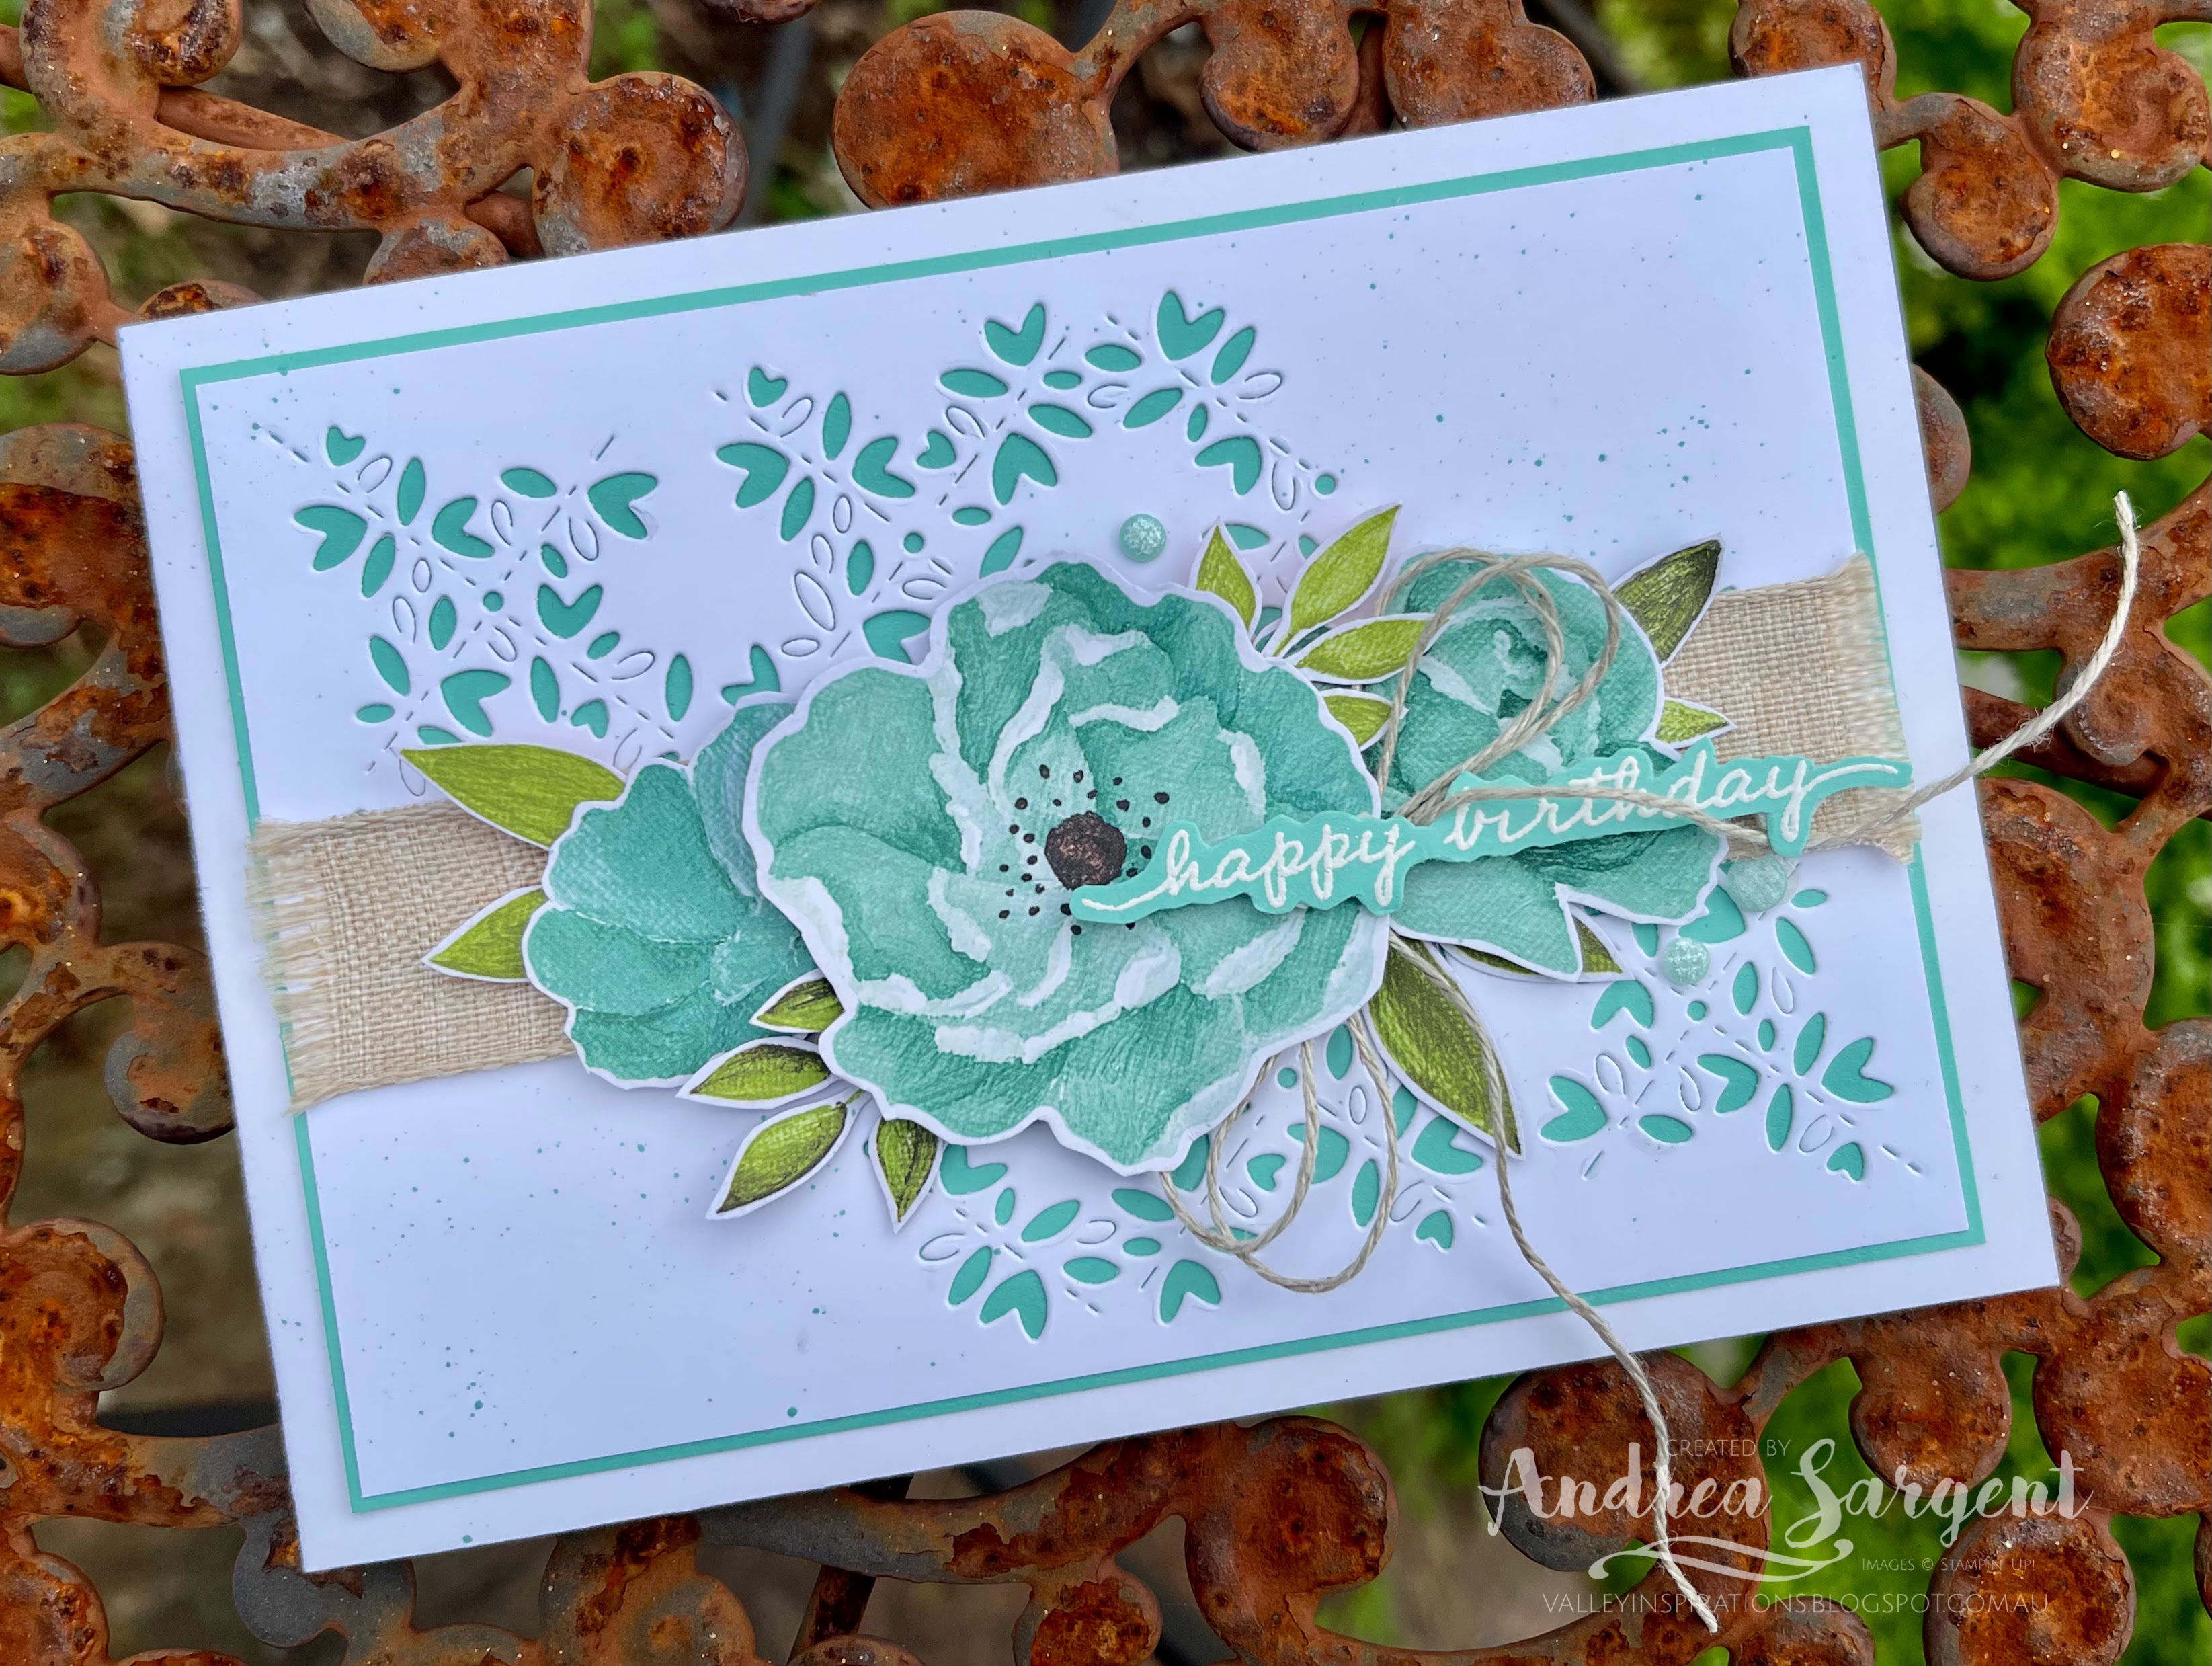
Wish a special friend "Happy Birthday" with a personally crafted Hues of Happiness card.

One of my favourite suites from the current Stampin' Up! Annual Catalogue is the Hues of Happiness Suite. Apart from a gorgeous floral stamp set with coordinating dies, that incorporate some brilliant extra pieces, the suite includes a delightful pack of Hues of Happiness Designer Series Paper. Not long after receiving this DSP, I set about fussy cutting flowers and leaves from this paper. However, I then created with the stamp set and either water-coloured or coloured with Stampin' Blends and have not used any of the fussy cut flowers. Today was the day.
Wish a special friend "Happy Birthday" with a personally crafted Hues of Happiness card.

The DSP flowers included flowers in Coastal Cabana. Three of these flowers form the central  focus. A Basic White background panel was die cut with the intricate background die from the Blossoming Happiness dies. This was mounted onto slightly larger Coastal Cabana card-stock, which in turn was mounted to a Thick Basic White card base. Some Coastal Cabana splatters were added using a Stampin' Write Marker.

Wish a special friend "Happy Birthday" with a personally crafted Hues of Happiness card.

A piece of the Natural Finish Ribbon spans the landscape card front and the 3 fussy cut DSP flowers were arranged over the ribbon. Fussy cut leaves were poked in here and there. One of the stamp set's sentiments was White Heat embossed on Coastal Cabana card-stock using Versamark ink, White Emboss Powder and a Heat Gun. A double Linen twine bow was tucked under the edge of the central flower and some Fine Sparkle Adhesive-backed Gems provided the finishing touch.

Wish a special friend "Happy Birthday" with a personally crafted Hues of Happiness card.

The card inner was layered with Basic White card-stock onto Coastal Cabana card-stock. A fussy cut flower and a few leaves were added. A Basic White C6 Envelope was stamped with a couple of flowers using Coastal Cabana ink and a little splattering was added.

Wish a special friend "Happy Birthday" with a personally crafted Hues of Happiness card.


Thank you so much for dropping by. I do value the time you spent with me.

There is more Coastal Cabana creativity. To continue with the blog hop, click on the "next" graphic below to be taken to the blog of a special lady, Kate Morgan. I always look forward to checking out Kate's creation. I do love seeing everyones' projects - always so much inspiration.

Hope to see you next week when we will be featuring Crumb Cake as we continue the weekly 2022-2023 Colour Creations blog hops.  Also, don't forget many of us are joining the Heart of Christmas Blog Hop on Monday evenings to share many delightful Christmas projects. 

Stay well, stay safe and be kind to yourself and others. 

Andrea 💕🐾

    

If you find a broken link or have come to this blog hop from a different entry point, you can view the full list of participants on Catherine Proctor’s blog @ What Cathy Made. Cathy is our wonderful Art With Heart Team Colour Creations Coordinator.  She is such an amazing lady. Check out her wonderful creation while you are there.

If you live in Australia, don't already have a Stampin' Up! demonstrator and would like your own copy of Stampin' Up's 2022-2023 Annual Catalogue and or the July - December 2022 Mini Catalogue then let me know and I will be delighted to send them to you.  Please don't hesitate to make contact with any other queries about these projects or Stampin' Up!. 

#colourcreationsbloghop  #stampinup #stampinupaustralia #stampinupsouthpacific #stampinupdemo  #handmadecards #makeacardsendacard #stampinupdemonstrator #papercrafting #artwithheartteam  #papercrafter  #stamper  #valleyinspirations   #happinessabounds 

Bron’s Birthday Blog Hop #5

Theme #5: Fancy Fold

Hello. Welcome to Valley Inspirations with Andrea and the fifth blog hop celebrating Bronwyn Eastly. We're a group of stamping friends that are recognising Bron's 60th Birthday in 2022 with six blog hops, over six months, with six fun themes! 


Knowing Bronwyn's brilliance in creating 3D fancy fold projects (as demonstrated above) I was somewhat intimidated with this theme. Having said that, I do enjoy creating fancy folds. As I knew I could not complete with Bron, I decided to create one of the fancy folds on my "To Do" List, that is a 
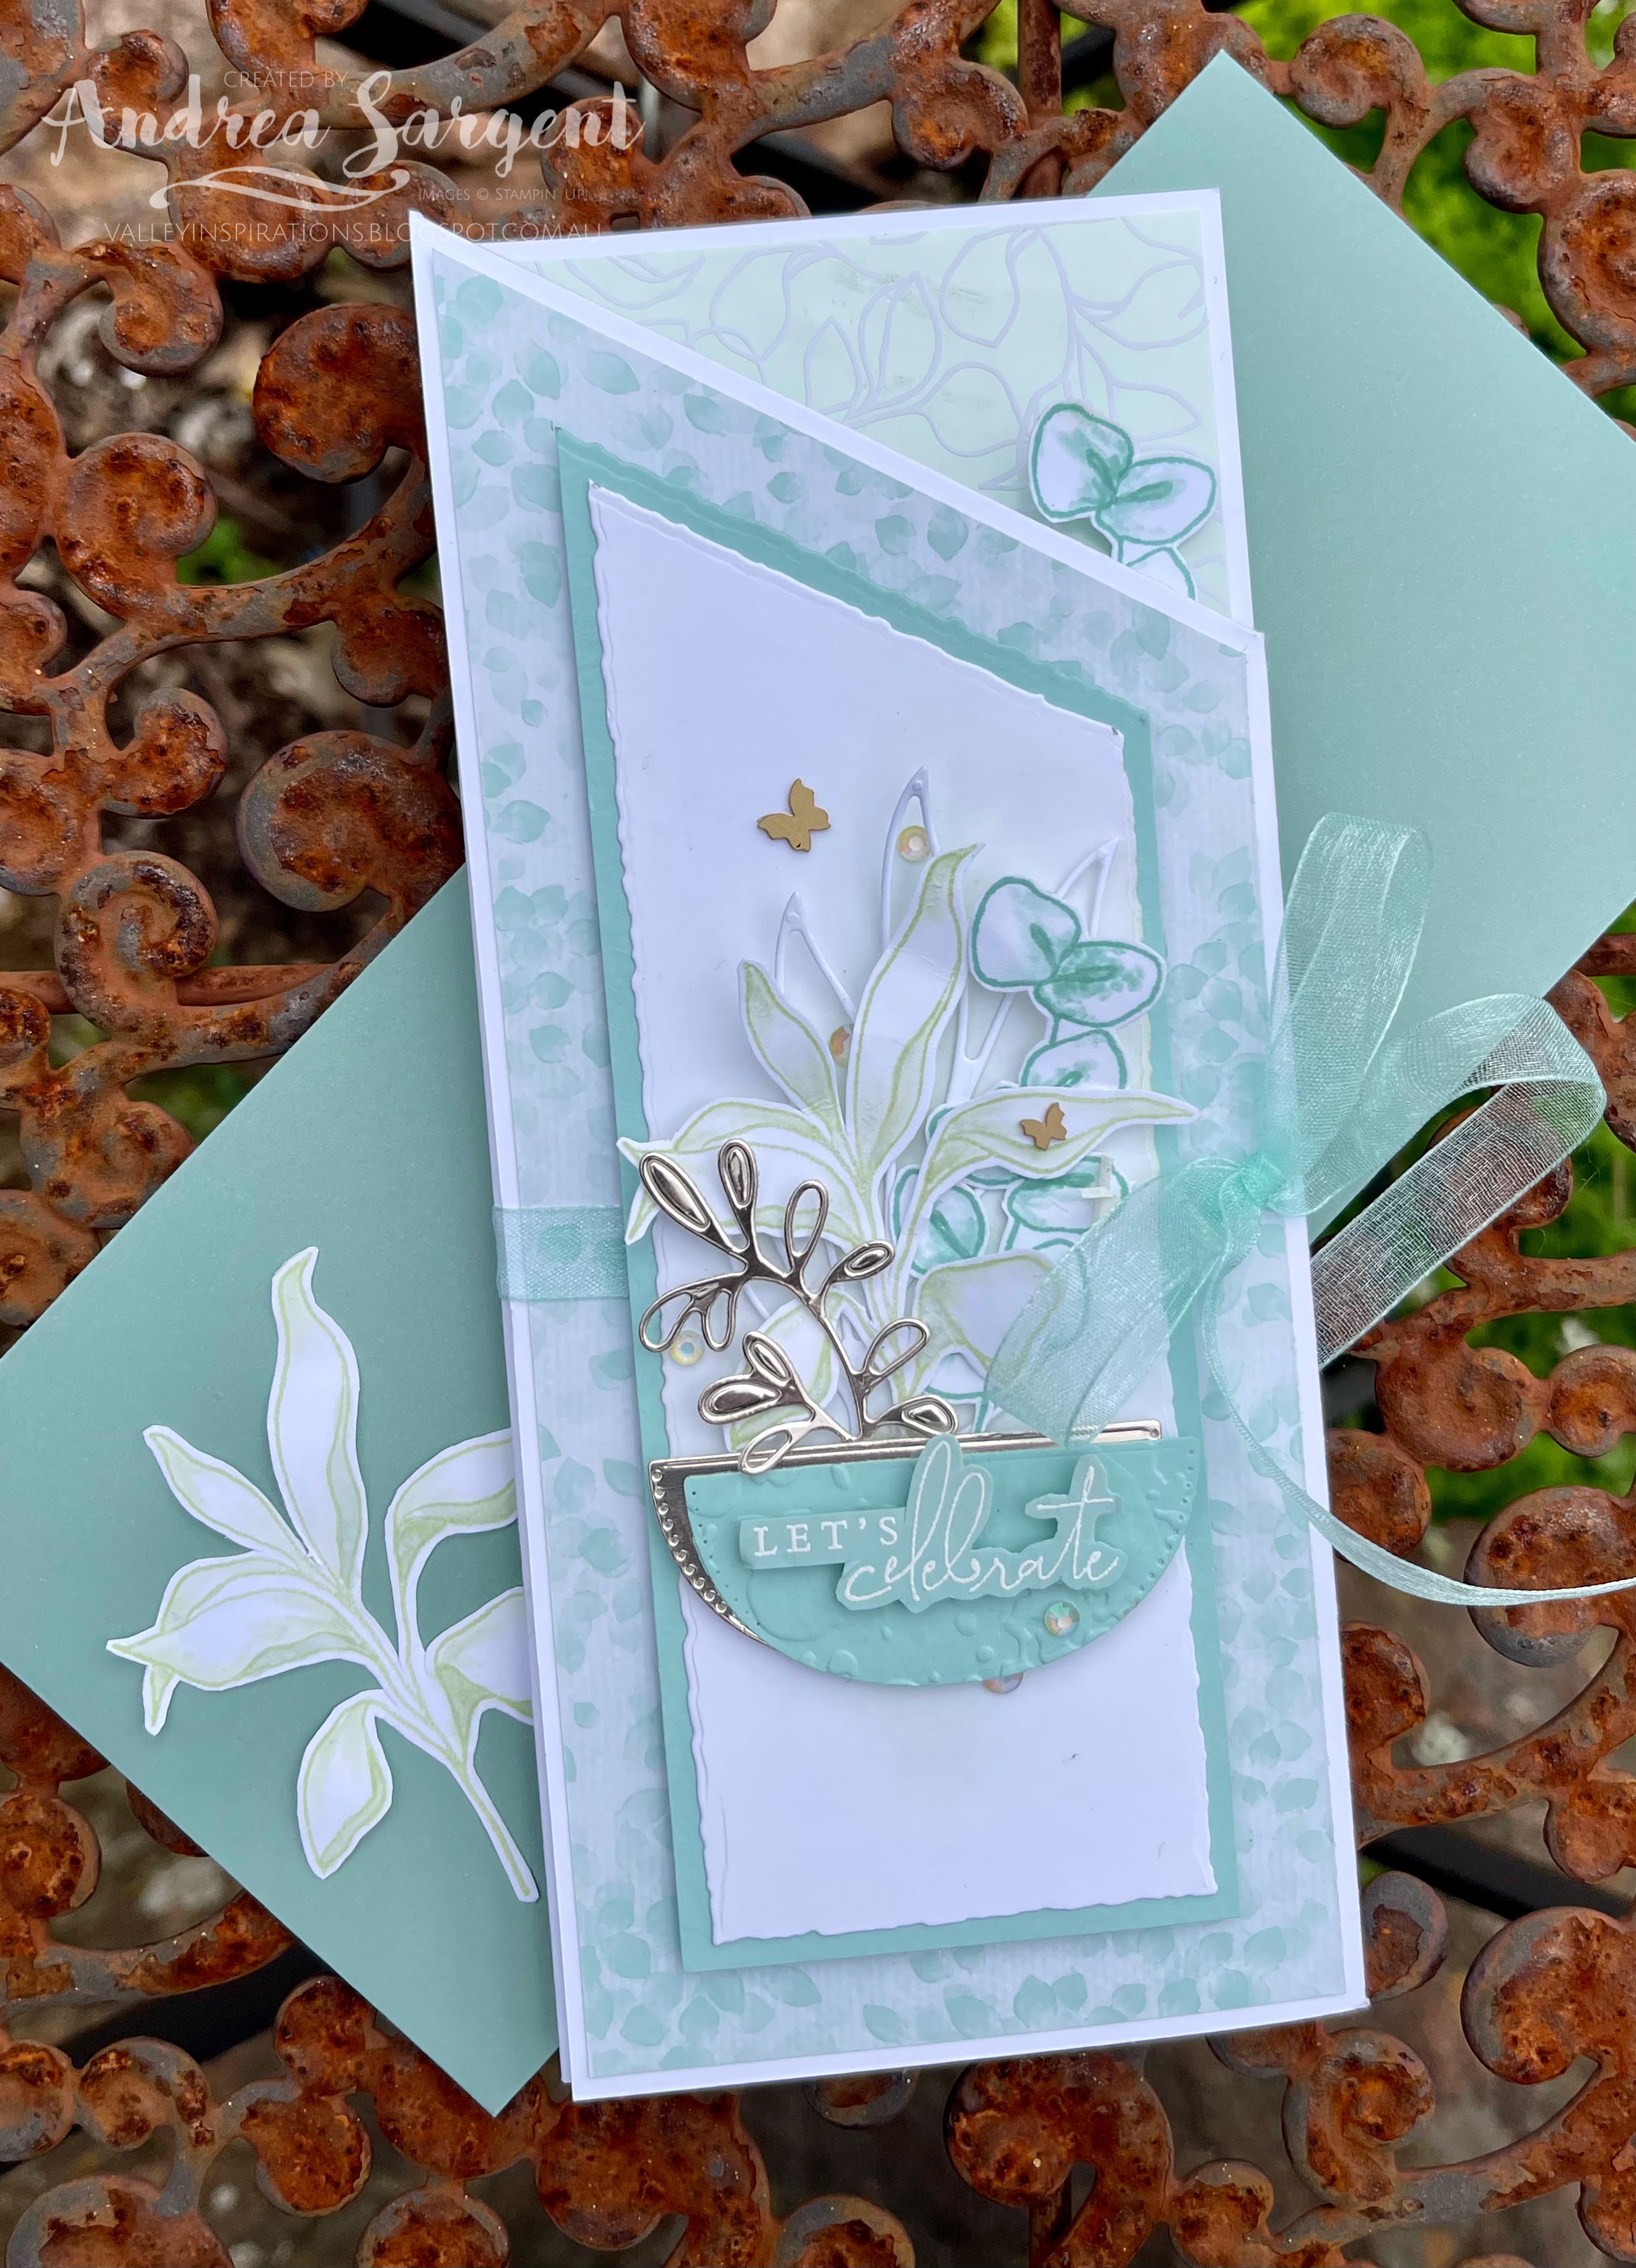
Free-standing Slimline Miura Card. Here it is:


I want to acknowledge Susan Wong, a New Zealand Stampin' Up! Demonstrator, a member of the Artisan team and part of the Crafty Carrot Collective. In a recent session Susan demonstrated a Miura Slimline card. While I used a completely different suite I so appreciated the numerous tips and tricks Susan shared. She and all the Crafty Carrot ladies are so amazing.


A friend of mine is enjoying an important "0" birthday and she is not one for flowers so i created this with her in mind. I hopes she likes it. I chose the Splendid Day Suite that includes gorgeous stamps, dies and amazing Speciality Designer Series Paper.


The Miura fancy fold is an Origami fold that required careful scoring of Basic white card base. The stamped outline leaves were coloured with a Blender Pen dabbed into either Soft Sea Foam or Pool Party Classic Stampin' ink pads. Some of the detailed dies from the Splendid Stems dies were used to cut out leaf shapes from either Basic White & Pool Party card-stocks or now retired Champagne Foil. The little bowl shapes were die cut from the same papers.


The photos above and below focus specifically on the 2 inner panels. The front panel uses what could be called a "B" side of the luscious Splendid Day SDSP, whereas the 2 inner panels used the foil designs, one with a Sahara Sand tinge, the other with a Soft Sea Foam tinge. Part of the difficulty is cutting the angles to match the folds.


The Miura fold does not usually have the extra panel showing underneath the diagonal fold (see the close up below) but I added this to enable the card to be more stable when standing.


The die cut panels were cut using the Deckled Edge dies. I so love the effect of the deckled edge. Pool Party Sheer ribbon was used to tie the card closed. A couple of Brushed Brass Butterflies were added to the front panel and a few Iridescent Rhinestone Jewels provided a subtle shimmer.


One of Stampin' Up!s Soft Succulent Slimline Envelopes is perfect for this card. I added a spare stamped and coloured leaf to the envelope.

Thank you so much for calling by.

Hop on over to the next blog by the very special Kathryn Mangelsdorf and check out her delightful creation. Just click on Kathryn's name or the Next graphic below to be taken to her Blog, Kathryn's Stampin' World.


If you come across a broken link or want to head back to Bron's blog for a list of everyone in this blog hop, just click on this link. 

Apart from this Blog Hop there is also an Instagram Hop starting with Bron at @addinktivedesigns. Check it out too - there is more creativity to find.

#bronsbdaybloghops #stampinup #stampinupsouthpacific #stampinupdemo  #handmadecards #makeacardsendacard #stampinupdemonstrator #papercrafting #splendidthoughts  #thecraftycarrotco

Thursday, 10 September 2020

Art with Heart Creative Showcase - September 2020

Masculine Theme with World of Good

Hello. Welcome to Valley Inspirations with Andrea and the September 2020 Art with Heart Creative Showcase

This month we are focusing on projects suitable to give fellas. I have created a card using Stampin' Up!s gorgeous World of Good Suite. I have had an idea floating around my brain ever since I first saw this Suite, so I'm delighted to try it out for this Creative Showcase. As I created this card, I also had a special guy in mind who will be celebrating his birthday soon. He is someone who has spent much of his life helping others.

World of Good Masculine Stampin Up card, Andrea Sargent, Independent Stampin Up Demonstrator, South Australia

I've been wanting to create a spinner card, that is to have part of the design spin when the card is opened. In this case it is the "world". I don't know about you, but at times I am feeling that the world is spinning too fast. We are in strange times...

A friend helped me take a video to help you see the card when it opens. I was crafting with friends - one in person and our other friend online; but needed to leave before this card was finished, so you may notice that there were no gems on the card in the video.


The World of Good Suite includes beautiful World of Good Speciality Designer Series Paper (SDSP), with a number of the designs having brass highlights. The sheet I chose has brass consecutive circles on a Misty Moonlight design. I cut the SDSP so that the centre of the circles would be in the middle of the card front ... and then I die cut a circle in the centre! 

How did this card come together ...?

World of Good Masculine Stampin Up card, Andrea Sargent, Independent Stampin Up Demonstrator, South Australia

A card base of Misty Moonlight card-stock (normal portrait size card in Australia) was scored in half and then the front was scored in half again. The World of Good SDSP sheet was cut so that one piece would fit the top front. The second piece - the same size as the first, was cut for the inner front. A third piece was to fit the bottom half of the card. Care was taken to ensure the pieces were kept in order so the circles continued on. Two very thin strips of Brass Foil card-stock were adhered to the beginning and end of the SDSP on the card.

World of Good Masculine Stampin Up card, Andrea Sargent, Independent Stampin Up Demonstrator, South Australia

A circle was cut from the centre of the front of the card using a circle die from the Stitched Shapes dies.  Two of the circular dies were used to cut two metallic round frames and the small pedestal out of the Brass Metallic card-stock. Half of the pedestal and one side of a round frame were adhered around the circular hole on the top folded section, that is, half was adhered directly, the other half hung over and across the card.

World of Good Masculine Stampin Up card, Andrea Sargent, Independent Stampin Up Demonstrator, South Australia

To create the world, a piece of Shimmery White card-stock was water-coloured with Seaside Spray, Pretty Peacock and Highland Heather Classic ink and the mid-size Water Painter. While the water-coloured card-stock was drying, the two world dies from the World Map dies were used to cut two spheres of the world out of Brass Metallic card-stock. I was excited when I first saw this die set - it was great to see Australia represented. Once the water-coloured piece was dry, two circles were die cut. This circle die was included in the World Map dies.

World of Good Masculine Stampin Up card, Andrea Sargent, Independent Stampin Up Demonstrator, South Australia

Each metallic world sphere was adhered to a watercolour circle. I wanted to use a fine thread that wouldn't dominate the design as the structural thread to suspend the world in space. I couldn't find a clear sewing thread (used many years ago) but found some retired Stampin' Up! Copper Thread. 

World of Good Masculine Stampin Up card, Andrea Sargent, Independent Stampin Up Demonstrator, South Australia

This was centred across the back of one of the world spheres and the other sphere adhered over it so the thread was completely stuck through the centre. The metallic thread was then adhered along the fold at the back of the card front. Another piece of SDSP then was adhered to the back of the card front, to ensure the thread was firmly attached and all card surfaces were decorated. The second metallic frame was adhered at the edge of the hole.

World of Good Masculine Stampin Up card, Andrea Sargent, Independent Stampin Up Demonstrator, South Australia

I usually add a sentiment on the card front. I tried numerous approaches, including gold heat embossing on Misty Moonlight card-stock; water-colouring more Shimmery White card-stock and either stamping or heat embossing on it; using a label or fussy cutting the sentiment, different size sentiments, etc. Nothing seemed to work - it just detracted from the SDSP design and that sense of outer space around our world. Yet I kept looking at the front of the card - it needed something. To finish the card a number of Wonderful Gems were scattered over the outer space to represent stars and planets and add a little sparkle. These embellishments are so delightful. A pack includes gems in both red and clear, with little specks of gold floating within the gems. Delicious.

World of Good Masculine Stampin Up card, Andrea Sargent, Independent Stampin Up Demonstrator, South Australia

A piece of Whisper White card-stock was stamped with a sentiment from the Beautiful World stamp set and the feather pen was added to the corner - all stamped in Misty Moonlight Classic ink. The feather pen was also stamped on a Whisper White C6 Envelope to tie it in with the card.

World of Good Masculine Stampin Up card, Andrea Sargent, Independent Stampin Up Demonstrator, South Australia

I had fun creating this card, even though it didn't just fall into place. There was a bit of nutting out how to create the effect that I wanted to achieve. Must admit, I was excited to see my world spinning around and practiced a number of times - only to find that the thread seemed to pull/stretch and my world started to fall - it was no longer centred in its space. It took a bit of fiddling to return it to its right position. Obviously, I'm no Atlas (ie the Greek god, Atlas).

World of Good Masculine Stampin Up card, Andrea Sargent, Independent Stampin Up Demonstrator, South Australia

Thank you for visiting Valley Inspirations. I really appreciate you spending time on my blog.


I am so blessed to be apart of such a talented team. Knowing each of my colleagues in this Creative Showcase, I am sure that they have some amazing projects to share with you. Don't miss checking out each of their blogs. Rachel is our wonderful host of the Art with Heart Monthly Creative Showcase. If you haven't finished visiting all of the team's amazing masculine creations, you can visit/revisit Rachel's page at Handstamped by Rachel, where she hosts all the links to the other Showcase participants. I'm certainly looking forward to checking out everyone's creations. I always find inspiration.


I hope you join us again next month for October's Art With Heart Team Creative Showcase. I'm not sure what we will be showcasing but I know it will be fun and inspiring given my colleagues and the Stampin' Up products we love. 


Please don't hesitate to contact me if you are in Australia and would like a copy of the  Stampin' Up! 2020-2021 Annual Catalogue or the August - December Mini Catalogue; or if you have any queries that I could help with. Also, if you are interested in buying Stampin' Up! products I would delighted to serve you.

Take care of yourself and your loved ones. Stay safe and stay heathy and sane.

Andrea 😘


Monday, 17 August 2020

Heart of Christmas 2020 - August

Art with Heart Team Heart of Christmas 2020 with Poinsettia Wreaths

Hello. Welcome to Valley Inspirations with Andrea and the second Heart of Christmas 2020 Showcase.
We are now half way through August and Christmas still seems quite a way off, however, the next few months will disappear quickly, so I really appreciate the Heart of Christmas 2020 Showcase to help me focus on creating in readiness for the festive season. Stampin' Up! have released their August - December 2020 Mini Catalogue with gorgeous products to help us make lovely projects. Leave me a message if you would like a copy of the new Mini Catalogue, if you are in Australia. I'd be delighted to help you.

I've created two projects this month. The two cards feature wreaths with poinsettias. Some aspects of the cards are the same or similar but the cards are different. I hope you like them. 

Poinsettia Wreath and Arrange a Wreath Stampin Up card, Andrea Sargent, Independent Stampin' Up! Demonstrator, South Australia

CARD 1: Long thin cards appear to be "in" at present so I thought I would give one a go. The size aligns with a standard DL envelope. I plan to make an envelope for this card but haven't created it as yet.

The card base is cut out of Thick Whisper White card-stock and the card front is made with a light wooden-like sheet from the In Good Taste Designer Series Paper (DSP) mounted with a thin boarder of a Brass Foil sheet. I so love this colour of foil - it is rich and delectable.

Poinsettia Wreath Stampin Up card, Andrea Sargent, Independent Stampin' Up! Demonstrator, South Australia

The card front was embossed at the top and bottom with one of the Meadow Moments embossing folders. The wreath was based on a luscious Gold Hoop embellishment. These hoops are soooo gorgeous. The hoop appears to be hanging on the Forever Greenery Trim Open Weave ribbon that is tied with the Gold trim from the same Combo Pack. The ribbon is tucked to the back of the card front before the card front was adhered directly to the base.

Poinsettia Wreath Stampin Up card, Andrea Sargent, Independent Stampin' Up! Demonstrator, South Australia

The poinsettias, a few leaves and some berries were fussy cut from one of the sheets of the Flowers for Every Season DSP. Holly leaves were fussy cut from one of the sheets of the Poinsettia Place DSP. This is great for those who aren't into colouring. Larger berries were die cut from Brass Foil using the Poinsettia dies. These elements were arranged with the  poinsettias raised on Mini Dimensionals

Poinsettia Wreath Stampin Up card, Andrea Sargent, Independent Stampin' Up! Demonstrator, South Australia

A sentiment from In The Pines stamp set was stamped in Versamark ink and heat embossed using Gold Emboss powder on a small piece of the same DSP as was used for the card front. A little Wink of Stella was added to the poinsettias to give a little extra shimmer. This isn't picked up by the camera, but is great in real life.

To coordinate with the card front the card inner had thin strips of the Brass foil added at the top and bottom with extra fussy cut holly leaves.

Poinsettia Wreath Stampin Up card, Andrea Sargent, Independent Stampin' Up! Demonstrator, South Australia

CARD 2: As mentioned, my second card features a wreath (but a different type of wreath) with poinsettias (but different poinsettias). The size of this card is standard rather the long thin style. The card base was the same Thick Whisper White card-stock and the card front was made from the same wood-like DSP from the In Good Taste DSP, that had been embossed with the Pinewood 3D embossing folder and was mounted on Brass Foil with a thin boarder showing. The card front was popped up on Dimensionals to give some dimension and to adhere the front to the card base.

Poinsettia Arrange a Wreath Stampin Up card, Andrea Sargent, Independent Stampin' Up! Demonstrator, South Australia

The wreath was created using the Wreath Builder dies. In the set there are two wreath dies, one with little twigs and buds the other with leaves. The first was cut out of a Brass Foil sheet while the leaf die cut a Garden Green and an Old Olive card-stock layer.  The Garden Green and Old Olive leaves were sponged with Whisper White Craft ink using Sponge Dauber. Each single wreath was layered one on the other ensuring part of the lower wreaths showed. 

Poinsettia Arrange a Wreath Stampin Up card, Andrea Sargent, Independent Stampin' Up! Demonstrator, South Australia

The poinsettias were cut using the poinsettia die (from the same die set) with two pieces cut from Calypso Coral card-stock for each flower. As you can see there are three flowers. Six tiny flowers were cut from Whisper White card-stock. The poinsettia pieces also were sponged with Whisper White Craft ink and the tiny flowers were daubed with Petal Pink Classic Stampin' Up! ink and the edges with Calypso Coral Classic Stampin' Up! ink

Poinsettia Arrange a Wreath Stampin Up card, Andrea Sargent, Independent Stampin' Up! Demonstrator, South Australia

The flowers were arranged with the poinsettias adhered with Mini Dimensionals. Two extra brass foil twigs also were added. The sentiment from the Arrange a Wreath stamp set was stamped on a little off-cut of the DSP with Versamark ink and heat embossed with Gold Emboss powder. This was fussy cut and positioned in the centre with Mini Dimensionals

Poinsettia Arrange a Wreath Stampin Up card, Andrea Sargent, Independent Stampin' Up! Demonstrator, South Australia

The card inner was stamped with part of the wreath from the Arrange a Wreath stamp set in Calypso Coral Classic Stampin' Up! ink and a die cut Brass foil bow from the Wreath Builder dies was added. The same wreath was similarly stamped onto a Whisper White envelope.

Poinsettia Arrange a Wreath Stampin Up card, Andrea Sargent, Independent Stampin' Up! Demonstrator, South Australia

A bow using the Vanilla Open Weave ribbon and the Gold Twine from the Forever Greenery Trim Combo Pack was adhered in place with Mini Glue Dots. Five tiny Champagne Rhinestone Basic Jewels were added to the centre of each poinsettia and one to the tiny flowers to finish off the wreath.

I love wreaths and the Arrange a Wreath bundle provides so many creative opportunities.

Poinsettia Arrange a Wreath Stampin Up card, Andrea Sargent, Independent Stampin' Up! Demonstrator, South Australia

I had fun creating two similar, but different Poinsettia Wreath cards. I hope you like them too.

Thank you for sharing the Heart of Christmas 2020 Showcase. I hope you are enjoying the blog hop and finding inspiration. We are always excited to see each others creations and are always inspired by one another.

Judy May is our talented host this year for the Heart of Christmas 2020 Showcase each month as we head up to Christmas. If you haven't finished looking at all of the teams Christmas creations, you can visit/revisit Judy's page at Just Judy Designs, where she hosts all the links to the Showcase participants.

Members of the Art with Heart team are conducting other regular blog hops including: 
  • Every Wednesday we are holding the Colour Creations Showcase where we feature a different Stampin' Up! colour each week. This coming Wednesday, members of the Team will share projects that hero a neutral colour - "Crumb Cake".
I am so blessed to share with such talented people and so I am sure there will be wonderful projects to inspire in each blog hop, so do drop by.  I hope to see you again next month for our September Heart of Christmas 2020 Showcase. Also, I hope you come back in a couple of days for the Colour Creations Showcase featuring "Crumb Cake".

I do appreciate you dropping by and visiting Valley Inspirations.

As mentioned, please don't hesitate to contact me if you are in Australia and would like a copy of the  Stampin' Up! 2020-2021 Annual Catalogue or the newly released August - December 2020 Mini Catalogue; or if you have any queries that I could help with. If you are interested in buying Stampin' Up! products, I would delighted to help you.

I hope you are coping in these difficult times. Look after yourself and your loved ones. Stay safe, stay healthy and know you are special - even though you may not feel that way.

Andrea 😘


List of Products used to create these projects: 

Stamps, Dies & Punches
    • Arrange A Wreath stamp set - #152587
    • Wreath Builder dies - #152722
    • In the Pines stamp set - #153448
          Inks & Applicators
          • Calypso Coral Classic Stampin' ink pad - #147101
          • Petal Pink Classic Stampin' ink pad - #147108
          • Whisper White Craft Stampin' ink - #147277
          • Sponge Daubers - #133773
          • Versamark ink pad - #102283
          • Gold Stampin' Emboss Powder - #109129
          Paper
          • Whisper White card-stock - #106549
          • Thick Whisper White card-stock - #140490
          • In Good Taste Designer Series Paper - #152494
          • Flowers For Every Season Designer Series Paper - #149612
          • Poinsettia Place Designer Series Paper - #153487
          • Calypso Coral card-stock - #124392
          • Garden Green card-stock - #108605
          • Old Olive card-stock - #106576
          • Brass Foil sheets - #153057
          • C6 Whisper White envelopes - #106589
          Embellishments
          • Forever Greenery Trim Combo Pack - #152475
          • Gold Hoops Embellishments - #152474
          • Champagne Rhinestone Basic Jewels - #151193
          Adhesives
          • Multipurpose Liquid Glue - #110755
          • Mini Glue Dots - #103683
          • Tear & Tape Adhesive - #138995
          • Mini Stampin' Dimensionals - #144108
          • Stampin' Dimensionals - #104430
          Tools (incl Embossing Folders)
          • Pinewood 3D Embossing Folder - #152320
          • Meadow Moments Embossing Folder - #153126
          • Take Your Pick Tool - #144107
          • Bone Folder - #102300
          • Paper Snips - #103579
          • Paper Trimmer - #152392
          • Stamparatus - #148187
          • Block C - #118486
          • Block D - #118485
          • Block E - #118484
          • Block H - #118490
          • Grid Paper - #130148
          • Silicone Craft Mat - #127857
          • Sponge Daubers - #133773
          • Stamping Sponge - #141337
          • Simple Shammy - #147042
          • Heat Tool - #129056
          • Stampin Cut & Emboss Machine - #149653
          • Magnetic Cutting Plate - #149656

          Wednesday, 22 July 2020

          Art With Heart Colour Creations Showcase - #8 Calypso Coral

          Calypso Coral and Jar of Flowers

          Hello. Welcome to Valley Inspirations with Andrea and the Art with Heart Colour Creations Showcase. I am so delighted you have dropped by. This week we are focussing on "Calypso Coral", a rich, soft pinky orange that sits within Stampin' Up!s "Subtles" range. 


          As you know, one of the great points of Stampin' Up!s products is the way Stampin' Up! coordinates colours and takes a colour through a range of products. This week's project has used Calypso Coral card-stock, Classic Stampin' ink pad, Stampin' Blends Combo and Artistry Blooms SequinsCalypso Coral also is in: Stampin' Write Markers, Watercolour Pencils, a range of Designer Series Papers and the Simply Citrus Card Kit.

          Jar of Flowers Stampin Up card with Calypso Coral, Andrea Sargent, Independent Stampin Up Demonstrator, South Australia

          Calypso Coral is a gorgeous colour and could be used in may ways. I had numerous ideas for projects for this Showcase, but have only had time to create one project, an arrangement of flowers using one of the Jar of Flowers stamp set floral sprays. I chose the sunflower spray as the sunflowers could also be interpreted as gerberas. I love gerberas and would love to plant some in my garden including those in a Calypso Coral colour.

          Jar of Flowers Stampin Up card with Calypso Coral, Andrea Sargent, Independent Stampin Up Demonstrator, South Australia

          I started by stamping the sunflower - or should I say, gerberas spray from the Jar of Flowers stamp set in Gray Granite Classic ink four times on Whisper White card-stock. I coloured the arrangements using Stampin' Blends Combos, ie Light & Dark Calypso Coral, Petal Pink, Soft Sea Foam and Old Olive. Once brought to life with colour, the arrangements were fussy cut.

          Jar of Flowers Stampin Up card with Calypso Coral, Andrea Sargent, Independent Stampin Up Demonstrator, South Australia

          The card base was cut from Calypso Coral card-stock. I played around a bit before landing on the card front and eventually decided on the blended Gray Granite design from the gorgeous In Good Taste Designer Series Paper (DSP). This panel was embossed with the Tasteful Texture 3D embossing folder before being mounted on Petal Pink card-stock

          Jar of Flowers Stampin Up card with Calypso Coral, Andrea Sargent, Independent Stampin Up Demonstrator, South Australia

          As the basis for the floral arrangement, one of the Forever Gold Laser-cut Speciality Paper decorated labels was cut in half and adhered to the card front. The flower sprays were arranged and a label decided on. The label was cut from matching Calypso Coral card-stock and a sentiment from the Celebrate Sunflowers stamp set was stamped in Versamark ink and heat embossed with White Emboss Powder.

          Jar of Flowers Stampin Up card with Calypso Coral, Andrea Sargent, Independent Stampin Up Demonstrator, South Australia

          As some of the flowers were going to be covered by the arrangement, they were fussy cut out. The sprays of flowers and individual flowers were either adhered directly to the card front or popped up on Dimensionals/Mini Dimensionals and the label was added with Dimensionals. Calypso Coral sequins from the Artistry Blooms Sequins were added as a finishing touch. The mounted card front was added to the card base with dimensionals. 

          I love to add ribbon or a trim in some form to my projects and so coloured some of the Braided Linen Trim with the Dark Calypso Coral Stampin' Blend so a bow could be added, however, when I tried the bow on the card, with and without a tie around the card front, I realised it really didn't add anything ... so decided to leave it off. Part of the design process is deciding what to add and what to leave off. You can see the bow sitting to the side in the last photo below.

          Jar of Flowers Stampin Up card with Calypso Coral, Andrea Sargent, Independent Stampin Up Demonstrator, South Australia

          To link the card inner to the card front design, the sunflower spray was stamped in Calypso Coral Classic Stampin' ink. The envelope was stamped in a similar way.

          Jar of Flowers Stampin Up card with Calypso Coral, Andrea Sargent, Independent Stampin Up Demonstrator, South Australia

          Thank you for visiting the Valley Inspirations blog. I do appreciate you spending time here. Please contact me if you would like any further information about the project; or if you live in Australia and would like either a new 2020-2021 Annual Catalogue and or the August - December 2020 Mini Catalogue posted to you; or if I can help you with any purchases.

          I hope you are enjoying this week's Colour Creations Showcase that has focused on Stampin' Up!s colour - Calypso Coral.

          The amazing Catherine Proctor is hosting the Art with Heart Colour Creations Showcase each week. If you haven't finished checking out all of the team's colour creations, you can visit/revisit Catherine's page at What Cathy Made, where she hosts all the links to the other Showcase participants. I'm certainly looking forward to being inspired by everyone's creations.

          I hope to see you again next week when members of the Team will share projects that hero a rich red called "Cherry Cobbler". I wonder what others will create - Cherry Cobbler would make a gorgeous Christmas card.

          Look after yourself and your loved ones. For those who live in Victoria and New South Wales -  I'm thinking of you.

          Have a great week.

          Andrea 😘 


          List of Products used to create these projects: 

          Stamps, Dies & Punches
            • Jar of Flowers stamp set - #152515
            • Celebrate Sunflowers stamp set - #152517
            • Tasteful Labels dies - #152886
                  Inks & Applicators
                  • Calypso Coral Classic Stampin' pad - #147101
                  • Gray Granite Classic Stampin' pad - #147118
                  • Versamark ink pad - #102283
                  • White Stampin' Emboss Powder - #109132
                  Paper
                  • Whisper White card-stock - #106549
                  • Thick Whisper White card-stock - #140490
                  • Calypso Coral card-stock - #124392
                  • In Good Taste Designer Series Paper - #152494
                  • Forever Gold Laser-cut Speciality Paper - #152493
                  • C6 Whisper White envelopes - #106589
                  Embellishments
                  • Artistry Blooms Sequins - #152477
                  Adhesives
                  • Multipurpose Liquid Glue - #110755
                  • Mini Glue Dots - #103683
                  • Tear & Tape Adhesive - #138995
                  • Mini Stampin' Dimensionals - #144108
                  • Stampin' Dimensionals - #104430
                  Tools (incl Embossing Folders)
                  • Tasteful Textile 3D Embossing Folder - #152718
                  • Take Your Pick Tool - #144107
                  • Bone Folder - #102300
                  • Paper Snips - #103579
                  • Paper Trimmer - #152392
                  • Stamparatus - #148187
                  • Block C - #118486
                  • Block D - #118485
                  • Block E - #118484
                  • Block H - #118490
                  • Grid Paper - #130148
                  • Stampin' Pierce Mat - #126199
                  • Silicone Craft Mat - #127857
                  • Stamping Sponge - #141337
                  • Simple Shammy - #147042
                  • Heat Tool - #129056
                  • Stampin Cut & Emboss Machine - #149653
                  • Magnetic Cutting Plate - #149656
                  • Speciality Plate - #154711

                  Be Inspired - July 2026 - Creating Backgrounds

                  Be Inspired Design Team Blog Hop CREATING BACKGROUNDS Welcome to Valley Inspirations with Andrea and the July  Be Inspired Blog Hop  where w...