Art with Heart Wow Tutorials

Showing posts with label Creative Showcase. Show all posts

Thursday, 11 March 2021

Art With Heart Creative Showcase - March 2021

Card Sketch with Butterfly Brilliance and Pierced Blooms

Hello. Welcome to Valley Inspirations with Andrea and the Art with Heart Creative Showcase for March 2021.


This month we are basing our projects on a card sketch. We can interpret the sketch "literally" or go wherever the sketch may take us.


I have created two cards using the sketch - both similar to each other though different dies sets and colours were used.

A couple of personally designed cards based on a card sketch challenge, using Stampin' Up!'s Butterfly Brilliance bundle and Pierced Blooms dies.

CARD 1: The design for the first card had been fluttering around in my heard for a little while. The Butterfly Brilliance suite has been released early by Stampin' Up! to whet our appetites for the coming release of the new 2021-2022 Annual Catalogue. It is such a gorgeous suite - I couldn't resist, especially as I love butterflies. This is the suite used for this card.

A personally designed card based on a card sketch challenge, using Stampin' Up!'s Butterfly Brilliance bundle.

The Butterfly Bijou Designer Series Paper is stunning. One of the beautiful butterfly sheets was cut to provide the lower section of the card design. The background of this piece of DSP has a watercolour effect using Magenta Madness, Calypso Coral and Bermuda Bay, so I decided to water-colour a background piece that would extend from the DSP to the top of the card. I used the same colours of Classic Stampin' ink on a piece of Fluid 100 Water-colour paper. When almost dry, it was embossed using the Brick & Mortar 3D embossing folder

A personally designed card based on a card sketch challenge, using Stampin' Up!'s Butterfly Brilliance bundle.

The embossed water-coloured piece and the DSP were adhered to a Calypso Coral card-stock mount - leaving a very fine border. Some white twine from the Snail Mail Twine Combo was wrapped around the card front twice and tied in a bow. I had a bowl of sentiments on my table and one seemed perfect for this card and it stretched all the way across the card front. The Many Messages stamp set was stamped using Versamark ink on Basic Black card-stock and heat embossed with White Emboss Powder. I just love the way a range of sentiments can be stamped and cut out with this amazing bundle. The sentiment strip was popped up on Dimensionals covering the join between DSP and water-coloured paper.

A personally designed card based on a card sketch challenge, using Stampin' Up!'s Butterfly Brilliance bundle.

Delightful filagree butterflies from the Butterfly Wings die set were cut from the beautiful Pearlescent Speciality paper. The butterflies represented the ink splotches on the sketch however, positioning is a bit different given the size of the butterflies. Two were adhered to the card front and 1 was popped up on a Mini Dimensional. White Elegant Faceted Gems were added to the card front for a little glimmer.

A personally designed card based on a card sketch challenge, using Stampin' Up!'s Butterfly Brilliance bundle.

The card front was adhered to a Thick Basic White card-stock card base with Dimensionals. The card inner was decorated with a strip of the same DSP and 3 fussy cut butterflies. A C6 Basic White envelope is to be stamped with butterflies from the Butterfly Brilliance stamp set. (Not pictured.)

A personally designed card based on a card sketch challenge, using Stampin' Up!'s Pierced Blooms dies

CARD 2: I created a couple of cards for last night's AWHT Colour Creations Showcase featuring Purple Posy. One of the cards wasn't ready for 'go live' and still needs to be finished. That card used stitched flowers from the Pierced Blooms dies.  As there were left over die cut pieces sitting on my table, I designed this card around them, with the flowers replacing the ink splotches on the sketch.

A personally designed card based on a card sketch challenge, using Stampin' Up!'s Pierced Blooms dies,

A card front of Basic White card-stock was passed through the Cut & Emboss machine twice using the leafy Greenery embossing folder. The embossed card front was adhered directly to a Purple Posy card base. A piece of Hydrangea Hill Designer Series Paper was adhered directly at the bottom of the card front. A different pre-stamped and cut sentiment using the Many Messages bundle with Momento ink on Basic White card-stock was popped up on Dimensionals over the edge of the DSP.

A personally designed card based on a card sketch challenge, using Stampin' Up!'s Pierced Blooms dies.

Stitched flowers, pre-cut using the Pierced Blooms dies with Basic White, Purple Posy, Highland Heather and Mint Macaron card-stocks were sponged with White Craft ink on the outer edges. Three large to mid sized flowers had different colour centres adhered in place. The 3 flowers were positioned with Dimensionals similar to the sketch's ink splotches. Five little flowers and a number of white Elegant Faceted Gems were scattered around. 

A personally designed card based on a card sketch challenge, using Stampin' Up!'s Pierced Blooms dies.

A few remaining pierced blooms were adhered to a Basic White card inner. As the card will be hand delivered to a lovely customer who is grieving the loss of a a special friend, a few pierced blooms will be added to the envelope to give a hint of what may be inside. 

A couple of personally designed cards based on a card sketch challenge, using Stampin' Up!'s Butterfly Brilliance bundle and Pierced Blooms dies.

I hope you like the cards. It is a versatile sketch and could be used with a range of Card-stocks, DSP, Stamps and Dies. A sketch is a great starting point if you are looking for inspiration for your project.


I am blessed to be apart of a talented team. Knowing each of my colleagues in this Creative Showcase, I am sure they have amazing projects to share with you that have been inspired by the sketch. Don't miss having a look at each of their blogs. Rachel is our amazing host of the Art with Heart Monthly Creative Showcase, so if you haven't finished visiting all of the team's creations, you can visit/revisit Rachel's page at Handstamped by Rachel, where she hosts all the links to the other Showcase participants. I'm certainly looking forward to checking out everyone's interpretation of the sketch. 


I hope you join us again on the second Thursday of April for our next Showcase. 


Please don't hesitate to contact me if you are in Australia and would like a copy of the coming Stampin' Up! 2021-2022 Annual Catalogue or the continuing January - June Mini Catalogue; or if you have any queries that I could help with. Also, if you are interested in buying Stampin' Up! products, I would delighted to serve you.

Take care of yourself and your loved ones. I hope you stay safe, stay heathy and stay sane in these strange times.

Have a great month.

Andrea 😘

Thursday, 10 December 2020

Art With Heart Creative Showcase - December 2020

December's Creative Showcase with Dragonfly Garden & Seaside View

Hi. Welcome to Valley Inspirations with Andrea and the December Art with Heart Creative Showcase - our last monthly blog hop for 2020.

The theme this month is "Summer", which is a theme with so much potential. For me, summer makes me think of happy & bright colours, of flowers and flying insects like butterflies and dragonflies. My first card was inspired by these elements. Summer also makes me think of relaxing and enjoying a meal or a cuppa outside with friends in view of beautiful scenery. My second card shows a seaside view, where I would love to be sitting, sipping a drink and looking out at the little sailing boat in the distance.

Misty Moonlight Dragonfly Garden and Seaside View Stampin Up card, Andrea Sargent, Independent Stampin' Up! Demonstrator, Valley Inspirations, Adelaide foothills, Australia

I created the first card with yesterday's Art with Heart Colour Creations Showcase in mind, where we were focussing on a gorgeous In Colour, Misty Moonlight. However, I then realised that with unexpected demands on my time, I didn't think I would be able to create another card for this Monthly Creative Showcase, so I saved the dragonfly card for this Blog Hop. Then ... I woke up this morning with a card design buzzing around in my head. I had to give it a go ... and the second card was created. As you can see the colour schemes are similar and the layouts similar, but different.

Misty Moonlight Dragonfly Garden Stampin Up card, Andrea Sargent, Independent Stampin' Up! Demonstrator, Valley Inspirations, Adelaide foothills, Australia

CARD 1: A piece of one of the Misty Moonlight designs from the Dandy Garden 6"x6" Designer Series Paper was adhered to the lower half of the Whisper White card-stock card front, prior to the card front being dry embossed with the Tasteful Textile 3D embossing folder. I love the effect of this subtle texture on both the card-stock and DSP. A piece of Misty Moonlight 2020 - 2022 In Colour ribbon was attached at the centre, covering the edge of the DSP. This card front was then adhered directly to the Misty Moonlight card-stock card base.

Misty Moonlight Dragonfly Garden Stampin Up card, Andrea Sargent, Independent Stampin' Up! Demonstrator, Valley Inspirations, Adelaide foothills, Australia

The floral stamp from the Dragonfly Garden stamp set was repeatedly stamped across a piece of Whisper White card-stock gradually increasing the height of the top flower. Using one of the new Blending Brushes, Seaside Spray Classic Stampin' ink was lightly applied at the base  over the flowers, softening out to no colour near the top. The Blending Brush was a delight to use. 
This stamped piece was mounted onto a piece of Misty Moonlight card-stock leaving a thin boarder. A piece of White twine from the Snail Mail Combo pack was wrapped twice around the panel and tied in a bow. This panel was centred on the card front and attached with  Dimensionals

Misty Moonlight Dragonfly Garden Stampin Up card, Andrea Sargent, Independent Stampin' Up! Demonstrator, Valley Inspirations, Adelaide foothills, Australia

A dragonfly from the stamp set was stamped in Misty Moonlight ink on a scrap piece of Whisper White card-stock. The dragonfly wings were coloured with Light & Dark Melon Mambo Blends and the Colour Lifter used to soften the colour out on the wing tips. The dragonfly was cut out using the Dragonflies punch and another 2 dragonflies were punched out of Vellum. The coloured and vellum dragonflies were layered on top of each other, and adhered just at the upper body to enable fluttering dimension to the wings.

Misty Moonlight Dragonfly Garden Stampin Up card, Andrea Sargent, Independent Stampin' Up! Demonstrator, Valley Inspirations, Adelaide foothills, Australia

A sentiment from the Dragonfly Garden stamp set was stamped in Versamark onto Misty Moonlight card-stock and heat embossed using White Stampin' Emboss powder. The sentiment strip was given a flag end using the Banners Pick a Punch. I love this punch as I find it hard to get an even flag end without it. A strip of Melon Mambo card-stock was added under the lower edge of the sentiment strip. This strip was popped up on Dimensionals over the twine. The dragonfly was adhered in place and a few clear Elegant Faceted Gems were added as a finishing touch.

Misty Moonlight Dragonfly Garden Stampin Up card, Andrea Sargent, Independent Stampin' Up! Demonstrator, Valley Inspirations, Adelaide foothills, Australia

The floral spray from the Dragonfly Garden stamp set also was stamped in Misty Moonlight Classic Stampin' ink on the Whisper White card inner to bring an aspect of the card front to the centre. The same flowers were stamped on the C6 Whisper White envelope.

Misty Moonlight Dragonfly Garden Stampin Up card, Andrea Sargent, Independent Stampin' Up! Demonstrator, Valley Inspirations, Adelaide foothills, Australia

CARD 2: As mentioned, I woke this morning with a card design buzzing around in my head. I had to give it a go, although the card did evolve along the creative process. I love Misty Moonlight with a pop of Melon Mambo as a colour scheme and so kept a similar colour combination, though added some neutrals as required by the stamped scene. I had thought of inking the stamp with Stampin' Write Markers but found my eyes were missing details so decided to colour the image with Stampin' Blends instead.

Misty Moonlight Seaside View Stampin Up card, Andrea Sargent, Independent Stampin' Up! Demonstrator, Valley Inspirations, Adelaide foothills, Australia

The larger scene from the Seaside View stamp set was stamped in Gray Granite Classic Stampin' ink on Shimmery White card-stock. The scene was coloured using Light & Dark Stampin' Blends, specifically Misty Moonlight, Melon Mambo, Crumb Cake, Pool Party, Seaside Spray, Daffodil Delight, Just Jade, Old Olive, Gray Granite 
and of course the Colour Lifter. The scene was trimmed down using one of the Stitched Rectangle dies. The panel was mounted on Seaside Spray card-stock, leaving a tiny boarder.

Misty Moonlight Seaside View Stampin Up card, Andrea Sargent, Independent Stampin' Up! Demonstrator, Valley Inspirations, Adelaide foothills, Australia

A piece of Whisper White card-stock was dry embossed with the delightful Seabed 3D embossing folder and adhered directly to the Seaside Spray card-stock card base. A strip of Misty Moonlight card-stock was stamped with palm trees in Misty Moonlight Classic Stampin' ink. Misty Moonlight twine from the Flowers for Every Season Combo pack was tied around this strip of stamped card-stock finishing with a bow. It was adhered with Dimensionals to the card front.

Misty Moonlight Seaside View Stampin Up card, Andrea Sargent, Independent Stampin' Up! Demonstrator, Valley Inspirations, Adelaide foothills, Australia

The coloured panel was centralised and popped up on Dimensionals. A sentiment from the same stamp set was stamped in Versamark on Seaside Spray card-stock and heat embossed with White Emboss powder. A strip of Melon Mambo card-stock was added underneath the sentiment strip with a thin strip of Melon Mambo showing underneath the sentiment. The sentiment strip was popped up with Dimensionals. As with card 1, 
a few clear Elegant Faceted Gems were added as a finishing touch. These gems are soooo gorgeous.

Misty Moonlight Seaside View Stampin Up card, Andrea Sargent, Independent Stampin' Up! Demonstrator, Valley Inspirations, Adelaide foothills, Australia

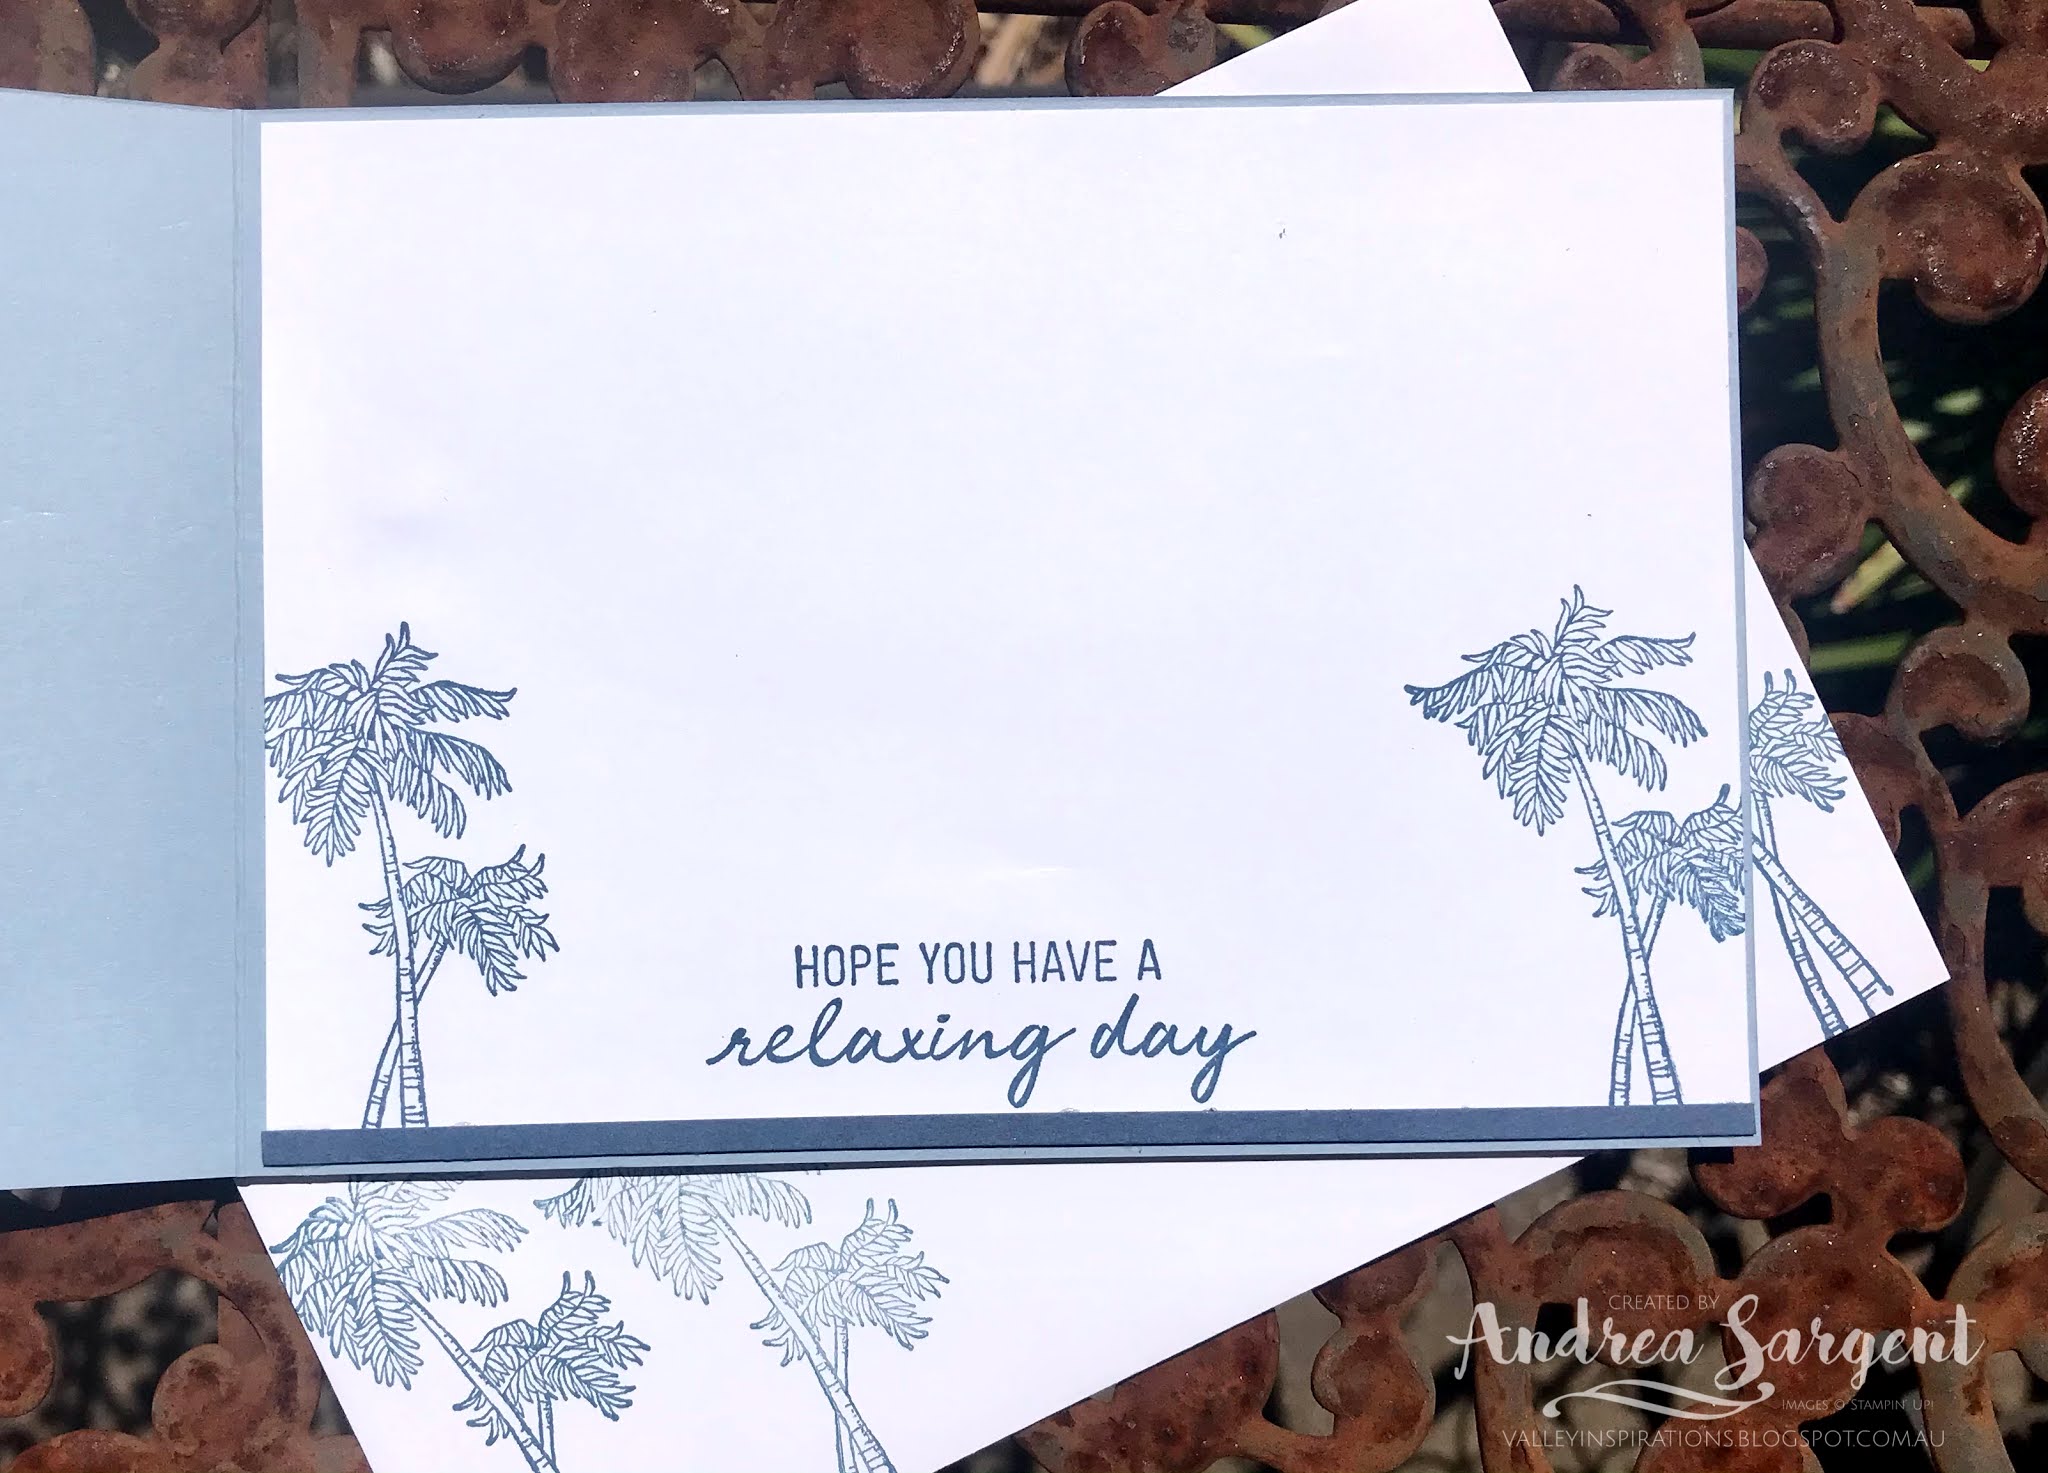
Palm trees and a sentiment from the Seaside View stamp set were stamped in Misty Moonlight Classic Stampin' ink on the Whisper White card inner. A thin strip of Misty Moonlight card-stock was adhered near the bottom of the card inner. Palm trees were also stamped on the C6 Whisper White envelope.

Misty Moonlight Seaside View Stampin Up card, Andrea Sargent, Independent Stampin' Up! Demonstrator, Valley Inspirations, Adelaide foothills, Australia

Thank you for visiting the Valley Inspirations blog. 
I really appreciate you spending time with me on my blog as part of the Art with Heart "Summer" themed projects blog hop. I hope you have been inspired in some way. I have really enjoyed creating these cards to share with you.

Misty Moonlight Dragonfly Garden and Seaside View Stampin Up card, Andrea Sargent, Independent Stampin' Up! Demonstrator, Valley Inspirations, Adelaide foothills, Australia

I am so blessed to be apart of such a talented team. Knowing each of my colleagues in this Creative Showcase, I am sure that they have amazing "Summer" projects to share with you. Don't miss checking out each of their blogs. Rachel is our brilliant host of the Art with Heart Monthly Creative Showcase, so if you haven't finished visiting all of the team's amazing creations, you can visit/revisit Rachel's page at Handstamped by Rachel, where she hosts all the links to the other Showcase participants. I'm certainly looking forward to checking out everyone's creations and always find inspiration.


I hope you join us again next year when our first Showcase will be featuring new products from the new January - June Mini Catalogue. There are so many gorgeous products in this catalogue. 


Please don't hesitate to contact me if you are in Australia and would like a copy of the  Stampin' Up! 2020-2021 Annual Catalogue or the January - June Mini Catalogue; or if you have any queries that I could help with. Also, if you are interested in buying Stampin' Up! products, I would delighted to serve you.

Take care of yourself and your loved ones. I hope you stay safe, stay heathy and stay sane.

Have a wonderful Christmas and New Year.

Andrea 😘

Thursday, 8 October 2020

Art with Heart Creative Showcase - October 2020

Designer Series Paper and Snowflake Splendor

Hello. Welcome to Valley Inspirations with Andrea and the Art with Heart Team Monthly Creative Showcase for October 2020.

This month the Team is focussing on the delicious and delightful Designer Series Papers (DSPs) that Stampin' Up has on offer. There is such an amazing array of styles, colour themes and topics, ranging from various styles of florals, bright colours, photographic, abstract designs, wood or textural and Christmas papers  - there is so many to choose from to ensure you can find something suitable for your projects. The difficulty is choosing which pack to buy!


The really great news is that all through October, there is a sale on many of the DSPs offered by Stampin' Up! - its 15% off. Any of the demonstrators participating in this Creative Showcase would be delighted to help you if you have any questions or would like to take advance of the sale price.

Snowflake Splendor Stampin Up box, Andrea Sargent, Independent Stampin' Up! Demonstrator, Valley Inspirations, Adelaide Foothills, South Australia, Australia

One of my favourite ways of using DSP is in making boxes and with Christmas coming up I decided to made a number of boxes to hold gifts for giving this Christmas. They have been decorated and tied with ribbon. I hope you like them. 

As I was making boxes, I decided to make a couple extra to give as a hostess gift for a Technique Class I was asked to hold last night. I also made a Christmas card to match one of the boxes. Here we go:

Snowflake Splendor Stampin Up box, Andrea Sargent, Independent Stampin' Up! Demonstrator, Valley Inspirations, Adelaide Foothills, South Australia, Australia

All my projects use the gorgeous Snowflake Splendor Designer Series Paper. It is so beautiful with soft muted tones. One side displays a range of beautiful snowflakes and the other side has even more of a watercolour feel with less defined snowflakes.

Snowflake Splendor Stampin Up box, Andrea Sargent, Independent Stampin' Up! Demonstrator, Valley Inspirations, Adelaide Foothills, South Australia, Australia

Project 1: A Set of 3 Boxes

Snowflake Splendor Stampin Up box, Andrea Sargent, Independent Stampin' Up! Demonstrator, Valley Inspirations, Adelaide Foothills, South Australia, Australia

As mentioned, my first project is a set of three boxes. The bases were made with coordinating card-stock and the lids created with three different designs of the Snowflake Splendor DSP. Each base has a depth of 2" (5cm), while the lid has a depth of 1" (2.5cm). These days I usually work in centimetres but with box making I often go back to my early years and work in inches. With the different depths of base and lid, both base and lid can be seen from the side. This also facilitates easy removal of the lid.

Snowflake Splendor Stampin Up box, Andrea Sargent, Independent Stampin' Up! Demonstrator, Valley Inspirations, Adelaide Foothills, South Australia, Australia

The largest box is 8"x8" (20cmx20cm) square with a depth of 2" (5cm). The base was made from 12"x12" (30cmx30cm) Coastal Cabana card-stock and the lid was cut to 10"x10" (25cmx25cm). When box creating I usually use my Simply Scored Scoring Tool with my Take Your Pick Tool, however, Stampin' Up! has a brilliant Paper Trimmer that includes a scoring blade along with the cutting blade - so this tool can be used instead - it's so versatile. The Snowflake was die cut from the Rainbow Glimmer Paper and Coastal Cabana card-stock using the So Many Snowflake diesBlue Adhesive-Backed Gems that had been coloured with a Light Bermuda Bay Blend were adhered in the centre. 

Snowflake Splendor Stampin Up box, Andrea Sargent, Independent Stampin' Up! Demonstrator, Valley Inspirations, Adelaide Foothills, South Australia, Australia

The 2nd box is 6"x6" (15cmx15cm) square with a depth of 2" (5cm). The base was made from 10"x10" (25cmx25cm) Balmy Blue card-stock and the lid was cut to 8"x8" (20cmx20cm) from DSP. The Snowflake was cut from Balmy Blue Glimmer Paper and Balmy Blue card-stock using the So Many Snowflake dies with a Blue Adhesive-Backed Gem adhered in the centre.

Snowflake Splendor Stampin Up box, Andrea Sargent, Independent Stampin' Up! Demonstrator, Valley Inspirations, Adelaide Foothills, South Australia, Australia

Snowflake Splendor Stampin Up box, Andrea Sargent, Independent Stampin' Up! Demonstrator, Valley Inspirations, Adelaide Foothills, South Australia, Australia

The 3rd box is 4"x4" (10cmx10cm) square with a depth of 2" (5cm). The base was cut to 8"x8" (20cmx20cm) of Highland Heather card-stock and the lid cut to 6"x6" (15cmx15cm) from DSP. The Snowflake was die cut from Balmy Blue Glimmer Paper (which was then coloured with a Light Highland Heather Blend) and Highland Heather card-stock using the So Many Snowflake dies. A Blue Adhesive-Backed Gem that had been coloured with a Dark Highland Heather Blend was adhered in the centre.

Snowflake Splendor Stampin Up box, Andrea Sargent, Independent Stampin' Up! Demonstrator, Valley Inspirations, Adelaide Foothills, South Australia, Australia

Snowflake Splendor Stampin Up box, Andrea Sargent, Independent Stampin' Up! Demonstrator, Valley Inspirations, Adelaide Foothills, South Australia, Australia

The labels for each of the boxes were cut from Whisper White card-stock using the Tasteful Labels dies. Each was stamped with tiny snowflakes from the Snowflake Wishes stamp set the different sentiments all came from the same stamp set. Aren't they lovely sentiments? The colour of Classic inks to stamp the sentiments were all chosen to coordinate with the particular DSP. Each of the boxes were tied with the luscious Metallic Mesh ribbon. It is so beautiful.

Snowflake Splendor Stampin Up box, Andrea Sargent, Independent Stampin' Up! Demonstrator, Valley Inspirations, Adelaide Foothills, South Australia, Australia

Project 2:

One of the boxes in this box stack is the same as the 3rd box shown above. In fact, it was this box that inspired me to make a stack as a hostess gift, as the DSP for the lid was cut to 6"x6" (15cmx15cm) so I could make a 2nd box from a pre-cut piece of DSP. 

Snowflake Splendor Stampin Up box, Andrea Sargent, Independent Stampin' Up! Demonstrator, Valley Inspirations, Adelaide Foothills, South Australia, Australia

The smallest box is 2"x2" (5cmx 5cm) square with a depth of 2" (5cm). The base was cut to 6"x6" (15cmx15cm) of Pool Party card-stock and the lid cut to 4"x4" (10cmx10cm) from DSP. 

Snowflake Splendor Stampin Up box, Andrea Sargent, Independent Stampin' Up! Demonstrator, Valley Inspirations, Adelaide Foothills, South Australia, Australia

The two boxes were stacked together and tie with the same Metallic Mesh ribbon. The Snowflake was die cut from Balmy Blue Glimmer Paper and Highland Heather card-stock using the So Many Snowflakes dies. Both a Blue Adhesive-Backed Gem and the Glimmer Paper were coloured with a Dark Pool Party BlendThe "Thank You" sentiment also came from the same stamp set.

My hostess was delighted with her gift and mentioned she would use the Box Stack as a Christmas decoration this year.

Project 3:

Snowflake Splendor Stampin Up card & box, Andrea Sargent, Independent Stampin' Up! Demonstrator, Valley Inspirations, Adelaide Foothills, South Australia, Australia

A Christmas card was created to coordinate with the Balmy Blue mid size box from Project 1. I was able to use for the card, the DSP that remained after cutting the piece of DSP out of a 12x12" (30x30cm) piece of DSP for the lid.

Snowflake Splendor Stampin Up card, Andrea Sargent, Independent Stampin' Up! Demonstrator, Valley Inspirations, Adelaide Foothills, South Australia, Australia

A standard card size (in Australia), ie half a A4 piece of Balmy Blue card-stock was scored in half and then the front scored in half again. Two labels were cut from both Balmy Blue and Whisper White card-stocks using the 3rd largest dies from Hippo & Friends dies. Tiny snowflakes were stamped in Balmy Blue Classic ink on the white labels; with one of the labels also being stamped with the sentiment in Misty Moonlight Classic ink. The Balmy Blue labels were both cut in half and adhered to the underneath side of the white labels with a tiny bit of blue showing on either side of the front of the label. 

Snowflake Splendor Stampin Up card, Andrea Sargent, Independent Stampin' Up! Demonstrator, Valley Inspirations, Adelaide Foothills, South Australia, Australia

A piece of the DSP was cut so that it would show a small boarder of the card base on the bottom half a card and a 2nd piece was cut to similarly show a boarder and adhere to the top quarter of the card. The label without the sentiment was adhered directly to the middle of the decorated bottom of the card base. The label with the sentiment was adhered on the LHS to the top decorated card front, ensuring it fully covered the label underneath.

Snowflake Splendor Stampin Up card, Andrea Sargent, Independent Stampin' Up! Demonstrator, Valley Inspirations, Adelaide Foothills, South Australia, Australia

In line with the box, Snowflake pieces were die cut from the Balmy Blue Glimmer Paper (1 x large and 2 x small snowflakes); and from Balmy Blue card-stock (2 x mid-size snowflakes). To create the larger snowflake the 3 different size pieces were adhered together and a Blue Adhesive-Backed Gem adhered in the middle. The smaller snowflake was created from the remaining 2 snowflakes. This smaller snowflake was adhered to the side of the top label and the larger snowflake to the side of the bottom label ensuring most of it would be seen when the card was closed.

Snowflake Splendor Stampin Up card, Andrea Sargent, Independent Stampin' Up! Demonstrator, Valley Inspirations, Adelaide Foothills, South Australia, Australia

Thank you for visiting Valley Inspirations. I really appreciate you spending time on my blog as we showcase some gorgeous Designer Series Papers that are on sale throughout October.

Snowflake Splendor Stampin Up card & box, Andrea Sargent, Independent Stampin' Up! Demonstrator, Valley Inspirations, Adelaide Foothills, South Australia, Australia
 

I am so blessed to be apart of such a talented team. Knowing each of my colleagues in this Creative Showcase, I am sure that they have some amazing DSP projects to share with you. Don't miss checking out each of their blogs. Rachel is our brilliant host of the Art with Heart Monthly Creative Showcase. If you haven't finished visiting all of the team's amazing masculine creations, you can visit/revisit Rachel's page at Handstamped by Rachel, where she hosts all the links to the other Showcase participants. I'm certainly looking forward to checking out everyone's creations. I always find inspiration.


I hope you join us again next month for October's Art With Heart Team Creative Showcase. when we will be showcasing cards that only use 5 products. This is going to be a challenge for me but I am sure my colleagues will inspire you with #simplestamping using the Stampin' Up! products we love. 


Please don't hesitate to contact me if you are in Australia and would like a copy of the  Stampin' Up! 2020-2021 Annual Catalogue or the August - December Mini Catalogue; or if you have any queries that I could help with. Also, if you are interested in buying Stampin' Up! products, I would delighted to serve you.

Take care of yourself and your loved ones. Stay safe and stay heathy and sane.

Andrea 😘


Thursday, 10 September 2020

Art with Heart Creative Showcase - September 2020

Masculine Theme with World of Good

Hello. Welcome to Valley Inspirations with Andrea and the September 2020 Art with Heart Creative Showcase

This month we are focusing on projects suitable to give fellas. I have created a card using Stampin' Up!s gorgeous World of Good Suite. I have had an idea floating around my brain ever since I first saw this Suite, so I'm delighted to try it out for this Creative Showcase. As I created this card, I also had a special guy in mind who will be celebrating his birthday soon. He is someone who has spent much of his life helping others.

World of Good Masculine Stampin Up card, Andrea Sargent, Independent Stampin Up Demonstrator, South Australia

I've been wanting to create a spinner card, that is to have part of the design spin when the card is opened. In this case it is the "world". I don't know about you, but at times I am feeling that the world is spinning too fast. We are in strange times...

A friend helped me take a video to help you see the card when it opens. I was crafting with friends - one in person and our other friend online; but needed to leave before this card was finished, so you may notice that there were no gems on the card in the video.


The World of Good Suite includes beautiful World of Good Speciality Designer Series Paper (SDSP), with a number of the designs having brass highlights. The sheet I chose has brass consecutive circles on a Misty Moonlight design. I cut the SDSP so that the centre of the circles would be in the middle of the card front ... and then I die cut a circle in the centre! 

How did this card come together ...?

World of Good Masculine Stampin Up card, Andrea Sargent, Independent Stampin Up Demonstrator, South Australia

A card base of Misty Moonlight card-stock (normal portrait size card in Australia) was scored in half and then the front was scored in half again. The World of Good SDSP sheet was cut so that one piece would fit the top front. The second piece - the same size as the first, was cut for the inner front. A third piece was to fit the bottom half of the card. Care was taken to ensure the pieces were kept in order so the circles continued on. Two very thin strips of Brass Foil card-stock were adhered to the beginning and end of the SDSP on the card.

World of Good Masculine Stampin Up card, Andrea Sargent, Independent Stampin Up Demonstrator, South Australia

A circle was cut from the centre of the front of the card using a circle die from the Stitched Shapes dies.  Two of the circular dies were used to cut two metallic round frames and the small pedestal out of the Brass Metallic card-stock. Half of the pedestal and one side of a round frame were adhered around the circular hole on the top folded section, that is, half was adhered directly, the other half hung over and across the card.

World of Good Masculine Stampin Up card, Andrea Sargent, Independent Stampin Up Demonstrator, South Australia

To create the world, a piece of Shimmery White card-stock was water-coloured with Seaside Spray, Pretty Peacock and Highland Heather Classic ink and the mid-size Water Painter. While the water-coloured card-stock was drying, the two world dies from the World Map dies were used to cut two spheres of the world out of Brass Metallic card-stock. I was excited when I first saw this die set - it was great to see Australia represented. Once the water-coloured piece was dry, two circles were die cut. This circle die was included in the World Map dies.

World of Good Masculine Stampin Up card, Andrea Sargent, Independent Stampin Up Demonstrator, South Australia

Each metallic world sphere was adhered to a watercolour circle. I wanted to use a fine thread that wouldn't dominate the design as the structural thread to suspend the world in space. I couldn't find a clear sewing thread (used many years ago) but found some retired Stampin' Up! Copper Thread. 

World of Good Masculine Stampin Up card, Andrea Sargent, Independent Stampin Up Demonstrator, South Australia

This was centred across the back of one of the world spheres and the other sphere adhered over it so the thread was completely stuck through the centre. The metallic thread was then adhered along the fold at the back of the card front. Another piece of SDSP then was adhered to the back of the card front, to ensure the thread was firmly attached and all card surfaces were decorated. The second metallic frame was adhered at the edge of the hole.

World of Good Masculine Stampin Up card, Andrea Sargent, Independent Stampin Up Demonstrator, South Australia

I usually add a sentiment on the card front. I tried numerous approaches, including gold heat embossing on Misty Moonlight card-stock; water-colouring more Shimmery White card-stock and either stamping or heat embossing on it; using a label or fussy cutting the sentiment, different size sentiments, etc. Nothing seemed to work - it just detracted from the SDSP design and that sense of outer space around our world. Yet I kept looking at the front of the card - it needed something. To finish the card a number of Wonderful Gems were scattered over the outer space to represent stars and planets and add a little sparkle. These embellishments are so delightful. A pack includes gems in both red and clear, with little specks of gold floating within the gems. Delicious.

World of Good Masculine Stampin Up card, Andrea Sargent, Independent Stampin Up Demonstrator, South Australia

A piece of Whisper White card-stock was stamped with a sentiment from the Beautiful World stamp set and the feather pen was added to the corner - all stamped in Misty Moonlight Classic ink. The feather pen was also stamped on a Whisper White C6 Envelope to tie it in with the card.

World of Good Masculine Stampin Up card, Andrea Sargent, Independent Stampin Up Demonstrator, South Australia

I had fun creating this card, even though it didn't just fall into place. There was a bit of nutting out how to create the effect that I wanted to achieve. Must admit, I was excited to see my world spinning around and practiced a number of times - only to find that the thread seemed to pull/stretch and my world started to fall - it was no longer centred in its space. It took a bit of fiddling to return it to its right position. Obviously, I'm no Atlas (ie the Greek god, Atlas).

World of Good Masculine Stampin Up card, Andrea Sargent, Independent Stampin Up Demonstrator, South Australia

Thank you for visiting Valley Inspirations. I really appreciate you spending time on my blog.


I am so blessed to be apart of such a talented team. Knowing each of my colleagues in this Creative Showcase, I am sure that they have some amazing projects to share with you. Don't miss checking out each of their blogs. Rachel is our wonderful host of the Art with Heart Monthly Creative Showcase. If you haven't finished visiting all of the team's amazing masculine creations, you can visit/revisit Rachel's page at Handstamped by Rachel, where she hosts all the links to the other Showcase participants. I'm certainly looking forward to checking out everyone's creations. I always find inspiration.


I hope you join us again next month for October's Art With Heart Team Creative Showcase. I'm not sure what we will be showcasing but I know it will be fun and inspiring given my colleagues and the Stampin' Up products we love. 


Please don't hesitate to contact me if you are in Australia and would like a copy of the  Stampin' Up! 2020-2021 Annual Catalogue or the August - December Mini Catalogue; or if you have any queries that I could help with. Also, if you are interested in buying Stampin' Up! products I would delighted to serve you.

Take care of yourself and your loved ones. Stay safe and stay heathy and sane.

Andrea 😘


Be Inspired - July 2026 - Creating Backgrounds

Be Inspired Design Team Blog Hop CREATING BACKGROUNDS Welcome to Valley Inspirations with Andrea and the July  Be Inspired Blog Hop  where w...