Art with Heart Wow Tutorials

Showing posts with label 3D project. Show all posts

Friday, 7 March 2025

Funky Folds Blog Hop #11

ANYTHING GOES WITH A FUNKY FOLD

Welcome to the eleventh Funky Folds Blog Hop.


We are a group of like-minded paper crafters who love to make cards with funky folds. Funky actually means "modern and stylish in an unconventional or striking way"... so we are featuring cards that are not your usual rectangle/square, portrait or landscape style. Think 'easel', 'pop-up', 'gatefold', 'z-fold', 'shaped' or 3D cards etc. The list is endless. Most of the Blog Hops have an 'anything goes' theme using any type of 'funky' card fold. 

A male friend has a birthday coming up so I thought of him as I created this card. He is an active fella so I’m hoping he loves the beach. Here is my card …


I have created a 3D card with a hexagon base featuring the Beach Day stamps and dies. To fold the card so it can slide into an envelope, it’s pushed down in the centre, as shown below.


Keep squeezing the card till it is flat - well flattish. With all the card-stock layers it won’t be totally flat like a card with a fold in the middle. See the folded flattish card below. I must confess that I was so intent on creating this fold (for the first time), that I didn’t stop to think about placement of  all the pieces to enable the folded card to fit into an envelope. Oops!  It just means that I will need to make a specially tailored envelope for this card. The envelope will need an to be a bit bigger than a standard 15.5cm x 15.5cm square envelope.


The card base was cut and scored from Pool Party card-stock and the Beach Day pieces were either stamped on or die cut from Basic White card-stock.


Some of the pieces were stamped in Misty Moonlight Classic Stampin’ ink and then coloured with Stampin’ Blends Combos, including Blueberry Bushel, Azure Afternoon, Granny Apple Green / Lemon Lime Twist, Crumb Cake and the Colour LifterThe reeds were stamped in Granny Apple Green, the sandcastles with Crumb Cake and the Sea Gull in Smokey Slate inks. The Life-saver ring was partially coloured with a Real Red Dark Blend. The Life Saver station was lightly coloured with some Basic Beige ink and a Blending Brush. Similarly, the palm tree trunk was coloured with a little Pecan Pie ink and the palm leaves with Granny Apple Green. I think the latter Blending Brush may have previously been used with some Old Olive ink as the green looks a bit muted.


The outside edge of the hexagon base was decorated with some retired Designer Series Paper, called Waves of the Ocean DSP. The “B” side of the Season of Elegance Speciality DSP was used to create a sandy beach.


The “Happy Birthday” sentiment from the Beach Day Stamp set was stamped in Misty Moonlight ink onto some Pool Party card-stock. The sentiment was fussy cut and separated. The final touch, the addition of some Riverside Flattened Pearls.


Thank you so much for dropping in on your way around this Funky Folds Blog Hop. I do so appreciate that you spent time with me. I hope you like this fun project.


Up next is the lovely Cathy PinchbeckI am looking forward to seeing Cathy’s funky fold and to hop around to check out everyone’s’ creations in this March Funky Folds Blog Hop. Just click on the graphic below to be taken to Cathy’s blog.


Here is a list of everyone participating in Funky Folds Blog Hop - March 2025

Wednesday, 18 September 2024

AWH Colour Creations Blog Hop #21 Crushed Curry

Crushed Curry with Country Birdhouse  

Hello. Welcome to Valley Inspirations with Andrea and the Art with Heart Colour Creations Blog Hop. We are working though the Stampin' Up! colours in alphabetical order, focussing on one colour each week.


This week’s Blog Hop is focussing on a beautiful deep yellow colour called Crushed Curry.  Crushed Curry is part of the Regals Colour Family and is a rich slightly muted yellow. Yellows are wonderful with grey, or blue and coordinate with many other colours, including oranges, greens etc. Crushed Curry is beautiful for flowers. 


Crushed Curry is produced in Stampin' Up!'s card-stock, both A4 & 12"x12"Classic Stampin' inks (ink pads re-inkers); Stampin' Write Marker; Stampin’ Watercolor Pencils (Assortment 2); Regals Designer Series Paper as well as a number of other products. 


This project has incorporated Crushed Curry as Classic Stampin' ink, card-stock, Stampin' Write Marker and Watercolor Pencil.


When thinking about a project to create using Crushed Curry I Googled yellow birds and found a beautiful bird with strong yellow belly and purple grey feathers. I then started to ponder what card design I could use to highlight the bird. The Country Birdhouse bundle came to mind and I started to think about a 3D project. A number of days later I saw an amazing 3D Christmas birdhouse by Mikaela Titheridge, one of Stampin’ Up!s Artisans. Then she posted a link to a U-tube video showing how she created it. I so admire Mikaela and her talent and am so appreciative of her video of the box birdhouse. Thank you so so much Mikaela.


Apart from decorating the box birdhouse differently to Mikaela I wanted to see if I could create a box with a base so that it could be used either as a box to hold a gift or as a card that folds flat to fit into an ordinary C6 Basic White envelope.


I challenged my grey matter to create a base for the box to keep the box stable and, as mentioned, so that the box could be used to hold a small gift. As I wasn’t sure how i would use this project, the base also needed to open and lie flat. I got there. There are two flaps that fold across the base and a third flap that folds over from the front and tucks in with a flap.


Three birds were stamped in Smoky Slate Classic Stampin’ ink onto Basic White card-stock, one of them was initially stamped onto a Stampin’ Up! Silicon Mat and cardstock was rubbed over the stamped image so the bird would be in reverse. They were coloured with Crushed Curry, Basic Gray, Gorgeous Grape and white Watercolor Pencils. The birdhouse was covered with Country Woods Designer Series Paper - with two designs that were both sides of one sheet. The die cut trims were cut from Basic White and Crushed Curry card-stock using the coordinating Country Birdhouse dies.


Flowers and leaves were die cut from Fluid 100 Watercolor Paper using dies from the same set. Other flowers were also die cut using the Thoughtful Wishes dies. All of the die cuts were wet on wet water-coloured using Crushed Curry and Old Olive inks.


A sentiment from the Country Birdhouse stamp set was white heat embossed on Crushed Curry card-stock and then fussy cut. A Linen Twine double bow was tucked under the sentiment and a number of Iridescent Foil Gems were scattered around.


A Basic White card-stock panel was cut to size and stamped with another sentiment in Smoky Slate ink. One of the Thoughtful Wishes coloured die cuts was adhered to this panel. The Basic White C6 envelope flap was stamped with the cute little bird in Smoky Slate ink.


Thank you so much for calling in to check out my Crushed Curry Country Woods box card. I loved creating it and have decided to give it to a friend to help her celebrate her birthday.


To continue with the Crushed Curry blog hop just click the "next" graphic below to be taken to the blog of a special lady, Kate MorganI am looking forward to checking out Kate’s creation(s). I do love seeing everyone’s' projects - there is always so much inspiration.

I do hope to see you next week when we will be featuring Daffodil Delight as we continue the weekly 2024-2025 Colour Creations Blog Hop series

Stay well, stay safe and be kind to yourself.

Andrea 💕🐾


If you find a broken link or would like to view the full list of participants go to Catherine Proctor’s blog @ What Cathy Made. Cathy is our brilliant Art With Heart Team Colour Creations Coordinator.  She is a wonderful lady. Check out her delightful creation while you are there.

Living in Australia, don't already have a Stampin' Up! demonstrator and would like your own copy of the Stampin' Up 2024-2025 Annual Catalogue or and the September-December Mini catalogue, then let me know and I will be delighted to send them to you.  

Please don't hesitate to make contact with any other queries about these projects or Stampin' Up! 


#colourcreationsbloghop  #stampinup #stampinupaustralia #stampinupsouthpacific #stampinupdemo  #handmadecards  #stampinupdemonstrator  #papercrafting #artwithheartteam  #papercrafter  #valleyinspirations   #countrybirdhouse  #countrywoods  #thoughtfulwishes


Monday, 26 August 2024

AWH Heart of Christmas Blog Hop #4

Christmas with Winter Meadow

Hello. Welcome to Valley Inspirations with Andrea and the fourth Art with Heart Heart of Christmas Blog Hop for 2024. We started this series early August and will be hopping every week until the end of November. I hope you can check us out each week as I know there will be so many inspirational ideas and different projects on show to help your Christmas preparations.


I love sharing Christmas creativity with you and hope that you will be inspired in your preparations for Christmas. This week I have been time poor so decided to go 3D with simple gift bags and coordinating tags. If you haven’t tried creating boxes and bags you may not realise just how easy they can be. It’s a lot of fun.


I love the ability to custom create a bag or box to a size suitable for a specific gift. However, in this instance, I certainly do not have Christmas presents purchased in readiness for the coming Christmas season - I am nowhere near that organised. As such, I have created 2 gift bags, one using half a sheet of Designer Series Paper ie 6”x12” (15.25 x 30.5cm) and the second gift bag using a full sheet of 12”x12” (30.5 x 30.5 cm) Designer Series Paper. With Stampin’ Up!s current sale of DSPs from the 2024/2025 Annual Catalogue, I have selected one of the set of papers that is ‘On Sale’, the gorgeous Winter Meadow Designer Series Paper.


This DSP was introduced last year and has carried over to this year’s Annual Catalogue. I adore this paper so have stocked up during the Sale and plan to use it during a coming class. It is a great opportunity if you have been interested in any of the standard DSPs, so don’t miss out as Stampin’ Up!s DSP sale finishes on the 31st August.


This first gift bag uses a full sheet of DSP. When designing a bag for a specific item, it’s about measuring the width, height and depth of the item and add a little extra to each measurement so there is room to manoeuvre your item without tearing the bag. Don’t forget to add cm for a seam to join edges together. Think about the closure at the top of the bag and add enough height so the bag can close easily. It’s also about considering the size of the paper you are going to use and whether you need to join sheets of DSP or card-stock. Then, using the Stampin’ Trimmer, score along one edge (for front, gusset, back, gusset and seam) and turn the sheet 90deg and score bottom section, bag height and turn back. Burnishing the folds with a Bone Folder is really important to give nice edges to the gift bag. For this bag, the finished dimensions are 22.2cm height x 10.2cm width x 4.5cm depth. 


The adhesive needs to have a sound grip so it doesn’t unstick when the bag is containing its goodies. I usually use either Tear ‘n Tape or Tombow Multipurpose Liquid Glue. Pieces of Basic White card-stock were trimmed a little smaller than the turn back and slipped in to hide under the turn-back. This is to strengthen the opening and also reinforce the punched holes that the ribbon feeds through to tie the opening closed. Another piece of card-stock was added inside the bag at  the base. My aim was to strengthen the bag so that it could maintain a good condition to enable it to be re-used. The gussets were gently pushed in and the top of the bag was pinched together at the top. The ribbon that tied the bag closed was white ribbon from the Petal Pink & White Diagonal Trim Combo Pack. 


Tags were cut from both Basic White and Pool Party card-stock and an extra piece of the same DSP used to make the bag. The die that cut the tags came from the Greetings of the Season dies. There are many different shapes and sizes and cuts a hole for ribbon or twine. The dies are amazing. The sentiment came from the Peaceful Season stamp set (from the coming September - December Mini Catalogue). The tags were tied together with white bakers twine from the Bakers Twine Essential’s Pack. In turn, the tags were tied around the ribbon bow. The final touch - a few Iridescent Faceted Gems.

GIFT BAG 2:


This second gift bag was created from half a sheet of DSP, ie 6” (15.25cm) x 12” (30.5cm). It was created in the same way as the gift bag (above), including the reinforcing panels under the turn back and at the base. The finished dimensions are 9.6cm height x 10.8cm width x 3.8cm depth.


A different tag die from the same set was used to cut a Basic White card-stock tag and a DSP tag. The same ribbon and Bakers Twine were used. The sentiment stamped on the white tag comes from Greetings of the Season stamp set. A few Iridescent Pearl Basic Jewels provide a touch of shimmer.


Thank you so much for calling in. I hope these gift bags give you ideas instead of wrapping a gift in the traditional way.


There is more Christmas creativity, so do continue with the blog hop. Just click on the "next" graphic below to be taken to the blog of a wonderful lady & friend, Sharon DavernI am looking forward to checking out Sharon’s creation(s). I do love seeing everyone’s' projects - there is always so much inspiration.

Also, many of us participate in the Colour Creations Blog Hop which goes live every Wednesday night, where we showcase one of Stampin’ Up!s colours each week. It would be wonderful if you could also check in on us for more creative inspiration.

Stay well, stay safe and be kind to yourself.

Andrea 💕🐾


If you find a broken link or would like to view the full list of participants go to Sharon Davern’s blog @ Rhapsody in Craft. Sharon is our amazing Art With Heart Team Heart of Christmas Coordinator.  She is a special lady. Check out her delightful creation while you are there.

If you live in Australia, don't already have a Stampin' Up! demonstrator and would like your own copy of the Stampin' Up 2023-2024 Annual Catalogue and or the coming September-December 2024 Mini Catalogue, then let me know and I will be delighted to send them to you.  Please don't hesitate to make contact with any other queries about these projects or Stampin' Up!. 

#heartofchristmas  #heartofchristmas2024 #stampinup #stampinupaustralia #stampinupsouthpacific #stampinupdemo  #handmadecards #stampinupdemonstrator #papercrafting #artwithheartteam  #papercrafter  #valleyinspirations   #wintermeadow  #greetingsoftheseason  #peacefulsseason

Monday, 26 September 2022

AWH Heart of Christmas #13

Heart of Christmas Blog Hop: Boughs of Holly and Celebrate Everything

Hello. Welcome to Valley Inspirations with Andrea and the Art with Heart Team Heart of Christmas Blog Hop for 2022. 

So glad you are joining us for our thirteenth 2022 Heart of Christmas Blog Hop

I had fun crafting with a friend on Saturday were we created a pack of Gift Cards. Later I made a stepped up version especially for Christmas. Here is the stepped up Christmas Gift Card Pack using the delightful Boughs of Holly Designer Series Paper:


This project is based on a u-Tube by the Paper Pixie where she created a no glue folded card holder for 3"x3" gift cards. As Julie DiMatteo provides a great tutorial, if you want to create something similar, I suggest you watch her uTube (Episode 252)Here are some brief details & photos to give you a sense of the process.

A sheet of 12x12 Boughs of Holly DSP was cut, scored and burnished. Then the card holder is folded into shape. There is no adhesive holding it together. It can be opened fully as shown here - showing both sides of the opened project.


To shape the ends of the top tags on the holder, the Very Best Trio Punch was used. It was also used to punch the slots for the ribbon that will hold it all together with a bow. The tag dies from the Holly Berry dies cut both tags in Basic White card-stock. The small tag was stamped with sentiments from the Leaves of Holly stamp set in Old Olive Classic Stampin ink. A piece of the muted green "B" side of one of the Boughs of Holly DSP sits behind the larger label.


The above photo shows the inside of the card holder. The photo below shows the No Glue Mini Gift Card Holder with its contents - 8 Christmas Gift Cards.


The gift cards end up as 3"x3" cards and can fit in the small square envelopes available from Stampin' Up!. I thought I had a few packs of these envelopes but couldn't find them so ... either they are put away in a "safe place" or I forgot that they were all used. They will be added to my next order. Back to the gift cards. Each gift card is cut to 3" x 6" and scored at 3". A piece of Basic White card-stock, cut to 2 7/8" x 2 7/8" is added to the inside of each card.


Two cards were made using the same DSP design and 4 different designs were used. The smaller tag from the Holly Berry dies was used with Basic White card-stock. The sentiments from the Leaves of Holly stamp set were stamped in inks coordinating with the colours in the relative DSPs, ie Mossy Meadow, Old Olive, Shade Spruce or Evening Evergreen Classic inks


The die cut holly leaves that are part of the larger label die and were cut from Basic White card-stock and added behind the smaller label. To change the holly leaf arrangement on some of the cards the leaves were cut apart and added in a different way.


A hole was punched in the folded corner of the Christmas Gift Cards using the Label Me Fancy punch and some fine ribbon was looped through the hole. Some retired Stampin' Up! ribbon was used as I couldn't find what I was looking for. The final touch was the addition of some Red Rhinestone Basic Jewels.


Here are some photos of the No Glue Mini Gift Card Holder and Gift Cards that were made when crafting with a friend. We used the Celebrate Everything Designer Series Paper to create the cardholder and gift cards. Stampin' Up!s DSP is fantastic with designs on both sides. It is wonderful for use where both sides of the paper will be seen. Handmade Wishes stamp set was used for the sentiments and some decorative touches.


Below is a photo of the Gift Card Holder and the set of Gift Cards. Of the 8 gift cards, 4 are Christmas specific and the other 4 could also be used at other times as well.


I have been asked as a guest demonstrator at a craft group in a few days time so we will make the Christmas gift cards shown below (together with another project).


Thank you for dropping in and spending some time with me. I do appreciate it.

It is always a delight to see everyone's creations and I am sure there will be gorgeous Christmas projects on show so don't miss checking out each blog. To continue with the blog hop, click on the "onto the next" graphic below to be taken to the blog of my friend, the lovely Christine Blain. I always look forward to checking out Christine's creations as well as everyone else's. 

Don't forget the weekly Colour Creations Blog Hop by the Art with Heart Team that launches every Wednesday at 8.00pm AEST. We will be featuring Garden Green this coming Wednesday.

Stay well, stay safe and be kind to yourself and others.

Andrea XXX


If at any time you find a broken link and the next blog doesn’t come up or you started part way through, please head to the blog of our Heart of Christmas Blog Hop Host, the very special Sharon Davern, and she will have the list of all Art With Heart Team members who are participating in this blog hop. Check out her beautiful creation while you are there.

If you are in Australia, don't already have a Stampin' Up! demonstrator and would like your own copy of Stampin' Up's 2022-2023 Annual Catalogue and or the July - December Mini Catalogue then let me know and I will be delighted to send them to you. Pease don't hesitate to contact me with any other queries about these projects or Stampin' Up!. 

#heartofchristmas #heartofchristmas2022  #awhtheartofchristmas #Stampin'Up! #stampinupaustralia #stampinupsouthpacific #stampinupdemo  #handmadecards #makeacardsendacard #stampinupdemonstrator #papercrafting #artwithheartteam  #papercrafter  #stamper  #valleyinspirations #boughsofholly #celebrateeverything #handmadewishes #leavesofholly

Monday, 8 November 2021

AWH Heart of Christmas #19

 Christmas with Delicate Baubles

Hello. Welcome to Valley Inspirations with Andrea and the 19th Art with Heart Team 2021 Heart of Christmas Blog Hop


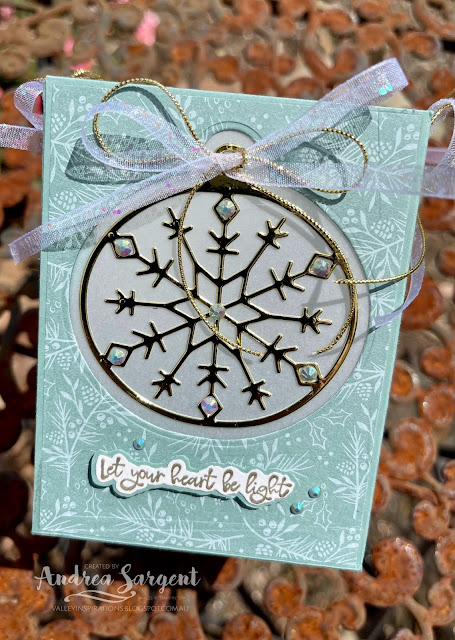
Its great you are joining us for this Heart of Christmas Blog Hop. I had quite a bit of fun  creating a luminary for this Christmas blog hop. I hope you like it:

Light up your Christmas with a Delicate Baubles Luminary, by Andrea Sargent, Australia

I'd been asked to run a class for a local Craft Group and create something different from a card for Christmas. I decided to design a Luminary or Votive and was told they hadn't done anything like that before. After deciding to use the Bright Baubles bundle and especially the Delicate Baubles dies, I started by measuring the dies to calculate the size of the panels that were to be cut. Having been caught previously by cutting the panels too small I wanted to have enough cardstock surrounding the die cut hole.

Light up your Christmas with a Delicate Baubles Luminary, by Andrea Sargent, Australia

I initially worked out dimensions with the 4 side panels, a fold back at the top and enough for a base, but...  It wasn't till I went to die cut the bauble shaped holes that I remembered that my Cut & Emboss Machine was only 6" wide and my card-stock was much wider. I then experimented with sizes till I worked out what was needed for a 4" x 4" cube. That was the size I made at class - see the Evening Evergreen Luminary in the first photo above.

Light up your Christmas with a Delicate Baubles Luminary, by Andrea Sargent, Australia

The Craft Group made the 4" x 4" x 4" but Christmas Designer Series Paper was added as an extra layer which gave more stability to the sides (not pictured). In creating a project for this blog hop I decided to change the dimensions to improve the overall design of the project.

Light up your Christmas with a Delicate Baubles Luminary, by Andrea Sargent, Australia

In this luminary, 2 pieces of Soft Succulent card-stock were cut, scored, burnished with the seams cut and notched. Coordinating pieces of Tidings of Christmas DSP was adhered to the relevant panels and then the two open baubles dies were used to cut holes in the side panels. (I'm hoping to create some decorations with all the bauble die cuts - stay tuned.)

Light up your Christmas with a Delicate Baubles Luminary, by Andrea Sargent, Australia

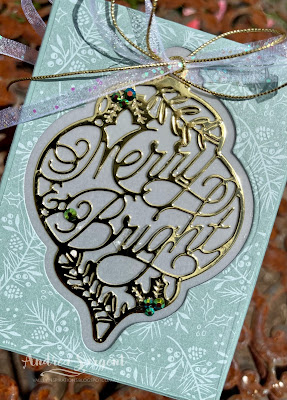
Vellum card-stock was adhered to the back of the panels over the bauble shaped holes. Each of the 4 detailed bauble die cuts were cut out of Gold Foil that had been backed Adhesive Sheets so each die cut bauble would become a sticker. After ensuring all the background die cut pieces were removed, the backing paper was removed and the detailed baubles were adhered to the Vellum.

Light up your Christmas with a Delicate Baubles Luminary, by Andrea Sargent, Australia

The two luminary pieces were adhered together to create a long flat piece. Then the remaining side seam was adhered to the other end, forming a tube. The top seam was adhered to the inside over the edge of the Vellum.  The base pieces were folded in across the bottom and adhered in place. Two square pieces of card-stock were then adhered on the base and inside the bottom of the luminary to neaten it off.

Light up your Christmas with a Delicate Baubles Luminary, by Andrea Sargent, Australia

The final touches were to add bows tied with Simply Elegant Gold Trim and the White Shimmer Organdy Ribbon. The ribbon had been cut in half lengthwise to give a daintier effect. Then the oh so gorgeous 2021-2023 In Colour Jewels were added to each bauble to add extra glimmer. I so so love these gems. A different colour jewel was used on the different baubles. 

Light up your Christmas with a Delicate Baubles Luminary, by Andrea Sargent, Australia

Here are some photos of the luminary at dusk to show you the impact of the light of a battery tea light shining though the vellum around the gold baubles. This tea light changes colour.


Thank you so much for spending time with me on my blog. I'm delighted you did.

If you are in Australia, don't already have a Stampin' Up! demonstrator and would like your own copy of Stampin' Up's 2021-2022 Annual Catalogue and or the July - December Mini Catalogue then let me know and I would love to send them to you. Pease don't hesitate to make contact with any other queries about these projects or Stampin' Up!. 

To continue with the blog hop, click on the "onto the next" graphic below to be taken to the blog of the lovely Rosa Leyden. I always look forward to checking out Rosa's creations together with everyone else's. 

Hope to see you next week for another AWHT Heart of Christmas Blog Hop. We only have 3 more Heart of Christmas Blog Hops this year, going up to the end of November

Also, don't forget the weekly Colour Creations Blog Hop by the Art with Heart Team that launches every Wednesday at 8.00pm AEST.

Stay well, stay safe and be kind to yourself and others.

Andrea XXX


As mentioned, it is always a delight to see everyone's creations and the way they each use the amazing Stampin' Up! products. I am sure there will be gorgeous Christmas projects on show so don't miss checking out each blog. 

If at any time you find a broken link and the next blog doesn’t come up or you started part way through, please head to the blog of this week’s host of the Heart of Christmas Blog Hop, very special Sharon Davern, and she will have the list of all Art With Heart Team members who are participating in this blog hop. Check out her beautiful creation while you are there.


#heartofchristmas #heartofchristmas2021 #awhtheartofchristmas #Stampin'Up! #brightbaubles

Be Inspired - July 2026 - Creating Backgrounds

Be Inspired Design Team Blog Hop CREATING BACKGROUNDS Welcome to Valley Inspirations with Andrea and the July  Be Inspired Blog Hop  where w...