Art with Heart Wow Tutorials

Showing posts with label In Colours. Show all posts

Wednesday, 17 May 2023

AWH Colour Creations Blog Hop #3 Moody Mauve

Moody Mauve with Pansy Patch

[Edit added]

So delighted, my Moody Mauve Pansy card was a Global Design Project winner!

Hello. Welcome to Valley Inspirations with Andrea and the Art with Heart Colour Creations Blog Hop. We are working though the Stampin' Up! colours in alphabetical order, focussing on one colour each week, however, we are starting with the new colours, with the 2023-2025 In Colours first.


This week’s Blog Hop is focussing on a muted reddy purple called Moody Mauve. Moody Mauve is part of the new 2023-2025 In Colour Family and is a colour I love - but then, I love muted colours. This colour would be lovely when used for flowers and all things mauve. I’m still exploring coordinating colours and have used Old Olive, some Mossy Meadow with a touch of Daffodil Delight in the card below. It also would go beautifully with Fresh Freesia.
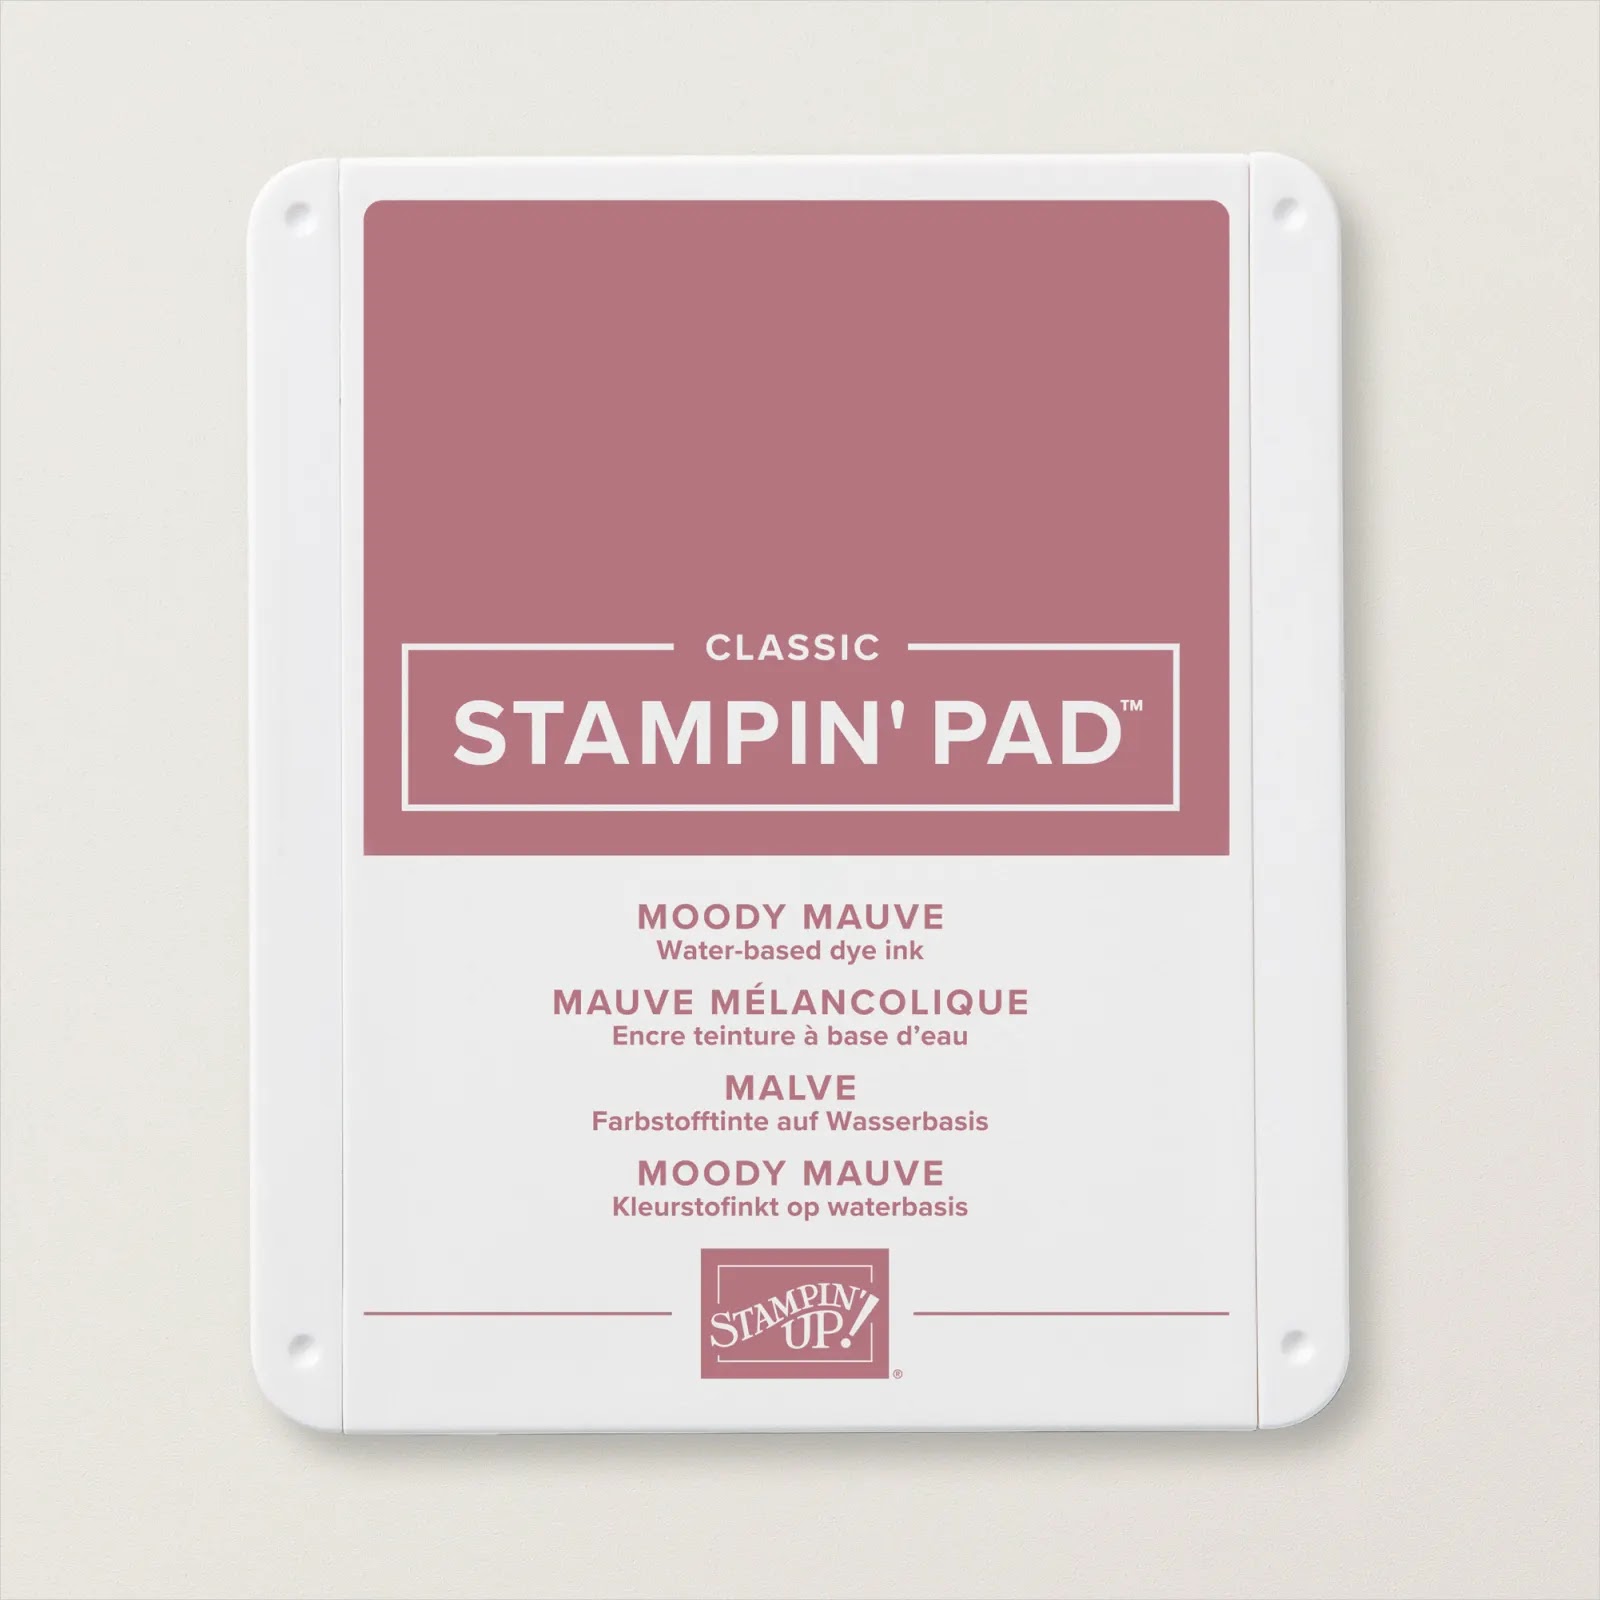

Moody Mauve is produced in Stampin' Up!'s card-stock, both A4 & 12"x12"; Classic Stampin' inks (ink pads & re-inkers); Stampin' Write Marker; Stampin' Blends Combo; In Color Designer Series Paper as well as Fresh As A Daisy, Earthen Elegance DSPs; plus In Color Luster Speciality Paper, Treat Bags & Grid Paper, In Color Textured Ribbon & Jute Trim; and In Color Dots.


Let a friend know you are thinking of them with a personally created Moody Mauve pansy card

Moody Mauve card-stock, ink, In Color Textured Ribbon and In Color Dots have been used in the creation of this project plus a range of non-Moody Mauve bits and pieces.

Let a friend know you are thinking of them with a personally created Moody Mauve pansy card

As Mothers’ Day was fast approaching I was looking at plants in my local nursery and saw some gorgeous pansies displaying Moody Mauve petals. I determined to water-colour die cut pansies for this Blog Hop. I then saw the newly released Global Design Project Challenge - #GDP394 so have used that layout for my card. I love to follow the GDP as most of the team have been and or are Stampin’ Up! Artisans. Always inspiring. Clicking on this image will take you to the GDP web site. 


The pansies, bud and leaves were cut from Fluid 100 Watercolor Paper using the Pansy die set. These pieces were water-coloured - wet on wet technique using Moody Mauve Classic Stampin’ ink together with Old Olive and Daffodil Delight Classic inks.

Let a friend know you are thinking of them with a personally created Moody Mauve pansy card

A piece of Basic White card-stock was used for the background. Delicate stencilling was added using a Foursquare Decorative Mask with Daffodil Delight and Mossy Meadows inks. Patches of Daffodil Delight and Mossy Meadow were added with Blending Brushes with some colour blending in areas. This panel was adhered directly to a Moody Mauve card-base.

Let a friend know you are thinking of them with a personally created Moody Mauve pansy card.

All the water-coloured flower, leaves and bud pieces were arranged with regard to the #GDP394 layout. A sentiment from the Wonderful Thoughts stamp set was white heat embossed on Moody Mauve card-stock with Versamark ink, White Emboss Powder and a Heat Tool. As it was a really long sentiment, it was cut into three. Some Moody Mauve Textured Ribbon was cut lengthwise into 3 and the 2 edge pieces were tied into a bow and tucked under a pansy with Glue Dots. A few beautiful 2023-2025 In Color Dots added a final touch of shine.

Let a friend know you are thinking of them with a personally created Moody Mauve pansy card.

A Basic White card inner also was stencilled with Daffodil Delight and Mossy Meadows inks along the inner and bottom edges. Another sentiment from the Wonderful Thoughts stamps was stamped with Moody Mauve ink. An envelope will be similarly stencilled.

Let a friend know you are thinking of them with a personally created Moody Mauve pansy card.

Thank you so much for dropping by. I so appreciate you spending time with me.

Let a friend know you are thinking of them with a personally created Moody Mauve pansy card.

There is 
more Moody Mauve creativity so do continue with the blog hop. Just click the "next" graphic below to be taken to the blog of my fellow South Australian, the talented Tina Gillespie. I am looking forward to checking out Tina’s creation. I do love seeing everyones' projects - there is always so much inspiration. Don’t miss out on seeing all the wonderful projects.

After checking out the Colour Creations Blogs don’t forget to check out the Global Design Projects for #GDP394 sketch creations. Just click on the GDP image above to be taken to their site and see stunning projects.
I hope to see you next week when we will be featuring Pebbled Path, another of the new In Colour family, as we continue the weekly 2023-2024 Colour Creations Blog Hop series. 

Stay well, stay safe and be kind to yourself and others.

Andrea 💕🐾

If you find a broken link or would like to view the full list of participants go to Catherine Proctor’s blog @ What Cathy Made. Cathy is our brilliant Art With Heart Team Colour Creations Coordinator.  She is a wonderful lady. Check out her delightful creation while you are there.

If you live in Australia, don't already have a Stampin' Up! demonstrator and would like your own copy of the new Stampin' Up 2023-2024 Annual Catalogue, then let me know and I will be delighted to send it to you.  Please don't hesitate to make contact with any other queries about these projects or Stampin' Up!. 


#colourcreationsbloghop  #stampinup #stampinupaustralia #stampinupsouthpacific #stampinupdemo  #handmadecards #makeacardsendacard #stampinupdemonstrator #papercrafting #artwithheartteam  #papercrafter  #valleyinspirations   #pansypatch  #GDP394 #wonderfulthoughts

Monday, 3 October 2022

AWH Heart of Christmas #14

Heart of Christmas Blog Hop: Caroling Mice

Hello. Welcome to Valley Inspirations with Andrea and the Art with Heart Team Heart of Christmas Blog Hop for 2022. 

So glad you are joining us for our fourteenth 2022 Heart of Christmas Blog Hop. I have had a lot of fun creating a card using the host Christmas set from Stampin’ Up!s July-December Mini Catalogue. Here is my card:


As I was planning this card I saw this week’s Just Add Ink challenge to use Sweet Sorbet, Parakeet Party and Starry Sky on a project so thought I would use those colours to colour the caroling mice. However, as I was colouring with the images with my Stampin’ Blends I realised I wanted to include other colours on my project and lightly colour the glass in the street lights and also colour my mice and so I gave up the idea of submitting the card in the Just Add Ink Challenge. Ah well, there will be another opportunity.


The images were stamped in Momento Black ink on Basic White card-stock and then coloured with a range of Stampin’ Blends, including Sweet Sorbet, Parakeet Party, Starry Sky, Basic Black, Crumb Cake, Gray Granite, Smoky Slate, Pool Party, Petal Pink combos as well as the Colour Lifter. All the images were fussy cut.


Basic white card-stock was embossed with one of the Charming Landscapes Embossing Folders. The embossing doesn’t show well in the photos but is lovely in real life. A little Pool Party Classic Stampin’ ink was lightly blended over the sky. The background panels were mounted on another Hostess product, the Celebrate Everything Designer Series Paper. Another piece of Basic White card-stock was cut with the stitched clouds Basic Boarders die. My concept was to use it to give a sense of bushes and so a little Soft Sea Foam ink was blended over the panel with a Blending Brush to add some very light colour. I didn’t was the background to compete with the brightly coloured mice.


The same process was undertaken for the front 2 half panels.


The same Granny Apple Green DSP was also mounted on the back of the middle panel as this would show from the front when the card was closed.


As I had “some issues” loosing things during the creative process, including mis-placing the front embossed panel, one of the coloured fussy cut trees, and the pack of In Colour twine, I lost time searching. I had in mind that the sentiment would be “Let heaven and nature sing” from the Perched In A Tree stamp set but my eye spied a “Merry Christmas” on my work table so it was fussy cut and added with Mini Dimensionals. I also found a double bow tied with White Bakers Twine and as the In Colour twine was hiding amongst products from Friday’s Craft Class. The White bow made its way under the sentiment. It isn’t adhered with a Glue Dot as yet in case when the In Colour twine is turns up I decide to swap the bow around. The card was finished with some Adhesive-backed Stars.


The back panel of the card is to be used for writing a personal message. A Basic White piece of card-stock was mounted on the same DSP design and a little tree was stamped a corner in Momento Black ink.


A Basic White C6 Envelope was also stamped with the little tree to coordinate with the card.


Thank you so much for dropping in. I so appreciate your visit.

It is always a delight to see everyone's creations in the Blog Hop and I am sure there will be gorgeous Christmas projects on show so don't miss checking out each blog. To continue with the blog hop, click the "onto the next" graphic below to be taken to the blog of the lovely Christine Blain. I always look forward to checking out Christine’s creations together with everyone else's. 

Don't forget the weekly Colour Creations Blog Hop by the Art with Heart Team launches every Wednesday at 8.00pm AEST. 

Stay well, stay safe and be kind to yourself and others.

Andrea XXX


If at any time you find a broken link and the next blog doesn’t come up or you started part way through, please head to the blog of our Heart of Christmas Blog Hop Host, the very special Sharon Davern, and she will have the list of all Art With Heart Team members who are participating in this blog hop with their links. Check out her beautiful creation while you are there.

If you are in Australia, don't already have a Stampin' Up! demonstrator and would like your own copy of Stampin' Up's 2022-2023 Annual Catalogue and or the July - December Mini Catalogue then let me know and I will be delighted to send them to you. Please don't hesitate to contact me with any other queries about this project or Stampin' Up!. Don’t forget on October 4th Stampin’ Up! Will not be charging for postage & packaging. It’s a great time to place an order.

#heartofchristmas #heartofchristmas2022  #awhtheartofchristmas #Stampin'Up! #stampinupaustralia #stampinupsouthpacific #stampinupdemo  #handmadecards #makeacardsendacard #stampinupdemonstrator #papercrafting #artwithheartteam  #papercrafter  #stamper  #valleyinspirations #Carolingmice

Wednesday, 1 June 2022

AWHT Colour Creations #5 Tahitian Tide

Tahitian Tide with Let's Set Sail, Watercolour and Paste 

Hello. Welcome to Valley Inspirations with Andrea and the Art with Heart Colour Creations Blog Hop. We are continuing to work though the new Stampin' Up! In Colours before focussing on all the other Stampin' Up! colours in alphabetical order. 


This week’s Blog Hop is focussing on a bright Turquoise called Tahitian Tide. Tahitian Tide is part of the In Colour Family for 2022-2024 and is a bright & happy colour. This colour is gorgeous when used with other blues such as Balmy Blue and Pacific Point. I am looking forward to exploring other colour combos.  


Tahitian Tide is produced in Stampin' Up!'s card-stock, both A4 & 12"x12"; Classic Stampin' inks (ink pads & re-inkers); Stampin' Write Markers; Stampin' Blends, In Colour Designer Series Papers, Glimmer Paper, In Colour Matte Decorative Dots & In Colour Twine. The card below has used Tahitian Tide Classic Stampin' ink (both re-inker and Stamp Pad), Card-stock, Stampin' Write Marker, Stampin' Blends, Glimmer Paper & In Colour Matte Decorative Dots  plus a range of other non-TT bits and pieces.

Here is my card to showcase Tahitian Tide:

Send that special friend personally created sentiments for the Best Day Ever using Let's Set Sail stamps and the Boat Builder Punch.

Isn't Tahitian Tide a bright & happy colour.  


CARD 1:

This card demonstrates the beauty of Tahitian Tide through a water-coloured section depicting the sea. Given the colour's name, I decided my project needed to have a sea theme.

Send that special friend personally created sentiments for the Best Day Ever using Let's Set Sail stamps and the Boat Builder Punch.

A half panel of Fluid 100 Watercolor Paper was watered down and then ink from a Balmy Blue  Re-inker was applied to the top of the panel, with the larger flat Water Painter, to represent sky.  Similarly, the bottom of the panel was coloured with Crumb Cake ink to represent sand. The centre section was coloured with Tahitian Tide ink with tiny touches of Pacific Point ink to give a little extra depth to the sea. The water-coloured panel was mounted to a slightly larger piece of Tahitian Tide card-stock.  A Basic White card-stock card front was splattered with a Light Tahitian Tide Blend and dry embossed with the Splatters embossing folder from the Stripes & Splatters 3D Embossing Folders set. This card front was mounted directly on a Tahitian Tide card base. 

Send that special friend personally created sentiments for the Best Day Ever using Let's Set Sail stamps and the Boat Builder Punch.

I initially was going to add ink to White Shimmer Embossing Paste to create faux sand - as I had recently seen this demonstrated by Krista Frattin of the Crafty Carrot Co. However, I just decided to add paste to the waters edge indicative of sea foam and also a little to the sky for clouds. Krista's layout inspired the placement of the focal point. The larger round die from the Beautiful Shapes dies cut a label from the Tahitian Tide Glimmer sheet and Vellum. A Dark Tahitian Tide Stampin' Blend darkened the lower section of the Glimmer label. The Vellum label was trimmed close to the stitching lines and added over the Glimmer label. A sail boat was punched out of Basic White card-stock using the Sailboat Builder Punch. This was layered on to the label with Dimensionals. My quirky nature was spiked as I was crafting and I thought about adding a whale in the sea. It didn't seem to work so I punched a whale's tail with the Whale Punch and tucked it poking out from the central panel on the RHS. Looking at the photos as a write my blog I am not keen that it communicates what I had intended. I will probably take the white tail off before giving the card. not enough light to re photograph the project now.

Send that special friend personally created sentiments for the Best Day Ever using Let's Set Sail stamps and the Boat Builder Punch.

The card front was finished with a sentiment from the Let's Set Sail stamp set that had been stamped on Basic White card-stock with a darker blue, Starry Sky ink. The sentiment was cut into two and fussy cut with the first line added over the boat. Some In Colour Matte Decorative Dots were adhered around the sentiment and boat, together with a little knotted Linen Twine.

Send that special friend personally created sentiments for the Best Day Ever using Let's Set Sail stamps and the Boat Builder Punch.

A piece of Basic White card-stock was adhered into the inner card base. The Basic White card-stock had been stamped with the little birds in Crumb Cake ink. A strip from the water-coloured panel was adhered to a thin strip of Tahitian Tide card-stock and then added at the side of the card inner. A Basic White C6 Envelope was splattered with Tahitian Tide ink from a Stampin Write Marker and stamped with the tiny birds stamp in Crumb Cake ink. 

Send that special friend personally created sentiments for the Best Day Ever using Let's Set Sail stamps and the Boat Builder Punch.


Thank you so much for dropping by. I do value the time you spent with me.

If you live in Australia, don't already have a Stampin' Up! demonstrator and would like your own copy of Stampin' Up's 2022-2023 Annual Catalogue and or the January - June 2022 Mini Catalogue then let me know and I will be delighted to send them to you.  Please don't hesitate to make contact with any other queries about these projects or Stampin' Up!. 

There is more Tahitian Tide creativity. To continue with the blog hop, click on the "next" graphic below to be taken to the blog of the lovely, Tina Gellespi. I always look forward to checking out Tina's creation (I wonder what she has in store this week - she is absolutely amazing). I do love seeing everyones' projects - always so much inspiration.

Hope to see you next week when we will be featuring a delightful colour, Balmy Blue, as we continue the weekly 2022-2023 Colour Creations blog hops.

Stay well, stay safe and be kind to yourself and others. 

Andrea 💕🐾


If you find a broken link or have come to this blog hop from a different entry point, you can view the full list of participants on Catherine Proctor’s blog, our very special Art With Heart Team Colour Creations Coordinator.  I so appreciate Cathy and all she does in coordinating this blog hop each week. Check out her wonderful creation while you are there.

#colourcreationsbloghop  #stampinup #stampinupaustralia #stampinupsouthpacific #stampinupdemo  #handmadecards #makeacardsendacard #stampinupdemonstrator #papercrafting #artwithheartteam  #papercrafter #letssetsail #stamper 

Wednesday, 25 May 2022

AWHT Colour Creations #4 Sweet Sorbet

Sweet Sorbet with Happiness Abounds using Watercolour Techniques

Hello. Welcome to Valley Inspirations with Andrea and the Art with Heart Colour Creations Blog Hop. We are continuing to work though new the Stampin' Up! In Colours and then will proceed through all the other colours in alphabetical order. 


This week’s Blog Hop is focussing on a bright red (that has a touch of pink) called Sweet Sorbet. As mentioned, Sweet Sorbet is part of the In Colour Family for 2022-2024 and is a lovely red. This colour is gorgeous on its own or can be combined with Blushing Bride & Sahara Sand or Smoky Slate. I’m looking forward to exploring this colour further.


Sweet Sorbet is produced in Stampin' Up!'s card-stock, both A4 & 12"x12"; Classic Stampin' inks (ink pads & re-inkers); Stampin' Write Markers; Stampin' Blends, In Colour Designer Series Papers, Lovely in Linen DSP, Tea Boutique DSP & Tea Boutique Cards & Envelopes, In Colour Glimmer paper, Metallic Woven Ribbon, In Colour Bakers Twine Pack, In Colour Matt Decorative Dots. The cards below have used Sweet Sorbet Classic Stampin' ink (both re-inker and Stamp Pad), Card-stock and a Stampin’ Write Marker plus a range of other non-PP bits and pieces.

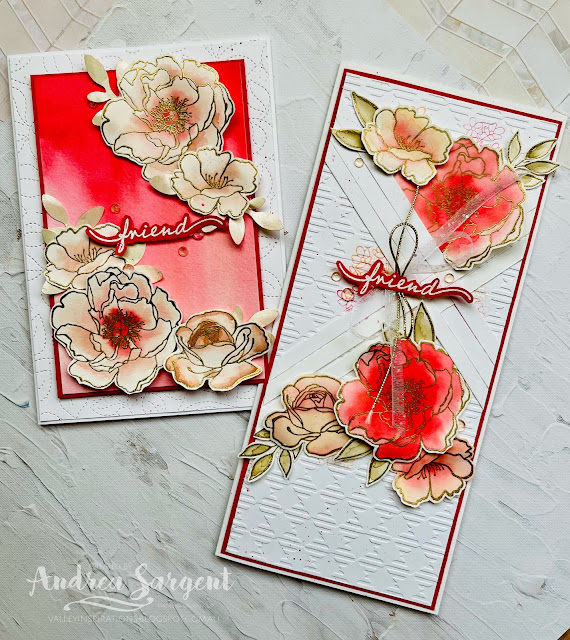
I have created 2 cards to showcase Sweet Sorbet:

Show a friend that you care with a personally created card using the delightful Happiness Abounds roses.

Isn't Sweet Sorbet a lovely colour.  Initially I wasn't sure if I liked it but having played with this colour using water-colouring techniques, I am loving it. I also need to apologise for this week's photography - I usually photograph outside but it has been raining on and off all day. The photos haven't captured a true Sweet Sorbet colour and the lighting isn't brilliant. Will re-photograph them all tomorrow.

CARD 1:

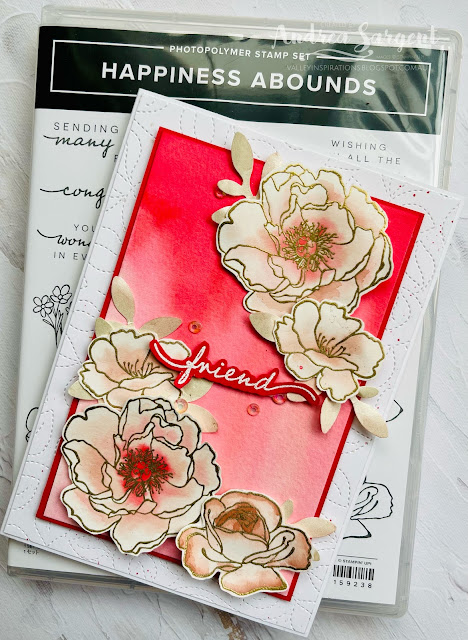
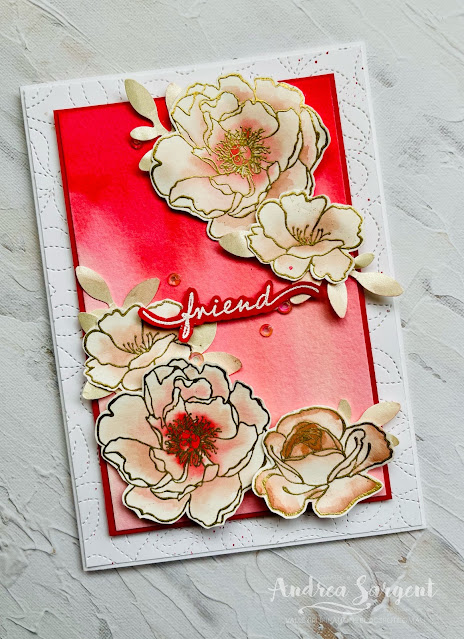
This card shows the beauty of Sweet Sorbet through a water-coloured ombre panel. I have created a similar watercolour panel with the previous In Colours. It is a great technique to help get to know a new colour.

Show a friend that you care with a personally created card using the delightful Happiness Abounds roses.

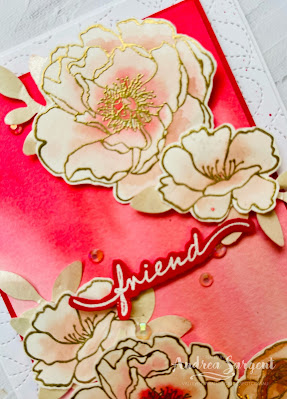
A half panel of Fluid 100 Watercolor Paper was fully watered down and then ink from a Sweet Sorbet Re-inker was applied to the top of the panel with the large flat Water Painter, allowing the ink to run/drip down to the bottom. The water-coloured panel, when dry, was mounted on to a slightly larger piece of Sweet Sorbet card-stock.  A Basic White card-stock card front was embossed with the delightful Stitched Greenery die, splattered with some Sweet Sorbet ink using a Stampin' Write Marker and then adhered directly to a Thick Basic White card base. 

Show a friend that you care with a personally created card using the delightful Happiness Abounds roses.

Flowers from the Happiness Abounds stamp set were Gold heat embossed using Versamark, Gold Emboss Powder and a Heat Gun. These flowers were water-coloured using Blushing Bride ink and a touch of Sweet Sorbet ink in the centre of the larger flower. Once dry, the flowers could be cut with the coordinating Blossoming Happiness dies. As I was running out of time, I decided to punch out some leaves using the Bough Punch and Pearlescent paper. The floral arrangement was inspired by the current Global Design Project challenge that was to CASE a selected Charlotte Mallett card.

Show a friend that you care with a personally created card using the delightful Happiness Abounds roses.

The centre panel was added to the card base with Dimensionals. This card front was finished with a sentiment from the same stamp set that had been White heat embossed on Sweet Sorbet card-stock. Some Iridescent Rhinestone Basic Jewels added some shimmer, together with a little Wink of Stella (which is so hard to capture in the photos).

Show a friend that you care with a personally created card using the delightful Happiness Abounds roses.

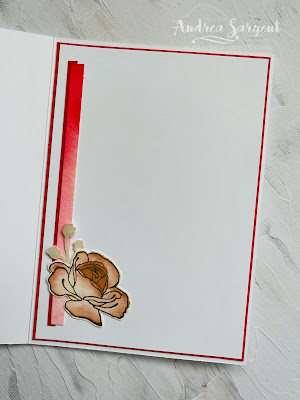
A piece of Basic White card-stock was mounted to a slightly larger piece of Sweet Sorbet card-stock and then adhered into the inner card base. A couple of strips of left-over card-stock and the water-colour panel were added to the side together with a left over water-coloured rose and punched twig. The LHS of a Basic White C6 Envelope was stamped a number of times with the tiny twig of leaves stamp in Versamark ink and was then gold heat embossed. 

Show a friend that you care with a personally created card using the delightful Happiness Abounds roses.


CARD 2:

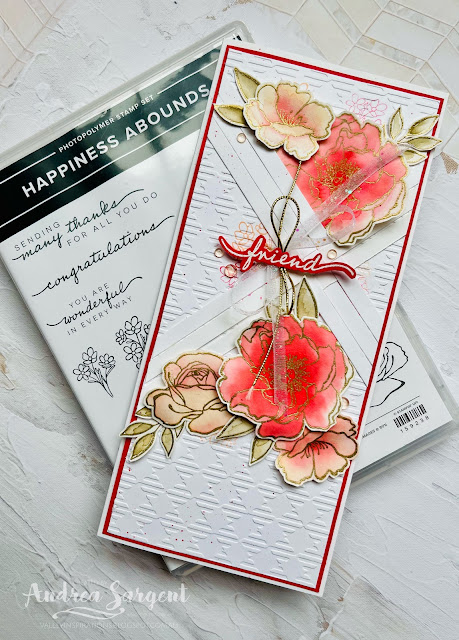
This second card features more water-coloured roses. In fact the second card came into being because initially I had water-coloured the roses with a Petal Pink and Sweet Sorbet inks. As they were turned out darker in colour they didn't show up well on the water-coloured panel on card 1 so I stamped and gold embossed more flowers on Shimmery White card-stock for that card. Not wanting to waste the first set of water-coloured roses I created the card below.

Show a friend that you care with a personally created card using the delightful Happiness Abounds roses.

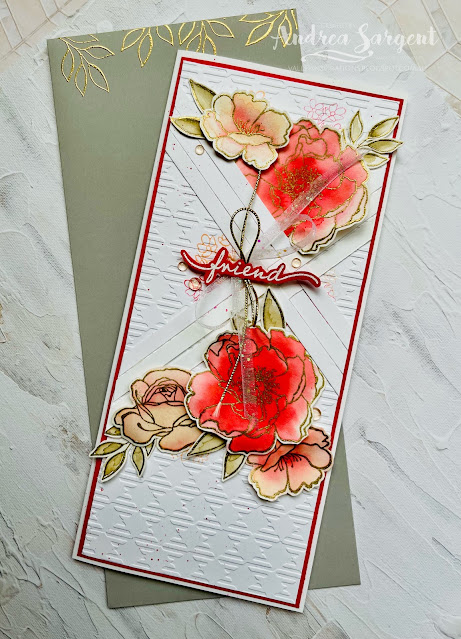
A Basic White card-stock front was stamped with the little flower sprays from the Happiness Abounds stamp set using either Petal Pink or Sweet Sorbet (stamped off once) inks. The panel was dry embossed with the Gingham Embossing Folder. As I was creating this card I remembered Susan Wong's challenge (one of Stampin' Up!s Artisans' from New Zealand) to create using left-over bits and pieces. As my base card fronts are usually cut a little smaller that the front of a standard card base, I have a large pile 5-6cm wide strips of Basic White card-stock. Also, as a weaver, I thought I would weave a number of strips together and add them to the background as some extra interest. (I think I had seen something that had been tucked away for a time such as this.) I also added some Sweet Sorbet splatter.

Show a friend that you care with a personally created card using the delightful Happiness Abounds roses.

The water-coloured roses were arranged around the woven strips and some leaves were stamped, gold embossed and water-coloured with Sahara Sand ink. The roses and leaves were adhered in place with either Multi-purpose Liquid Glue or Dimensionals.

Show a friend that you care with a personally created card using the delightful Happiness Abounds roses.

A sentiment from the Happiness Abounds stamp set was White heat embossed on Sweet Sorbet card-stock, fussy cut and added with Mini Dimensionals over a bow tied with a thin strip of White Glittered Organdy Ribbon and Gold Simply Elegant Trim. Polished Dots were sprinkled around for that added touch of very subtle bling.

Show a friend that you care with a personally created card using the delightful Happiness Abounds roses.

A piece of Basic White card-stock was mounted to a slightly larger piece of Sweet Sorbet card-stock before being adhered to the card inner. A left-over rose and a couple of leaves were added as well.  A Smoky Slate Stampin' Up! Slim-line Envelope was stamped with leaves that were gold heat embossed.

Show a friend that you care with a personally created card using the delightful Happiness Abounds roses.


There is more Sweet Sorbet creativity. To continue with the blog hop, click on the "next" graphic below to be taken to the blog of the lovely, Diane Furniss. I always look forward to checking out Diane's creation (I wonder if she has created one of her amazing fun-folds?). I do love seeing everyones' projects - always so much inspiration.

Hope to see you next week when we will be featuring another In Colour, Tahitian Tide, as we continue the weekly 2022-2023 Colour Creations blog hops.

Stay well, stay safe and be kind to yourself and others. 

Andrea 💕🐾


If you find a broken link or have come to this blog hop from a different entry point, you can view the full list of participants on Catherine Proctor’s blog @ What Cathy Made. Cathy is our wonderful Art With Heart Team Colour Creations Coordinator.  I so appreciate all she does in coordinating this blog hop each week. She is such a special lady. Check out her wonderful creation while you are there.

#colourcreationsbloghop  #stampinup #stampinupaustralia #stampinupsouthpacific #stampinupdemo  #handmadecards #makeacardsendacard #stampinupdemonstrator #papercrafting #artwithheartteam  #papercrafter #huesofhappiness #stamper #happinessabounds

Be Inspired - September 2026 - Neutrals Only

  Be Inspired Design Team Blog Hop USING ONLY NEUTRALS Welcome to Valley Inspirations with Andrea and the September  Be Inspired Blog Hop  w...