Art with Heart Wow Tutorials

Showing posts with label Pansy Patch. Show all posts

Wednesday, 17 May 2023

AWH Colour Creations Blog Hop #3 Moody Mauve

Moody Mauve with Pansy Patch

[Edit added]

So delighted, my Moody Mauve Pansy card was a Global Design Project winner!

Hello. Welcome to Valley Inspirations with Andrea and the Art with Heart Colour Creations Blog Hop. We are working though the Stampin' Up! colours in alphabetical order, focussing on one colour each week, however, we are starting with the new colours, with the 2023-2025 In Colours first.


This week’s Blog Hop is focussing on a muted reddy purple called Moody Mauve. Moody Mauve is part of the new 2023-2025 In Colour Family and is a colour I love - but then, I love muted colours. This colour would be lovely when used for flowers and all things mauve. I’m still exploring coordinating colours and have used Old Olive, some Mossy Meadow with a touch of Daffodil Delight in the card below. It also would go beautifully with Fresh Freesia.


Moody Mauve is produced in Stampin' Up!'s card-stock, both A4 & 12"x12"; Classic Stampin' inks (ink pads & re-inkers); Stampin' Write Marker; Stampin' Blends Combo; In Color Designer Series Paper as well as Fresh As A Daisy, Earthen Elegance DSPs; plus In Color Luster Speciality Paper, Treat Bags & Grid Paper, In Color Textured Ribbon & Jute Trim; and In Color Dots.


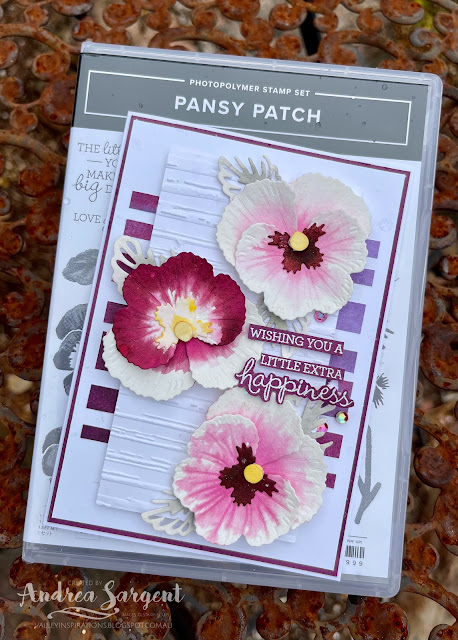
Let a friend know you are thinking of them with a personally created Moody Mauve pansy card

Moody Mauve card-stock, ink, In Color Textured Ribbon and In Color Dots have been used in the creation of this project plus a range of non-Moody Mauve bits and pieces.

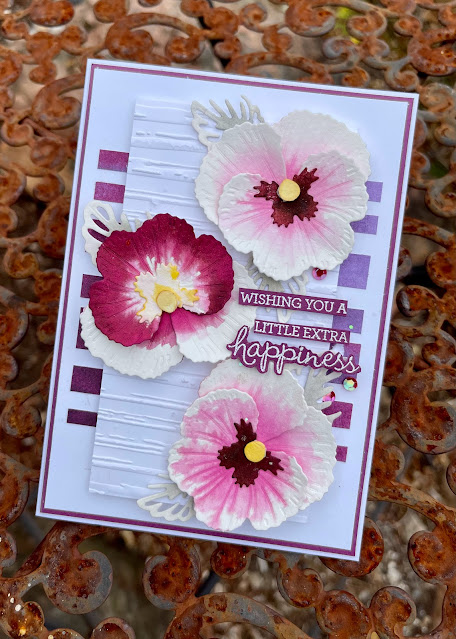
Let a friend know you are thinking of them with a personally created Moody Mauve pansy card

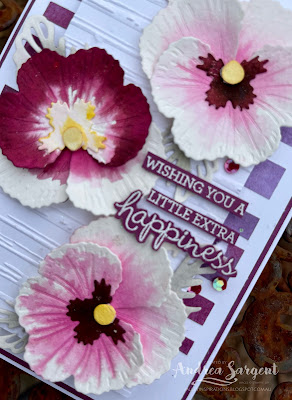
As Mothers’ Day was fast approaching I was looking at plants in my local nursery and saw some gorgeous pansies displaying Moody Mauve petals. I determined to water-colour die cut pansies for this Blog Hop. I then saw the newly released Global Design Project Challenge - #GDP394 so have used that layout for my card. I love to follow the GDP as most of the team have been and or are Stampin’ Up! Artisans. Always inspiring. Clicking on this image will take you to the GDP web site. 


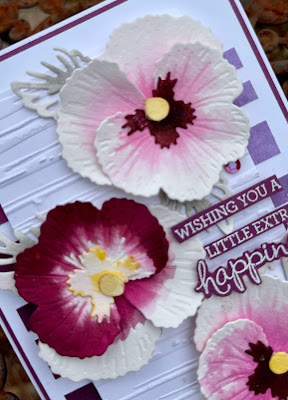
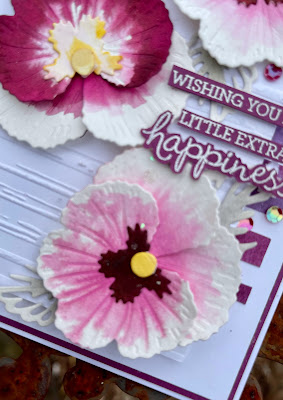
The pansies, bud and leaves were cut from Fluid 100 Watercolor Paper using the Pansy die set. These pieces were water-coloured - wet on wet technique using Moody Mauve Classic Stampin’ ink together with Old Olive and Daffodil Delight Classic inks.

Let a friend know you are thinking of them with a personally created Moody Mauve pansy card

A piece of Basic White card-stock was used for the background. Delicate stencilling was added using a Foursquare Decorative Mask with Daffodil Delight and Mossy Meadows inks. Patches of Daffodil Delight and Mossy Meadow were added with Blending Brushes with some colour blending in areas. This panel was adhered directly to a Moody Mauve card-base.

Let a friend know you are thinking of them with a personally created Moody Mauve pansy card.

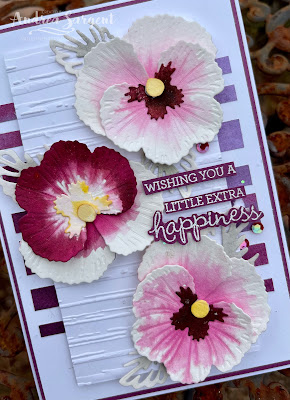
All the water-coloured flower, leaves and bud pieces were arranged with regard to the #GDP394 layout. A sentiment from the Wonderful Thoughts stamp set was white heat embossed on Moody Mauve card-stock with Versamark ink, White Emboss Powder and a Heat Tool. As it was a really long sentiment, it was cut into three. Some Moody Mauve Textured Ribbon was cut lengthwise into 3 and the 2 edge pieces were tied into a bow and tucked under a pansy with Glue Dots. A few beautiful 2023-2025 In Color Dots added a final touch of shine.

Let a friend know you are thinking of them with a personally created Moody Mauve pansy card.

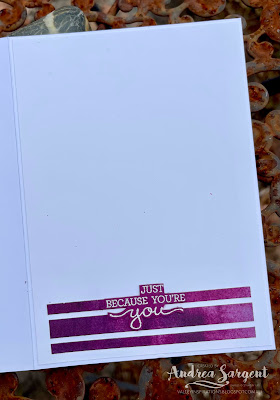
A Basic White card inner also was stencilled with Daffodil Delight and Mossy Meadows inks along the inner and bottom edges. Another sentiment from the Wonderful Thoughts stamps was stamped with Moody Mauve ink. An envelope will be similarly stencilled.

Let a friend know you are thinking of them with a personally created Moody Mauve pansy card.

Thank you so much for dropping by. I so appreciate you spending time with me.

Let a friend know you are thinking of them with a personally created Moody Mauve pansy card.

There is 
more Moody Mauve creativity so do continue with the blog hop. Just click the "next" graphic below to be taken to the blog of my fellow South Australian, the talented Tina Gillespie. I am looking forward to checking out Tina’s creation. I do love seeing everyones' projects - there is always so much inspiration. Don’t miss out on seeing all the wonderful projects.

After checking out the Colour Creations Blogs don’t forget to check out the Global Design Projects for #GDP394 sketch creations. Just click on the GDP image above to be taken to their site and see stunning projects.

I hope to see you next week when we will be featuring Pebbled Path, another of the new In Colour family, as we continue the weekly 2023-2024 Colour Creations Blog Hop series. 

Stay well, stay safe and be kind to yourself and others.

Andrea 💕🐾

If you find a broken link or would like to view the full list of participants go to Catherine Proctor’s blog @ What Cathy Made. Cathy is our brilliant Art With Heart Team Colour Creations Coordinator.  She is a wonderful lady. Check out her delightful creation while you are there.

If you live in Australia, don't already have a Stampin' Up! demonstrator and would like your own copy of the new Stampin' Up 2023-2024 Annual Catalogue, then let me know and I will be delighted to send it to you.  Please don't hesitate to make contact with any other queries about these projects or Stampin' Up!. 


#colourcreationsbloghop  #stampinup #stampinupaustralia #stampinupsouthpacific #stampinupdemo  #handmadecards #makeacardsendacard #stampinupdemonstrator #papercrafting #artwithheartteam  #papercrafter  #valleyinspirations   #pansypatch  #GDP394 #wonderfulthoughts

Wednesday, 16 March 2022

AWHT Colour Creations #40 Rich Razzleberry

Rich Razzleberry with Pansy Patch 

Hello. Welcome to Valley Inspirations with Andrea and the Art with Heart Colour Creations Blog Hop. We are continuing to work though all the Stampin' Up! colours in alphabetical order. Having started mid 2021 we are finishing colours starting with "R". 


This week’s Blog Hop is focussing on a deep red with a touch of purple called Rich Razzleberry. Rich Razzleberry is part of the Regals Colour Family and is a delightful colour. While playing with it for this blog hop I have wondered why I don't use it more. Rich Razzlebury is lovely with Highland Heather and Smoky Slate and as seen in various pansies it is lovely with a bright yellow, eg Daffodil Delight. 


Rich Razzleberry is produced in Stampin' Up!'s card-stock, both A4 & 12"x12"; Classic Stampin' inks (ink pads & re-inkers); Stampin' Write Markers; Watercolor Pencils; Regals and Flowering Fields Designer Series Papers and Artistry Blooms Adhesive-Backed Sequins. The cards below have used Rich Razzleberry Classic Stampin' ink, Card-stock, Flowering Fields DSP and the Razzlebury Artistry Blooms Adhesive-backed Sequins, plus a range of other non-PP bits and pieces.

I have created 2 cards showcasing Rich Razzleberry with water-colour:


Isn't Rich Razzleberry a great colour. Both cards show the beauty of Rich Razzlebury using the wet on wet water-colour technique.


CARD 1:

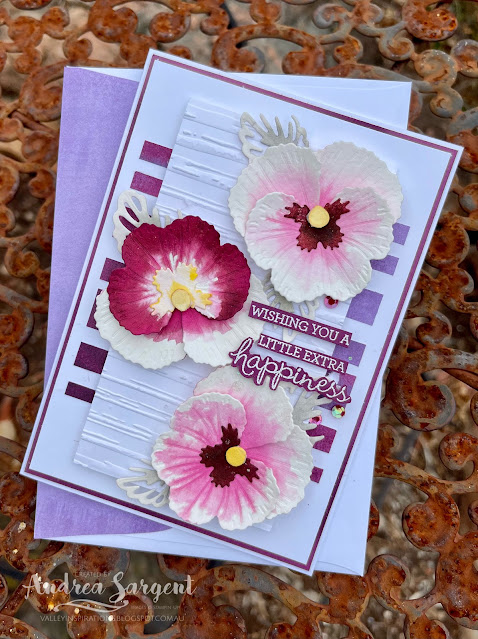
Water-coloured pansies are delightful when wanting to send a note or tell someone you are thinking of them.

Pansy pieces from the Pansy dies were cut from Fluid 100 Watercolor Paper. Having researched pansy colours - checking a friend's pansies and a number of photographs, I then played with a mid-sized Water Painter and some Rich Razzlebury ink using the wet on wet water-colour technique. The flower centres were coloured with Daffodil Delight Classic ink and the leaf die cuts with Smoky Slate ink.

Water-coloured pansies are delightful when wanting to send a note or tell someone you are thinking of them.

Basic White and Rich Razzlebury card-stocks were mounted on a Thick Basic White card-base. A piece of Flowering Fields Designer Series Paper (the piece that looks like water-coloured Rich Razzlebury and Highland Heather) was randomly trimmed into strips and then adhered to the white card front layer.

Water-coloured pansies are delightful when wanting to send a note or tell someone you are thinking of them.

Another piece of Basic White card-stock was embossed with the Stripe embossing folder from the Stripes and Splatters 3D Embossing Folders.

Water-coloured pansies are delightful when wanting to send a note or tell someone you are thinking of them.

The water-coloured pansy pieces were adhered together to form the pansies. I so love the way the wet colour channelled along the embossed pansy veins.

Water-coloured pansies are delightful when wanting to send a note or tell someone you are thinking of them.

The pansies were positioned in place and a number of Smoky Slate water-coloured leaves were tucked under the pansies. The leaf die used is actually a part leaf die to be used on top of a open leaf die. I chose this die to help the leaves stay in the background.

Water-coloured pansies are delightful when wanting to send a note or tell someone you are thinking of them.

The card front was finished with a sentiment from the same stamp set, Pansy Patch, that had been White heat embossed on Rich Razzlebury card-stock and fussy cut into pieces. The first 3 lines of the sentiment were added individually with Mini Dimensionals. Some Artistry Blooms Adhesive-Backed Sequins added a little shimmer, together with a sprinkling of Wink of Stella. I did try hard to add ribbon or trim but it didn't add anything so I decided to let the pansies shine.


The Basic White card inner was decorated with some extra Flowering Fields DSP strips and the 2nd half of the heat embossed sentiment. Some of the same DSP was adhered to the Basic White C6 Envelope flap to tie it in with the card. 

Water-coloured pansies are delightful when wanting to send a note or tell someone you are thinking of them.

I so love the effect of water-colouring with Rich Razzlebury Classic ink on the pansy die cut pieces. How about you?


CARD 2:

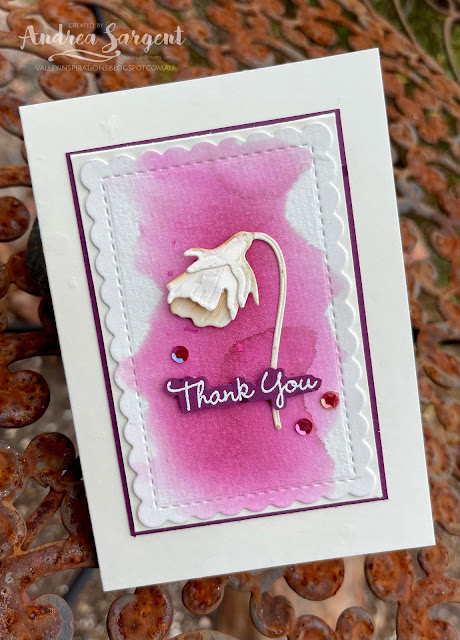
With the second card,  I thought I would challenge myself and try to create a more minimalist card. I recently saw this challenge on one of the Facebook/Blog Challenges that I follow and thought it was time to challenge myself to create some clean and simpler cards. This was my first try. I know, the centre panel has been double mounted - read below to find out why...

Water-coloured pansies are delightful when wanting to send a note or tell someone you are thinking of them.

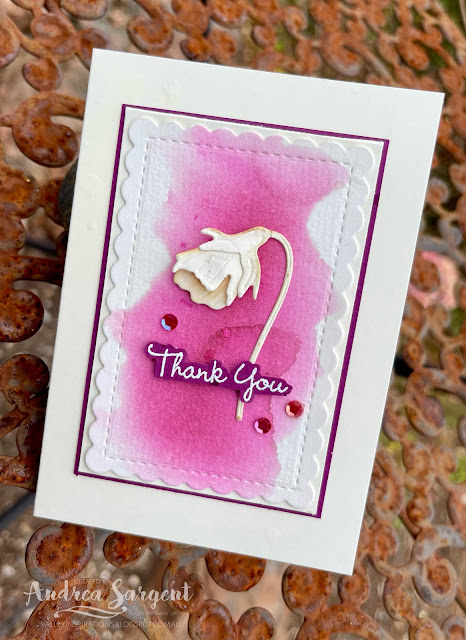
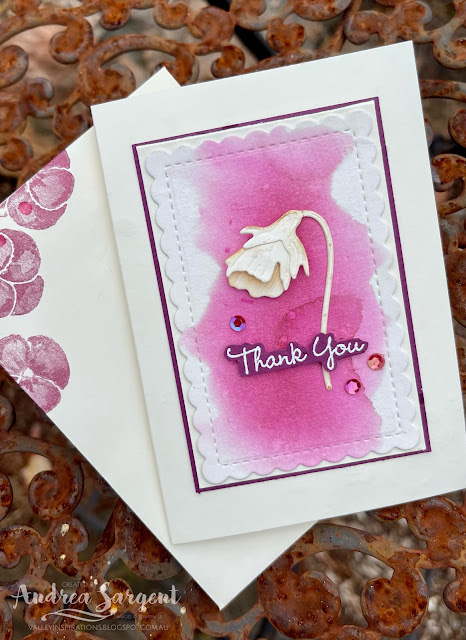
Some Rich Razzlebury Classic ink was wet on wet water-coloured on a piece of Fluid 100 Watercolor Paper. It was cut with a mid-sized die from the Scalloped Contour dies. 

Water-coloured pansies are delightful when wanting to send a note or tell someone you are thinking of them.

The 3 bud dies from the Pansy dies were used to cut Very Vanilla card-stock. The bud was formed and adhered on the water-coloured panel. 

Water-coloured pansies are delightful when wanting to send a note or tell someone you are thinking of them.

A sentiment from the same stamp set was White heat embossed on Rich Razzlebury card-stock, fussy cut and added with Mini Dimensionals. A few Artistry Blooms Adhesive-Backed Sequins were sprinkled around for that touch of bling. 

Water-coloured pansies are delightful when wanting to send a note or tell someone you are thinking of them.

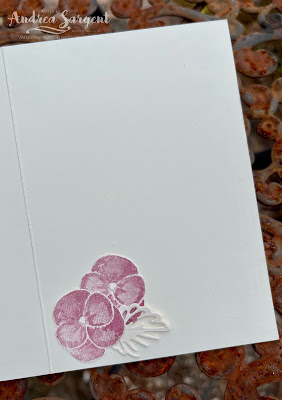
This front panel was adhered directly to a Very Vanilla Notecard. You may be thinking " but that's not what is pictured". Quite right - that's because the front panel was accidentally adhered slightly askew. I found it annoying but kept going and stamped some pansies inside the notecard. A couple didn't stamp well so I decided to cut off the card front; trim it down slightly and adhere it to a new card front. HOWEVER, it was one of those days when I couldn't cut straight; so I trimmed ... and trimmed ... and trimmed ... Eventually, it seemed straight but by then it was quite close to the scallops. In frustration with myself, I decided to mount it onto a slightly larger piece of Rich Razzlebury card-stock and adhere this to the card front. I know, it isn't quite so minimalist now.

Water-coloured pansies are delightful when wanting to send a note or tell someone you are thinking of them.

A couple of fussy cut stamped pansies (cut from the original inner stamping) and a small die cut leaf were adhered to the Very Vanilla card inner.  A few pansies were stamped onto the front of the coordinating Very Vanilla Notecard Envelope.

Water-coloured pansies are delightful when wanting to send a note or tell someone you are thinking of them.


Thank you so much for dropping by. I do value the time you spent with me.

If you live in Australia, don't already have a Stampin' Up! demonstrator and would like your own copy of Stampin' Up's 2021-2022 Annual Catalogue and or the new January - June 2022 Mini Catalogue then let me know and I will be delighted to send them to you.  Please don't hesitate to make contact with any other queries about these projects or Stampin' Up!. 

There is more Rich Razzleberry creativity. To continue with the blog hop, click on the "next" graphic below to be taken to the blog of the lovely, Diane Furniss. I always look forward to checking out Diane's creation (I wonder what she has in store this week). I do love seeing everyones' projects - so many ideas and such great inspiration.

Hope to see you next week when we will be featuring an extremely versatile colour Sahara Sand as we continue the weekly 2021-2022 Colour Creations blog hops.

Stay well, stay safe and be kind to yourself and others. 

Andrea 💕🐾

If you find a broken link or have come to this blog hop from a different entry point, you can view the full list of participants on Catherine Proctor’s blog, our wonderful Art With Heart Team Colour Creations Coordinator.  I so appreciate all Cathy does in coordinating this blog hop each week. She is such a special lady. Check out her wonderful creation while you are there.

#colourcreationsbloghop  #colourcreationsbloghop2022  #stampinup #stampinupdemo  #artwithheartteam  #handmadecards #makeacardsendacard #pansypatch


Wednesday, 7 July 2021

AWH Colour Creations #6 Blushing Bride

Blushing Bride with Pansy Patch & Hand-penned Petals

Hi. Welcome to Valley Inspirations with Andrea and the Art with Heart 2021-2022 Colour Creations Blog Hop. This week's Blog Hop is focussing on another colour starting with "B", that is Blushing Bride.
Blushing Bride is a pretty pale pink. It is a lovely colour and is part of the Subtles Colour Family.


Blushing Bride is produced in Stampin' Up!'s card-stock, both A4 & 12"x12"; Classic Stampin' inks (ink pads & re-inkers); Stampin' Write Markers; Hand Penned & Subtles Designer Series Papers (DSP) and Hand Penned Memories & More Cards.


I loved playing with Blushing Bride so ended up creating 2 cards to share. However, in doing so I am now running short on time to write my blog, so I won't go into as much detail as I usually do. That said, please don't hesitate to contact me if you have any queries. Here are my Blushing Bride projects: 


Project 1:

I started by playing with some water colouring on Fluid 100 paper, using Blushing Bride Classic Stampin' ink and Stampin' Up!'s flat end Water Painter. In the end I cut the piece of water-colour paper into 2 and have used the piece that was pretty well coloured all over. The 2nd piece will be used another time.


Once the water-coloured paper was dry, I embossed it with a new set of decorative masks, ie the Plenty of Patterns Decorative Masks and Shimmery Embossing Paste. I usually forget about embossing paste, but I love the effect. I'm thankful to Emma Goddard who used some embossing paste in her Facebook Live this week and reminded me to give it ago. 


I hadn't used my Pansy Patch bundle and thought it would be great to showcase Blushing Bride, so I die cut pieces of Basic White card-stock using the Pansy dies to form flowers, buds and leaves. I part coloured each piece using Blushing Bride, So Saffron & Soft Sea Foam Classic Stampin' inks and sponge daubers. Must admit, I used a Sponge Dauber for the leaves that had previously been used with a darker green. I tried it on scrap paper and no ink was transferred so I inked it up with Soft Sea Foam, however, the colour that transferred onto the leaves was not a pure Soft Sea Foam green so I applied ink lightly as I didn't have an un-inked dauber to use. The flowers and bud were pieced together using Glue Dots.


The water-coloured panel was mounted on a slightly larger piece of Blushing Bride card-stock. Before arranging the pansies, a piece of White Crinkled Seam Binding was wrapped around the card front and tied in a bow. The flowers, bud and leaves were arranged and then adhered with either Multipurpose Liquid Glue or Dimensionals.


A sentiment from the Pansy Patch stamp set was stamped in Versamark ink on Blushing Bride card-stock and heat embossed using White Stampin' Emboss Powder and a Heat Gun. A few white Elegant Faceted Gems were added as the finishing touch.


A piece of Basic White card-stock that had been pierced with the Stitched Greenery die was adhered to a Thick Basic White card-stock base. I so love the subtle and beautiful effect of this die. The card front was popped up on Dimensionals.


The card inner was created by stamping the delightful pansy and leaves in Blushing Bride and Soft Sea Foam. Another sentiment from the Pansy Patch stamp set was stamped in Polished Pink ink to give the sentiment added strength of colour. The card inner was mounted on Blushing Bride card-stock. 


A Basic White C6 Envelope was also stamped with the delightful little pansy in Blushing Bride ink to link it to the card it will carry. (I love Stampin' Up!s distinctive stamps that give variegated levels of colour with just one step - check out the detail of the pansies on the envelope.)


PROJECT 2:


After creating the pansy card, I remembered the Stampin' Up!s Designer Series Paper Sale that is on throughout the month of July, with 15% of selected papers. It's a good deal that needs to be highlighted so you don't miss out. This was the impetus for the 2nd project. Even though I was running out of time, I didn't want to miss the opportunity to showcase at least one of the gorgeous Designer Series Papers - especially as the Hand Penned DSP is one of my favs.


One of the designs in the Hand-Penned DSP was Blushing Bride and White, so it was perfect for my card. A piece was cut to card front size. Both Basic White and Blushing Bride card-stocks were cut with one of the dies from the Basic Borders dies. Do check them out in the catalogue - they are great.


The detailed die from the Penned Flowers dies was used to die cut Basic White card-stock multiple times. The die cuts were then arranged and adhered all over the white panel, giving a subtle, though effective tone on tone effect. White Crinkled Seam Binding was wrapped around the centre and tied in a bow.


A floral stamp from the coordinating Hand-Penned Petals stamp set was stamped in Basic Grey ink twice and the flower's infill stamp was used with Blushing Bride ink. Stampin' Blends Combos were used to further colour the flowers and leaves, ie Polishing Pink, So Saffron, Smoky Slate and the Colour Lifter. The flowers alone were coloured on the second image and they were fussy cut and added over the first image to give added dimension. A sentiment from the stamp set was also stamped in Basic Gray ink and fussy cut. Pearl Basic Jewels were added to finish the card front design.


The card inner was created with a piece of the same Blushing Bride Hand-penned DSP and a large Scalloped Contours die. A Basic White C6 Envelope was stamped with the same flower, but this time in Blushing Bride ink. It doesn't need a lot of effort to bring coordination.


Thank you for visiting Valley Inspirations with Andrea. I had fun playing with some water-colouring, daubering/sponging and infill stamping/Blends colouring featuring Blushing Bride to create these projects to share. 
 

If you are in Australia, don't already have a Stampin' Up! demonstrator and would like your own copy of Stampin' Up's 2021-2022 Annual Catalogue then let me know and I will be delighted to send one to you. Please don't hesitate to make contact with any other queries about this project or Stampin' Up!. 

There is more Blushing Bride creativity. To continue with the blog hop, click on the "next" graphic to be taken to the lovely Diane Furniss' blog. I am looking forward to checking out Diane's creation and everyone else's. If you started part way through or if you missed someone click on the link below to go to Catherine Proctor's blog where she has a list of all the participants in tonight's Colour Creation Blog Hop and their links.

Hope to see you next week when we will be featuring Bumblebee; and don't forget the AWH Heart of Christmas Blog Hop launches every Monday evening up to mid-December.

Stay well, stay safe and be kind to yourself and others.

Andrea 💕🐾


If you find a broken link or have come to this blog hop from a different entry point, you can view the full list of participants on Catherine Proctor’s blog.  Check out her amazing creation while you are there.

#colourcreationsbloghop

AWH Heart of Christmas - #10

Christmas with Noel Greetings Hello. Welcome to  Valley Inspirations with Andrea  and the tenth  Art with Heart Team Heart of Christmas Blog...