Art with Heart Wow Tutorials

Showing posts with label Blending. Show all posts

Wednesday, 29 July 2026

Be Inspired - July 2026 - Creating Backgrounds

Be Inspired Design Team Blog Hop

CREATING BACKGROUNDS

Welcome to Valley Inspirations with Andrea and the July Be Inspired Blog Hop where we are focusing on projects that show wonderful backgrounds. However you have arrived here, whether from Melanie Hocking or directly here, I am so delighted that you are here.


As I was thinking about the type of background I would use my minds flittered around thinking “oo, I could do that; and then - well how about that … or that …. There are many types of backgrounds to try and many old favourites. In the end I decided to share one of my favourite backgrounds, that is Dry Embossed backgrounds. I love the subtle tone on tone texture that allows the focal point to shine while providing interest to the project.


You may recognise the gorgeous Floral Spray 3D Embossing Folder that was used to emboss the Basic White background. This is a wonderful embossing folder. I love that some parts of the background are left in-embossed to contrast with the embossed sections.


To provide a simple focal point a Party Banner die was used to cut the end of the Basic White banner that was mounted on Hydrangea Hue In Color Shimmer Speciality Paper. Violets were both stamped and die cut using the Pressed Violets bundle. I love working with this bundle as it brings warm childhood memories of picking violets for my Mum. The violets were coloured in Hydrangea Hue and the leaves in Soft Sea Foam with a touch of Peaceful Pine to add a little shading & depth.


Iridescent Pearls Basic Jewels add a little shimmer to the flower centres and around the sentiment. White ribbon was cut in half lengthwise and tied into a double bow then ticked in between the violets and sentiment.


The card inner was simply stamped with it of the violet stamps in Secret Sea Classic ink. I often use this ink instead of black. If you have time, the violets could be coloured with StampinBlends, but my time was running away with speed so it is simply stamped.


A Stampin’ Basic White C6 envelope was also stamped with the violets in Secret Sea ink.


Thank you so much for dropping in on your way around the July Be Inspired Blog Hop. I so appreciate you.


I am really looking forward to seeing what everyone else has created for the Creating Backgrounds Blog Hop.  Next in line is the amazing Angela Meiritz-Reid. Just click on the "Next" graphic below to head over to Angela’s blog.


Sunday, 29 March 2026

CASEing the Catty #563 CASE The Easter Joy Suite

CASE Stampin’ Up!s Easter Joy Suite meets Scalloped Wishes

Hello, welcome to Valley Inspirations with Andrea & #563 Challenge with CASEing the Catty.


I am so glad you have dropped by. You may have come from Rochelle Blok as you take this week’s Blog Hop or perhaps arrived directly here; either way I am delighted you are here. At the end of my blog, I have linked to Peta Stephens so you can continue with the Blog Hop.

At CASEing the Catty we love to use the samples from the Stampin' Up! Catalogues and On Line Exclusives as inspiration and each week we have a different theme to guide our CASEing. To CASE is to "Copy And Selectively Edit" or some say "Copy And Share Everything". This week we are CASE-ing the projects showcasing the Easter Joy Suite found on pages 34-36 of the 2026 Stampin' Up! January-April Catalogue.


As you can see above, I have CASEd the 3rd card down on the 2nd half of page 36. The card has an oval of flowers with 3 daffodils featured in the centre. As soon as I saw this card I thought of the gorgeous Scalloped Wishes bundle from the latest On-line Exclusives release. I turned the card to portrait and featured 3 die cut dragon flies instead of the daffodils. Of course I also  added my own touch with a bow and gems as finishing touches.


I started with a Basic Beige card base, I added a background panel from one of my favourite Designer Series Papers - Speciality Delicate Whispers. A Basic White Scalloped Oval, that was cut using the largest Scalloped Wishes die, was lightly Bronze Heat embossed around the edges and then was popped up on Dimensionals.


Basic White leaves were cut using the 2 leaf dies from the Scalloped Wishes dies and flowers with the flowers die. Using Blending Brushes, Old Olive ink was partially blended over each of the leaves - darker at the base then lightening to white at the tip. Each of the flowers had a little Pretty in Pink ink partially blended over them.


The coloured leaves were layered around the oval near the edge. Once they were arranged nicely, Glue Dots or Multipurpose Liquid Glue was used to adhere them in place. Most of the flowers were arranged near the base of the oval and a couple of flowers were sprinkled in other spots.


A double bow was added with Glue Dots and the flowers were positioned around the centre of the bow. Pretty in Pink glittering Gems were added to the centres of the flowers and a couple extra gems near the fussy cut Bronze embossed sentiment. The dragon flies bodies were cut from Bronze Foil and the wings from the Mossy Meadows "B" side of the Speciality DSP.


The card inner was simply a Basic White panel with a strip of the same DSP as the card front. A fourth dragonfly was also added. A C6 Basic White envelope was decorated with a remaining piece of the same DSP.


Thank you so much for spending some time here with me. I so appreciate you dropping in. 


Don’t miss any of the inspiration from this creative CASEing The Catty Crew. The next blog in the hop is by the wonderful Peta Stephens and Marvi. Just click on the "next" graphic below to be taken to her blog. I wonder which project she has CASEd - I am sure her project will be something special.


Join In The Challenge: We would love you to share a project that you have created for this Challenge which has been inspired by the Easter Joy Suite. To share, all you need to do is go to the CASEing The Catty Challenge Group on Facebook. If you aren't a member, it’s easy to request to join and once anpproved all you need to do is upload a photo of your project to the main section. You can click on the graphic below to be taken to the group on Facebook. We would so love to see your creation.


#ctc563 #stampinup #stampinupaustralia #stampinupsouthpacific #stampinupdemo  #handmadecards #makeacardsendacard #stampinupdemonstrator #papercrafting #valleyinspirations  #scallopedwishes  #easterjoy #delicatewhispers  #caseingthecatty #artisandesignteam2026 #artisandesignteam

Monday, 6 October 2025

AWH Heart of Christmas Blog Hop #6

Christmas with Snowy Delights & Traditions of Christmas

Hello. Welcome to Valley Inspirations with Andrea and the sixth Art with Heart Team Heart of Christmas Blog Hop for 2025. We are sharing Christmas inspiration each Monday evening until the end of November. I do hope you will check us out as often as you can.


This week I am sharing two projects that were started recently as extra projects for different hops but not finished in time for the hop. Here they are:


The first card, top left, was started for last Colour Creations Wednesday’s Instahop (a hop on Instagram) where we were showcasing Fresh Freesia. I created 2 large snowflakes using the Snowy Delights Masks were the first two layers were Fresh Freesia Classic ink. The third layer was Pretty in Pink and the fourth Petunia Pop. I love the detail of the snowflakes using the masks. They can then be die cut with corresponding Snowy Delights dies.


I had a card fold in mind that was similar to this one and then I saw Krista in this month’s Crafty Carrot Co session create a card with this fold. As I was watching her, my mind was planning this card. Thank you Krista for your inspiration. As you can see in the close-up below the largest die cut snowflake from the Snowy Delights dies is the central feature. Two die cuts were adhered together to give strength. A belly band was created using the white Snowflake Speciality Paper. A ribbon was tied around the belly band and into a bow. The snowflake was adhered on top with Mini Dimensionals and some Iridescent Faceted Gems strategically added. A sentiment from the Snowy Delights stamp set was white heat embossed, cut in 2 and fussy cut out.


To open the card, the belly band with a large snowflake is slid off the card. This enables the beauty of the blended snowflakes to show. They had been scored and the smaller section adhered to the back of the card.


The two blended snowflakes are lifted to reveal the next layer with the second section of the sentiment and some small snowflake stamping in Petunia Pop ink. The background is a panel of the Snowflake Speciality Paper that has some Fresh Freesia blended over the edges.


The centre panel is lifted to reveal the personal message. A panel of Basic White card-stock was stamped with more small snowflakes in Fresh Freesia and then another sentiment in Petunia Pop.


I do love this style of card with the numerous reveals, and yes, it still fits into a standard A6 Basic White envelope. The envelope was simply stamped with more small snowflakes in Petunia Pop.


CARD 2


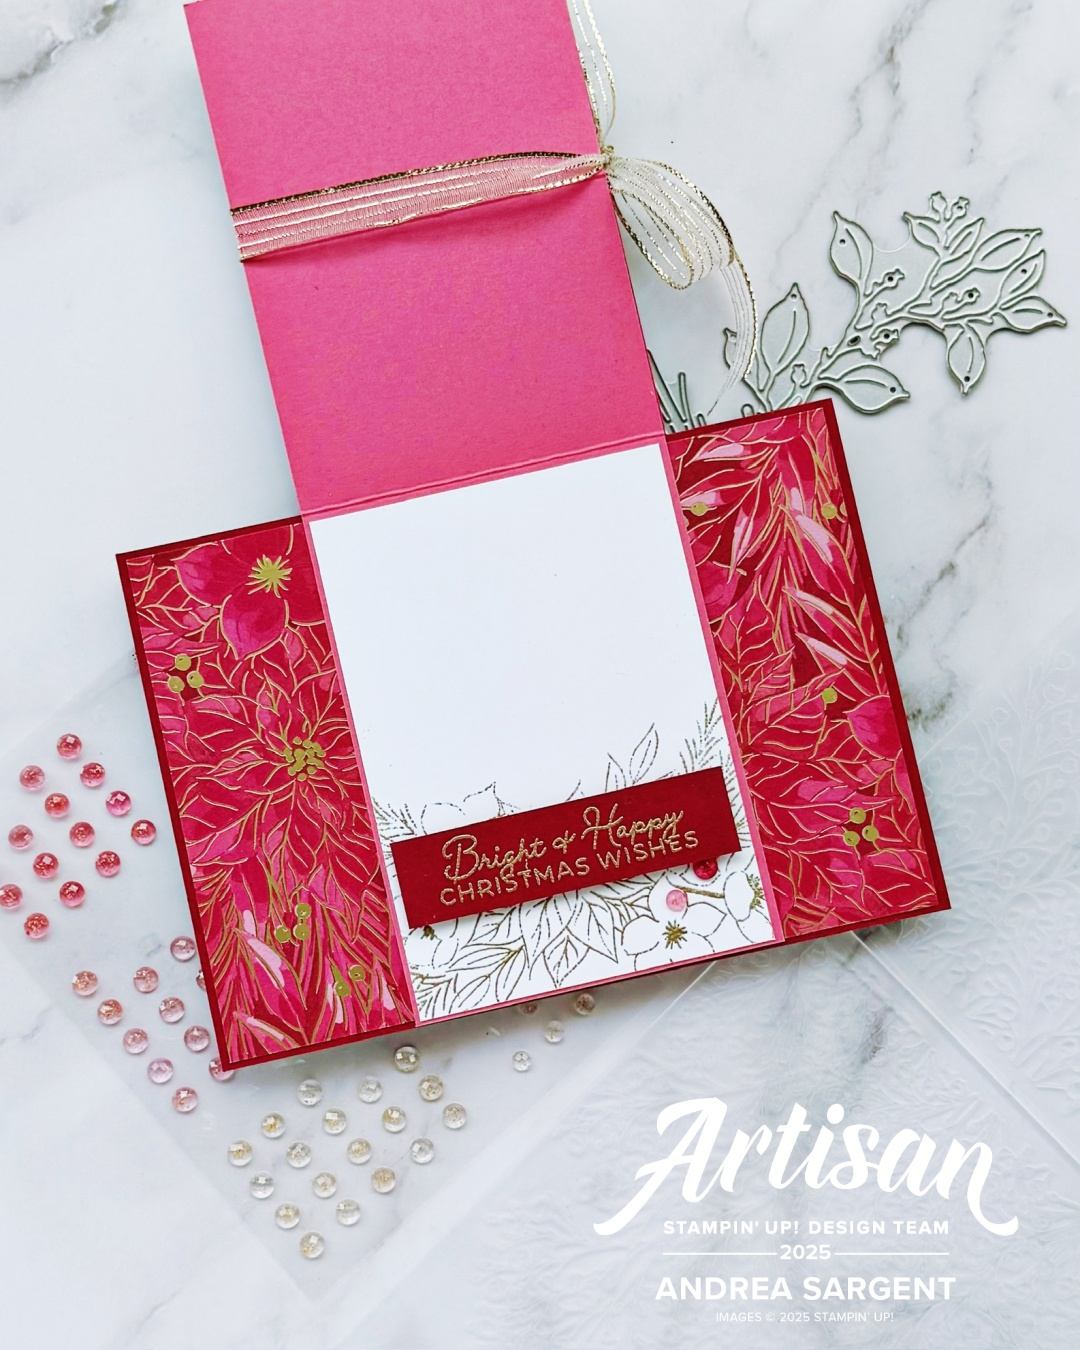
I created 2 cards using this fold 2 weeks ago. At that time I had started to cut the card-stock and Traditions of Christmas DSP. I was so pleased with it when I finished the card this week that I wanted to share it with you. The background uses one of the Traditions of Christmas DSP designs mounted on Cherry Cobbler card-stock.


The bunch of flowers stamp from the … stamp set was stamped in Versamark ink and heat embossed with Gold Wow Embossed Powder. The flowers were water-coloured with Cherry Cobbler, Old Olive and Pretty in Pink inks. There is a coordinating die that can cut it out. The Basic White background panel was embossed with the Pressed Flowers Embossing Folder.


If you don’t want to embossed and colour this bunch of flowers you can die cut similar bunches out from the Traditions of Christmas DSP. The Easel Fold section uses Strawberry Slush card-stock as the base. Cherry Cobbler card-stock was gold heat embossed with the sentiment.


As you can see, 2 Basic White card-stock pine fronds cut using the … dies were poked behind the floral arrangement. A gold die cut sprig of leaves was also tucked behind.  Gorgeous Strawberry Slush & Pretty in Pink gems were sprinkled around with a couple coloured with a Dark Cherry Cobbler Blend.


Here you can see underneath the Easel panel. A white panel was gold heat embossed with the poinsettia stamp design and the Cherry Cobbler gold embossed piece was popped up with Dimensionals so it can act as a stopper for the easel. It can be used for writing a personal message at the top, however, I also added a Basic White panel on the back of the card (with a strip of DSP) for a more verbose personal message. A Basic White C6 envelope was gold heat embossed using the poinsettias stamp design to tie it in with the card it will hold.


There is more Christmas creativity, so do continue with this blog hop. Just click on the "next" graphic below to be taken to the blog of the lovely Kate MorganI always look forward to checking out Kate’s creation(s). I do love seeing everyone’s' projects - there is so much inspiration.

Also, many of us participate in the Colour Creations Blog Hop that goes live every Wednesday night where we showcase one of Stampin’ Up!s colours each week. We would love you to also check in on us on Instagram for more creative inspiration.

Stay well, stay safe and be kind to yourself.

Andrea 💕🐾


If you find a broken link or would like to view the full list of participants go to Sharon Davern’s blog @ Rhapsody in Craft. Sharon is our amazing Art With Heart Team Heart of Christmas Coordinator.  Check out her delightful creation while you are there.

If you live in Australia, don't already have a Stampin' Up! demonstrator and would like your own copy of the Stampin' Up 2025-2026 Annual Catalogue and or the new September-December 2025 Mini Catalogue, then let me know and I will be delighted to send them to you.  Please don't hesitate to make contact regarding any queries about this project or Stampin' Up!. 

#heartofchristmas  #heartofchristmas2025 #stampinup #stampinupaustralia #stampinupsouthpacific #stampinupdemo  #handmadecards #stampinupdemonstrator #papercrafting #artwithheartteam  #papercrafter  #valleyinspirations   #artisandesignteam  #artisandesignteam2025 #traditionsofchristmas #snowydelights

Wednesday, 24 September 2025

Be Inspired - Masculine Makes

 Be Inspired Design Team Blog Hop


Welcome to Valley Inspirations with Andrea and the September Be Inspired Blog Hop where we are focusing on Masculine projects. However you have arrived here, whether from Annette Elias or directly here, I do so appreciate that you are here.


With a theme of Masculine Makes my mind went to the current “Autumn” products. I love leaves and colouring them in autumnal colours, even, like know we in Australia are heading into spring. I hadn’t used the Gathering Moments bundle and don’t currently have the coordinating DSP. As I was thinking about what to create I remembered something that I had seen many years ago but hadn’t had the right products to give it a go - but the current offerings are perfect. I have created a seen within a leaf shaped die cut card front.


I started with a Basic Beige card base and a Country Woods Designer Series Paper background that was mounted on a slightly larger piece of Crumb cake card-stock. One of the large leaf dies from the Gathering Moments dies was used to cut a hole in the card background panel.


A piece of Basic White card-stock was coloured with autumn colours to create an unusually coloured sky. Blending Brushes were used with Crushed Curry, Pumpkin Pie, Cajun Craze and Secret Sea. Mountains, trees and larger trees were cut from Basic White card-stock and then the mountains were coloured with Crushed Curry and a little Pumpkin Pie; the trees with Old Olive - in different strengths. A small piece of the Soft Sea Foam Peace on Earth Glimmer Paper was die cut to be some water glimmering in the light of the moon. It was also coloured with autumn little Crushed Curry and a Blending Brush.


The blended panel was adhered to the Basic Beige card-base and the mountains, trees and water were arranged while regularly checking how the scene would look through the die cut hole.


Some leaves were stamped in Old Olive, Cajun Craze with touches of Pumpkin Pie were stamped using the Gathering Moments stamp set. I adore the effect created by these stamps. The sentiment is similar to one in the mentioned stamp set, however, this one was laying on my workstation  so trimmed it down and popped it up on Mini Dimensionals.


The design for the card was finished with a little Old Olive Linen Thread bow and some gorgeous Cajun Craze & Gold Dots.


The card inner simply used some stamped leaves and a little Mossy Meadows splatter.

Thank you so much for calling in on your way around the Be Inspired Blog Hop. 


I am really looking forward to seeing what everyone else has created for the Masculine Makes theme.  Next in line is the amazing Lynn Cheesmur. Just click on the graphic below to head over to Lynn’s blog.


The full list of those participating in this hop is:

Andrea Sargent <you are here 

#beinspired  #beinspireddesignteam  #stampinup   #stampinupofficial  #stampinupaustralia #valleyinspirations  #artisandesignteam #artisandesignteam2025  #light&wonder  #stampinupofficial #gatheringmoments


Friday, 7 March 2025

Funky Folds Blog Hop #11

ANYTHING GOES WITH A FUNKY FOLD

Welcome to the eleventh Funky Folds Blog Hop.


We are a group of like-minded paper crafters who love to make cards with funky folds. Funky actually means "modern and stylish in an unconventional or striking way"... so we are featuring cards that are not your usual rectangle/square, portrait or landscape style. Think 'easel', 'pop-up', 'gatefold', 'z-fold', 'shaped' or 3D cards etc. The list is endless. Most of the Blog Hops have an 'anything goes' theme using any type of 'funky' card fold. 

A male friend has a birthday coming up so I thought of him as I created this card. He is an active fella so I’m hoping he loves the beach. Here is my card …


I have created a 3D card with a hexagon base featuring the Beach Day stamps and dies. To fold the card so it can slide into an envelope, it’s pushed down in the centre, as shown below.


Keep squeezing the card till it is flat - well flattish. With all the card-stock layers it won’t be totally flat like a card with a fold in the middle. See the folded flattish card below. I must confess that I was so intent on creating this fold (for the first time), that I didn’t stop to think about placement of  all the pieces to enable the folded card to fit into an envelope. Oops!  It just means that I will need to make a specially tailored envelope for this card. The envelope will need an to be a bit bigger than a standard 15.5cm x 15.5cm square envelope.


The card base was cut and scored from Pool Party card-stock and the Beach Day pieces were either stamped on or die cut from Basic White card-stock.


Some of the pieces were stamped in Misty Moonlight Classic Stampin’ ink and then coloured with Stampin’ Blends Combos, including Blueberry Bushel, Azure Afternoon, Granny Apple Green / Lemon Lime Twist, Crumb Cake and the Colour LifterThe reeds were stamped in Granny Apple Green, the sandcastles with Crumb Cake and the Sea Gull in Smokey Slate inks. The Life-saver ring was partially coloured with a Real Red Dark Blend. The Life Saver station was lightly coloured with some Basic Beige ink and a Blending Brush. Similarly, the palm tree trunk was coloured with a little Pecan Pie ink and the palm leaves with Granny Apple Green. I think the latter Blending Brush may have previously been used with some Old Olive ink as the green looks a bit muted.


The outside edge of the hexagon base was decorated with some retired Designer Series Paper, called Waves of the Ocean DSP. The “B” side of the Season of Elegance Speciality DSP was used to create a sandy beach.


The “Happy Birthday” sentiment from the Beach Day Stamp set was stamped in Misty Moonlight ink onto some Pool Party card-stock. The sentiment was fussy cut and separated. The final touch, the addition of some Riverside Flattened Pearls.


Thank you so much for dropping in on your way around this Funky Folds Blog Hop. I do so appreciate that you spent time with me. I hope you like this fun project.


Up next is the lovely Cathy PinchbeckI am looking forward to seeing Cathy’s funky fold and to hop around to check out everyone’s’ creations in this March Funky Folds Blog Hop. Just click on the graphic below to be taken to Cathy’s blog.


Here is a list of everyone participating in Funky Folds Blog Hop - March 2025

Be Inspired - July 2026 - Creating Backgrounds

Be Inspired Design Team Blog Hop CREATING BACKGROUNDS Welcome to Valley Inspirations with Andrea and the July  Be Inspired Blog Hop  where w...