Art with Heart Wow Tutorials

Wednesday, 25 May 2022

AWHT Colour Creations #4 Sweet Sorbet

Sweet Sorbet with Happiness Abounds using Watercolour Techniques

Hello. Welcome to Valley Inspirations with Andrea and the Art with Heart Colour Creations Blog Hop. We are continuing to work though new the Stampin' Up! In Colours and then will proceed through all the other colours in alphabetical order. 


This week’s Blog Hop is focussing on a bright red (that has a touch of pink) called Sweet Sorbet. As mentioned, Sweet Sorbet is part of the In Colour Family for 2022-2024 and is a lovely red. This colour is gorgeous on its own or can be combined with Blushing Bride & Sahara Sand or Smoky Slate. I’m looking forward to exploring this colour further.


Sweet Sorbet is produced in Stampin' Up!'s card-stock, both A4 & 12"x12"Classic Stampin' inks (ink pads re-inkers); Stampin' Write Markers; Stampin' Blends, In Colour Designer Series Papers, Lovely in Linen DSP, Tea Boutique DSP & Tea Boutique Cards & Envelopes, In Colour Glimmer paper, Metallic Woven Ribbon, In Colour Bakers Twine Pack, In Colour Matt Decorative Dots. The cards below have used Sweet Sorbet Classic Stampin' ink (both re-inker and Stamp Pad), Card-stock and a Stampin’ Write Marker plus a range of other non-PP bits and pieces.

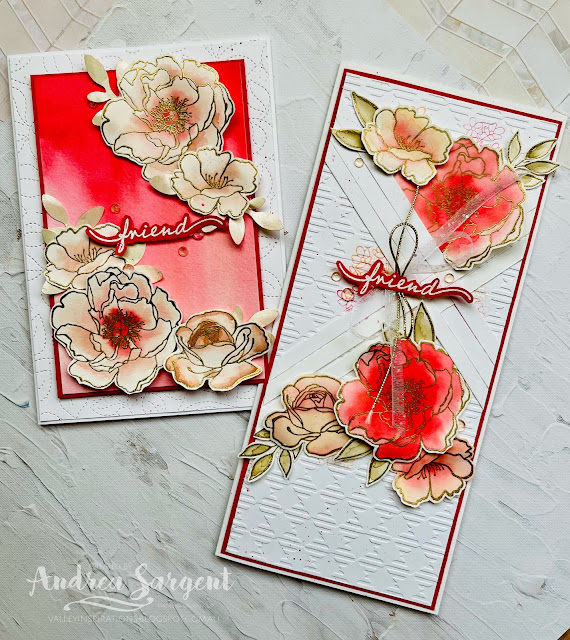
I have created 2 cards to showcase Sweet Sorbet:

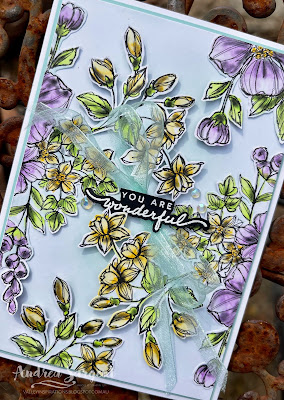
Show a friend that you care with a personally created card using the delightful Happiness Abounds roses.

Isn't Sweet Sorbet a lovely colour.  Initially I wasn't sure if I liked it but having played with this colour using water-colouring techniques, I am loving it. I also need to apologise for this week's photography - I usually photograph outside but it has been raining on and off all day. The photos haven't captured a true Sweet Sorbet colour and the lighting isn't brilliant. Will re-photograph them all tomorrow.

CARD 1:

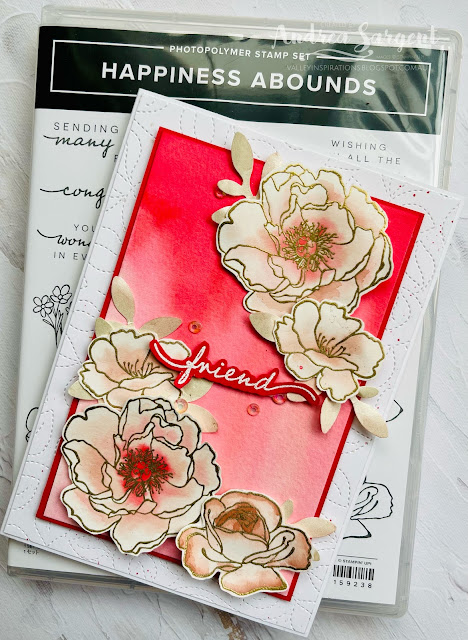
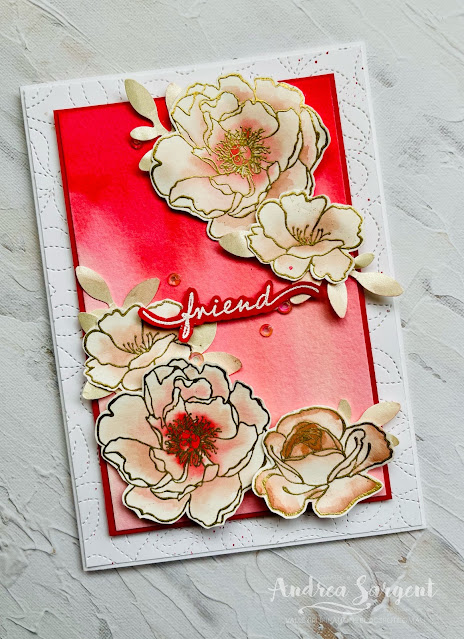
This card shows the beauty of Sweet Sorbet through a water-coloured ombre panel. I have created a similar watercolour panel with the previous In Colours. It is a great technique to help get to know a new colour.

Show a friend that you care with a personally created card using the delightful Happiness Abounds roses.

A half panel of Fluid 100 Watercolor Paper was fully watered down and then ink from a Sweet Sorbet Re-inker was applied to the top of the panel with the large flat Water Painter, allowing the ink to run/drip down to the bottom. The water-coloured panel, when dry, was mounted on to a slightly larger piece of Sweet Sorbet card-stock.  Basic White card-stock card front was embossed with the delightful Stitched Greenery die, splattered with some Sweet Sorbet ink using a Stampin' Write Marker and then adhered directly to a Thick Basic White card base. 

Show a friend that you care with a personally created card using the delightful Happiness Abounds roses.

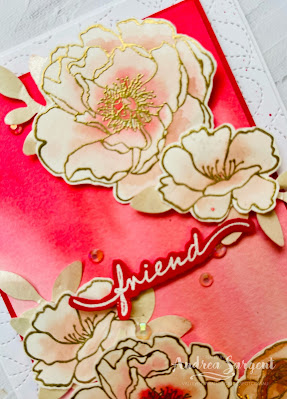
Flowers from the Happiness Abounds stamp set were Gold heat embossed using Versamark, Gold Emboss Powder and a Heat Gun. These flowers were water-coloured using Blushing Bride ink and a touch of Sweet Sorbet ink in the centre of the larger flower. Once dry, the flowers could be cut with the coordinating Blossoming Happiness dies. As I was running out of time, I decided to punch out some leaves using the Bough Punch and Pearlescent paper. The floral arrangement was inspired by the current Global Design Project challenge that was to CASE a selected Charlotte Mallett card.

Show a friend that you care with a personally created card using the delightful Happiness Abounds roses.

The centre panel was added to the card base with Dimensionals. This card front was finished with a sentiment from the same stamp set that had been White heat embossed on Sweet Sorbet card-stock. Some Iridescent Rhinestone Basic Jewels added some shimmer, together with a little Wink of Stella (which is so hard to capture in the photos).

Show a friend that you care with a personally created card using the delightful Happiness Abounds roses.

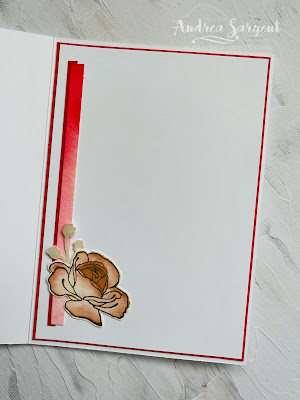
A piece of Basic White card-stock was mounted to a slightly larger piece of Sweet Sorbet card-stock and then adhered into the inner card base. A couple of strips of left-over card-stock and the water-colour panel were added to the side together with a left over water-coloured rose and punched twig. The LHS of a Basic White C6 Envelope was stamped a number of times with the tiny twig of leaves stamp in Versamark ink and was then gold heat embossed. 

Show a friend that you care with a personally created card using the delightful Happiness Abounds roses.


CARD 2:

This second card features more water-coloured roses. In fact the second card came into being because initially I had water-coloured the roses with a Petal Pink and Sweet Sorbet inks. As they were turned out darker in colour they didn't show up well on the water-coloured panel on card 1 so I stamped and gold embossed more flowers on Shimmery White card-stock for that card. Not wanting to waste the first set of water-coloured roses I created the card below.

Show a friend that you care with a personally created card using the delightful Happiness Abounds roses.

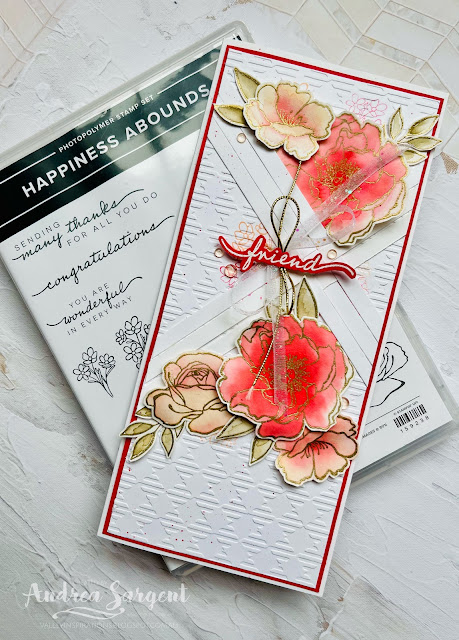
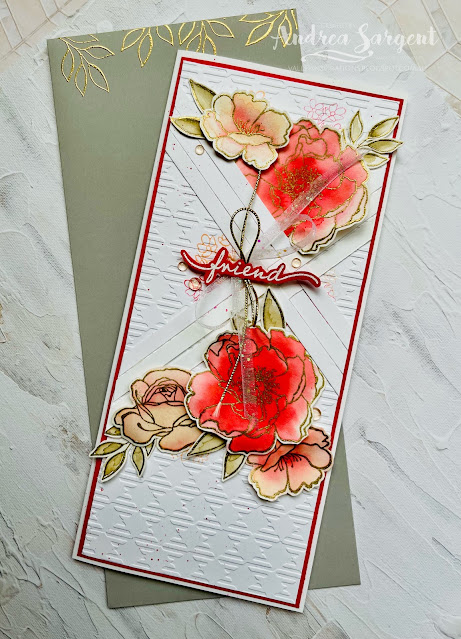
A Basic White card-stock front was stamped with the little flower sprays from the Happiness Abounds stamp set using either Petal Pink or Sweet Sorbet (stamped off once) inks. The panel was dry embossed with the Gingham Embossing Folder. As I was creating this card I remembered Susan Wong's challenge (one of Stampin' Up!s Artisans' from New Zealand) to create using left-over bits and pieces. As my base card fronts are usually cut a little smaller that the front of a standard card base, I have a large pile 5-6cm wide strips of Basic White card-stock. Also, as a weaver, I thought I would weave a number of strips together and add them to the background as some extra interest. (I think I had seen something that had been tucked away for a time such as this.) I also added some Sweet Sorbet splatter.

Show a friend that you care with a personally created card using the delightful Happiness Abounds roses.

The water-coloured roses were arranged around the woven strips and some leaves were stamped, gold embossed and water-coloured with Sahara Sand ink. The roses and leaves were adhered in place with either Multi-purpose Liquid Glue or Dimensionals.

Show a friend that you care with a personally created card using the delightful Happiness Abounds roses.

A sentiment from the Happiness Abounds stamp set was White heat embossed on Sweet Sorbet card-stock, fussy cut and added with Mini Dimensionals over a bow tied with a thin strip of White Glittered Organdy Ribbon and Gold Simply Elegant TrimPolished Dots were sprinkled around for that added touch of very subtle bling.

Show a friend that you care with a personally created card using the delightful Happiness Abounds roses.

A piece of Basic White card-stock was mounted to a slightly larger piece of Sweet Sorbet card-stock before being adhered to the card inner. A left-over rose and a couple of leaves were added as well.  A Smoky Slate Stampin' Up! Slim-line Envelope was stamped with leaves that were gold heat embossed.

Show a friend that you care with a personally created card using the delightful Happiness Abounds roses.


There is more Sweet Sorbet creativity. To continue with the blog hop, click on the "next" graphic below to be taken to the blog of the lovely, Diane Furniss. I always look forward to checking out Diane's creation (I wonder if she has created one of her amazing fun-folds?). I do love seeing everyones' projects - always so much inspiration.

Hope to see you next week when we will be featuring another In Colour, Tahitian Tide, as we continue the weekly 2022-2023 Colour Creations blog hops.

Stay well, stay safe and be kind to yourself and others. 

Andrea 💕🐾


If you find a broken link or have come to this blog hop from a different entry point, you can view the full list of participants on Catherine Proctor’s blog @ What Cathy Made. Cathy is our wonderful Art With Heart Team Colour Creations Coordinator.  I so appreciate all she does in coordinating this blog hop each week. She is such a special lady. Check out her wonderful creation while you are there.

#colourcreationsbloghop  #stampinup #stampinupaustralia #stampinupsouthpacific #stampinupdemo  #handmadecards #makeacardsendacard #stampinupdemonstrator #papercrafting #artwithheartteam  #papercrafter #huesofhappiness #stamper #happinessabounds

Wednesday, 18 May 2022

AWHT Colour Creations #3 Starry Sky

Starry Sky with Nature's Prints and Water-colour

Hello. Welcome to Valley Inspirations with Andrea and the Art with Heart Colour Creations Blog Hop for 2022-2023. Earlier this month we commenced working though all the Stampin' Up! colours, starting with the new In Colours for 2022-2024.


This week’s Blog Hop is focussing on a rich and beautiful junior blue called Starry Sky. As mentioned Starry Sky is part of the new 'In Colour' Colour Family and is one of my favourite new In Colours - it is fighting it out with Orchid Oasis. This colour is gorgeous in a monochromatic project or would be amazing with pinks or yellows or so many other combinations. 


Starry Sky is produced in Stampin' Up!'s card-stock, both A4 & 12"x12"Classic Stampin' inks (ink pads re-inkers); Stampin' Write Markers; Stampin' Blends, In Colour Designer Series Papers and Tea Boutique, Sun Prints, Butterfly Kisses DSPs, Metallic Woven Ribbon, In Colour BakersTwine and Matte Decorative Dots, Fun Flower Resin Dots and Tea Boutique Cards & Envelopes. The card below has used Starry Sky Classic Stampin' ink (both re-inker and Stamp Pad), Card-stock and Stampin' Blends plus a range of other non-PP bits and pieces.

Here is this week's card to showcase Starry Sky:


Isn't Starry Sky a delightful colour.  It is such a relief that this blog is completed on time as I have been without power for nearly all of the day and my phone ran out of power nearing the end of the day. At the last moment SA Power came and fixed my connection to the power source. Phewwww.

CARD 1:

This card shows the beauty of Starry Sky through a water-coloured ombre  background panel.


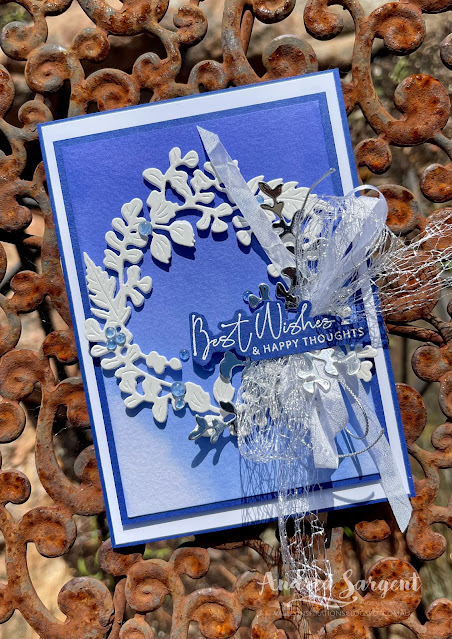
A half panel of Fluid 100 Watercolor Paper was watered down and then ink from a Starry Sky Re-inker was applied to the top of the panel with a large Water Painter, allowing the ink to run/drip down to the bottom. I have so much fun with this technique and I love the effect. It is a great way to get to know a new colour as water-colouring can show the different hues that make up the colour. The water-coloured panel was mounted to slightly larger piece of Starry Sky card-stock.  A piece of Basic White card-stock was adhered directly to the Starry Sky card base


A wreath from the Nature’s Prints dies was die cut 3 times using Thick Basic White card-stock and a 4th time from Mother of Pearl Speciality Paper. The wreaths were then layered directly one on top of the other with the Mother of Pearl wreath on top. Pieces of gorgeous Metallic Mesh Ribbon, the White Crinkled Seam Binding and the Silver Simply Elegant Trim were tied into bows and adhered with Glue Dots on the right side of the wreath. Some extra sprigs from the same set of dies were die cut from Silver Foil and tucked in and around the bow. This mounted centre panel was added to the card base with Dimensionals.


The card front was finished with a sentiment from the Nature’s Prints stamp set that had been White heat embossed on Starry Sky card-stock. Some Clear Polished Dots were coloured with a Light Starry Sky Blend and added around the sentiment and on the wreath to give a little shimmer.


A piece of Basic White card-stock that had been stamped  with the leaf from the stamp set was adhered into the inner card base.  The front and the back flap of a Basic White C6 Envelope also was stamped with the same leaf stamp in Starry Sky ink.


I had a second card design in mind using a new (to me) fun fold but my power outage changed my plans for the day. I still want to play with this fun fold so it is likely to turn up sometime in the next few weeks. Keep an eye out.

Thank you so much for dropping by. I do value the time you take out of your day to spend with me.


If you live in Australia, don't already have a Stampin' Up! demonstrator and would like your own copy of the new 2022-2023 Annual Catalogue and or the January - June 2022 Mini Catalogue then let me know and I will be delighted to send them to you.  Please don't hesitate to make contact with any other queries about this project or Stampin' Up!. 

There is more Starry Sky creativity. To continue with the blog hop, click on the "next" graphic below to be taken to the blog of the lovely Diane Furniss. I always look forward to checking out Diane's creation (I wonder whether she has a fancy fold in store this week - she is amazing with fancy folds). I do love seeing everyones' projects - there are always so many ideas.

Hope to see you next week when we will be featuring another new colour, Sweet Sorbet, as we continue the weekly 2022-2023 Colour Creations blog hops featuring the new In Colours.

Stay well, stay safe and be kind to yourself and others. 

Andrea 💕🐾


If you find a broken link you can view the full list of participants on Catherine Proctor’s blog, What Cathy Made, Cathy is our wonderful Art With Heart Team Colour Creations Coordinator.  I so appreciate all Cathy does in coordinating this blog hop each week. She is such a special lady. Check out her wonderful creation while you are there.

#colourcreationsbloghop  #stampinup #stampinupaustralia #stampinupsouthpacific #stampinupdemo  #handmadecards #makeacardsendacard #stampinupdemonstrator #papercrafting #artwithheartteam  #papercrafter #naturesprints 


Wednesday, 11 May 2022

AWHT Colour Creations #2 Parakeet Party

Parakeet Party with Perfectly Penciled and Alcohol Blends

Hello. Welcome to Valley Inspirations with Andrea and the Art with Heart Colour Creations Blog Hop. Last week we started afresh to work through the Stampin' Up! colours, and commenced with the brand new In Colours for 2022-2024. 


This week’s Blog Hop is focussing on a bright yellowy green called Parakeet Party. As mentioned, Parakeet Party is part of the In Colours Family and is an amazing super bright and happy green. As the name suggests, it is a green that can be found on parakeet feathers. It is a colour that is gorgeous when used with other greens for leaves, etc or with other colours such as Pool Party & Daffodil Delight. I'm still exploring colour combos.


Parakeet Party is produced in Stampin' Up!'s card-stock, both A4 & 12"x12"Classic Stampin' inks (ink pads re-inkers); Stampin' Write Markers; Stampin' Blends, In Colour 2022-2024, Butterfly Kisses and Tea Boutique Designer Series Papers, Tea Boutique Cards & Envelopes, In Colour Glimmer Paper, Metallic Woven Ribbon, Bakers Twine, In Colour Decorative Dots, and Fun Flowers Resin Shapes. The card below has used Parakeet Party Stampin' Blends and the half created card is using Classic Stampin' ink (both re-inker and Stamp Pad) and Card-stock plus a range of other non-PP bits and pieces.

I have created 1 1/2 cards to showcase Parakeet Party. Here is the completed card:

Show someone how wonderful they are with a personally created card featuring the Perfectly Penciled Designer Series Paper.


CARD 1:

This card shows the happy nature of Parakeet Party through Stampin' Blends coloured leaves.

Show someone how wonderful they are with a personally created card featuring the Perfectly Penciled Designer Series Paper.

Sections of one of the designs of the stunning Perfectly Penciled Designer Series Paper were coloured with Stampin' Blends. When I first looked at the larger floral spray design I was calculating the number of large sprays that could be used for projects. I also looked at the edges and how I could increase project numbers by using part floral sprays. I decided to just use some edge sprays for this card. The Alcohol Blends colours used were Parakeet Party, Daffodil Delight and Fresh Freesia plus some Pool Party - Light and Dark in all colours.

Show someone how wonderful they are with a personally created card featuring the Perfectly Penciled Designer Series Paper.

A Basic White card front had some Pool Party Classic Stampin' ink applied with a Blending Brush. The coloured sprays were all fussy cut and the pieces were arranged on the card front. The straight edges were adhered directly along the edges and Mini Dimensionals were used to pop flowers up in the centre. The card front was mounted on to a slightly larger piece of Pool Party card-stock and then to the Basic White card base.

Show someone how wonderful they are with a personally created card featuring the Perfectly Penciled Designer Series Paper.

The card front was finished with a fussy-cut sentiment from the Happiness Abounds stamp set that had been White heat embossed on Basic Black card-stock. A bow of Pool Party Sheer Ribbon was tucked under the sentiment and some Iridescent Rhinestone Basic Jewels added a little shimmer.

Show someone how wonderful they are with a personally created card featuring the Perfectly Penciled Designer Series Paper.

A piece of Basic White card-stock was mounted on to a slightly larger piece of Pool Party card-stock and another edge floral spray was coloured and added to the edge of the card inner.  An uncoloured fussy cut spray of flowers was adhered to the side of a Basic White C6 Envelope to coordinate the envelope with the card. 

Show someone how wonderful they are with a personally created card featuring the Perfectly Penciled Designer Series Paper.


CARD 2:

This second card will feature a water-coloured Parakeet Party panel. 

Come back in a couple of days to check out this card - it is a work in progress. Things happened and I ran out of time to finish it.


Thank you so much for dropping by. I do value the time you spent with me.

If you live in Australia, don't already have a Stampin' Up! demonstrator and would like your own copy of Stampin' Up's new 2022-2023 Annual Catalogue and or the continuing January - June 2022 Mini Catalogue then let me know and I will be delighted to send them to you.  Please don't hesitate to make contact with any other queries about these projects or Stampin' Up!. 

There is more Parakeet Party creativity. We have quite a number of the team participating in this blog hop. To continue with the blog hop, click on the "next" graphic below to be taken to the blog of the lovely, Amie McIlroy at Eager to Stamp.  I look forward to checking out Amie's creation (I wonder what she has in store). I do love seeing everyones' projects - always so many ideas.

Hope to see you next week when we will be featuring another In Colour - Starry Night, as we continue the weekly 2022-2023 Colour Creations blog hops.

Stay well, stay safe and be kind to yourself and others. 

Andrea 💕🐾


If you find a broken link you can view the full list of participants on Catherine Proctor’s blog, our amazing Art With Heart Team Colour Creations Coordinator.  I so appreciate all Cathy does in coordinating this blog hop each week. She is such a special lady. Check out her wonderful creation while you are there.

#colourcreationsbloghop  #stampinup #stampinupaustralia #stampinupsouthpacific #stampinupdemo  #handmadecards #makeacardsendacard #stampinupdemonstrator #papercrafting #artwithheartteam  #papercrafter #perfectlypenciled #happinessabounds


Wednesday, 4 May 2022

AWHT Colour Creations #1 Orchard Oasis

Orchid Oasis with Ranunculus Romance 

Hello. Welcome to Valley Inspirations with Andrea and the Art with Heart Colour Creations Blog Hop. We are starting afresh to work though all the Stampin' Up! colours in alphabetical order, although as we begin a new round, we are featuring the new In Colours for 2022 to 2024. 


This week’s Blog Hop is focussing on a deep purple with rich blue undertones called Orchid Oasis. As mentioned, Orchid Oasis is part of the In Colour Family and is a beautifully rich blue purple. This colour is gorgeous on its own or with touches of gold.  It is going to be fun over the next 2 years to explore colour combos that go well with this colour.


Orchid Oasis is produced in Stampin' Up!'s card-stock, both A4 & 12"x12"Classic Stampin' inks (ink pads, Spots re-inkers); Stampin' Write Markers; Stampin' Blends, In Colours 2022-2024 Designer Series Papers, Tea Boutique Cards & Envelopes and Designer Series Paper, In Colour Bakers Twine, Shimmer Ribbon, Glimmer Paper and Matte Decorative Dots. The card below has used Orchid Oasis Classic Stampin' ink, Card-stock, Stampin' Write Marker plus a range of other non-PP bits and pieces.

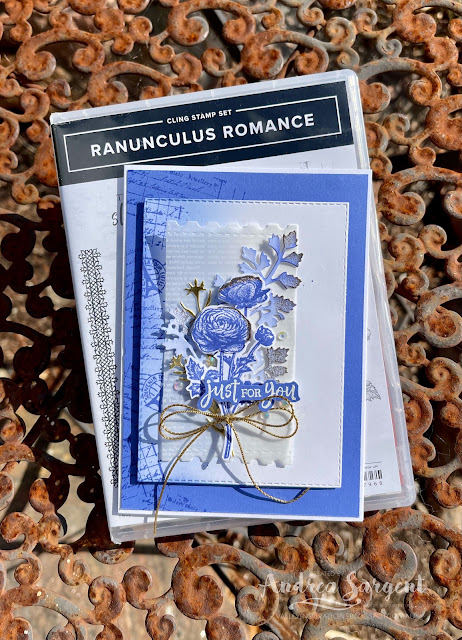
Here is the card showcasing the delightful Orchid Oasis:

Let a friend know you are thinking of them with a Ranunculus Romance Orchid Oasis card.

Isn't Orchid Oasis a beautiful colour.  

CARD 1:

This card shows the beauty of Orchid Oasis through some tone on tone stamping, ink blending and stamping on white, as well as some splatters.

Let a friend know you are thinking of them with a Ranunculus Romance Orchid Oasis card.

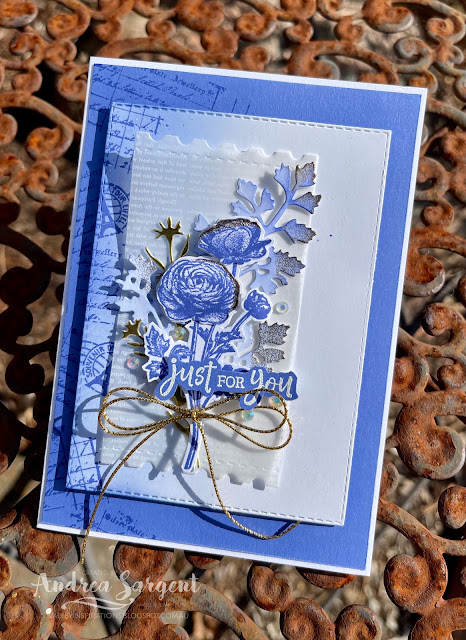
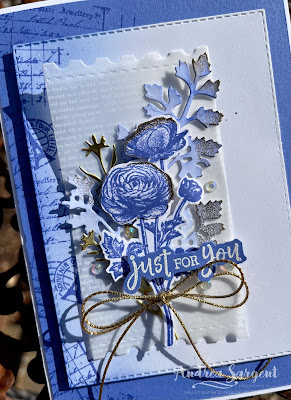
I loved playing with Orchid Oasis this week. It is a beautiful colour. My time to create was very short for this project given commitments over the past week so I decided to only use the featured colour and Basic White with touches of Gold. Orchid Oasis card-stock and ink was used with some partial background stamping with the scripty stamp from the Ranunculus Romance stamp set. Some Basic White card-stock was die cut with a Stitched Rectangle die. Some Orchid Oasis ink was blended over the LHS using a Blending Brush, then the panel was stamped with the Eiffel Tower and script stamps. Some splatters were added using an Orchid Oasis Stampin' Write Marker.

Let a friend know you are thinking of them with a Ranunculus Romance Orchid Oasis card.

The beautiful Ranunculus stamp was stamped a couple of times in Orchid Oasis Classic ink. Sadly, I couldn't find my Ranunculus dies, so I fussy cut the full flower spray and the two larger flower heads from the second stamped image. Having lost time trying to find my dies I had to alter my design quickly and use dies that were easily at hand. Some Gold Foil was die cut with one of the little floral sprays from the Honey Bee Bloom dies and the larger leaf die from the Meadows dies was used on some Basic White card-stock. A little Orchid Oasis ink was blended over the white leaf die cut. The fussy cut flowers and the leaf were partially Gold heat embossed on the edges using Versamark ink, Gold Stampin' Emboss Powder and a Heat Gun.

Let a friend know you are thinking of them with a Ranunculus Romance Orchid Oasis card.

The larger ticket die from the Sports Events dies cut a label from the Vellum Layering Designs. The leaf and flowers were arranged over the vellum label and the individual flower heads were layered over the flowers with Mini Dimensionals. A double bow was tied with the gold Simply Elegant Trim and attached with Glue Dots. A sentiment from the same stamp set was White Heat embossed with White Stampin' Emboss Powder on Orchid Oasis card-stock and then fussy cut. Some Iridescent Rhinestone Basic Jewels added a little shimmer, together with a splattering of Wink of Stella (which is so hard to capture in the photos).

Let a friend know you are thinking of them with a Ranunculus Romance Orchid Oasis card.

My time completely disappeared and so I didn't have a chance to work on the card inner or envelope. It will happen but later.
 
I sincerely thank Emma Goddard, UK Stampin' Up! Demonstrator and past Artisan for her inspiration. I so love Emma and her amazing talent and noticed as this card came together her definite influence. 


Thank you so much for dropping by. I do value the time you spent with me.

If you live in Australia, don't already have a Stampin' Up! demonstrator and would like your own copy of Stampin' Up's new 2022-2023 Annual Catalogue and or the January - June 2022 Mini Catalogue then let me know and I will be delighted to send them to you.  Please don't hesitate to make contact with any other queries about these projects or Stampin' Up!. 

There is more Orchard Oasis creativity. To continue with the blog hop, click on the "next" graphic below to be taken to the blog of a special woman and friend, the lovely and talented, Tina Gillespie. I always look forward to checking out Tina's creation (I wonder what she has in store this week - she is always amazing). I do love seeing everyones' projects - always so many ideas. 

Hope to see you next week when we will be featuring another new In Colour, Parakeet Party, for the weekly 2022-2024 Colour Creations blog hops.

Stay well, stay safe and be kind to yourself and others. 

Andrea 💕🐾


If you find a broken link you can view the full list of participants on Catherine Proctor’s blog, our amazing Art With Heart Team Colour Creations Coordinator.  I so appreciate all Cathy does in coordinating this blog hop each week. She is such a special lady and so talented. Check out her wonderful creation while you are there.

#colourcreationsbloghop  #stampinup #stampinupaustralia #stampinupsouthpacific #stampinupdemo  #handmadecards #makeacardsendacard #stampinupdemonstrator #papercrafting #artwithheartteam  #ranunculusromance #papercrafter 

Tuesday, 3 May 2022

Bron’s Birthday Blog Hop #2

 #2 Theme - 60’s Retro

Hello. Welcome to Valley Inspiration with Andrea and the second blog hop celebrating Bronwyn Eastly. We're a group of stamping friends that are celebrating Bron's 60th Birthday in 2022 with six blog hops, over six months, with six fun themes! 


While I lived through the 1960s, I was very young so the '60s and 70s blend together in my memory. As I researched the era, so many memories came tumbling back - but what could I incorporate into a card design? Thinking about the era key things jumped out, ie psychedelic, designs and colours that would make you feel woozy, Hippies, the flower children, "Peace and love man", etc. I saw many designs that combined bright orange and pink with some yellow; stylised flowers and smiley faces in the middle of daisies. 

With all of that in mind, this is what I came up with:

Do you know someone who is celebrating their birthday and was born in the 1960s - check this out!

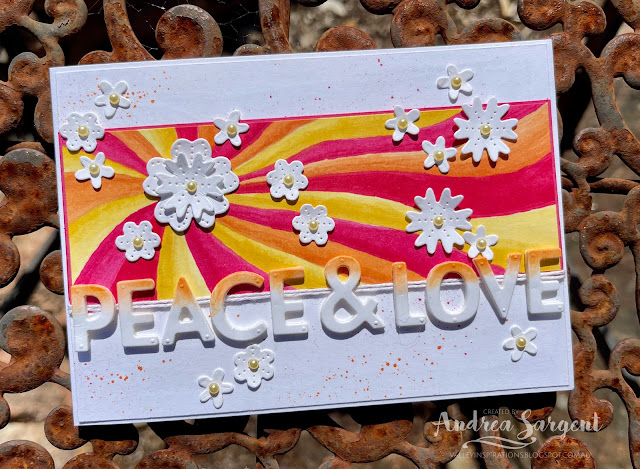
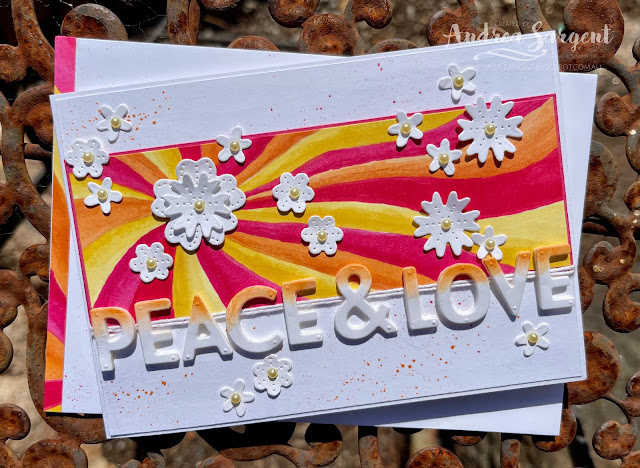
A panel was created with wavy swirls emanating from an off-centre point. Wavy stripes were coloured using a range of Stampin' Alcohol Blends, ie Light and Dark Daffodil Delight, Melon Mambo, Pumpkin Pie and some Sweet Sorbet (one of the new In Colours). Once the coloured panel was trimmed to size, it was mounted onto a slightly larger piece of Melon Mambo card-stock.

Do you know someone who is celebrating their birthday and was born in the 1960s - check this out!

A Basic White card-stock card front was spattered with both Melon Mambo and Pumpkin Pie Stampin' Write Markers. I was a bit carried away with the splatters! Some White Bakers Twine was wrapped around the card front a couple of times. I was intending to add a Twine bow but it didn't really work so just left it with the twine under the lettering.

Do you know someone who is celebrating their birthday and was born in the 1960s - check this out!

The recently retired Playful Alphabet dies were used to cut PEACE & LOVE and a touch of Pumpkin Pie ink was added to the top of the letters with a Blending Brush. Also, the recently retired Pierced Blooms dies were used to cut stylised flowers from Basic White card-stock. The flowers were scattered around and Pearl Basic Jewels that had been coloured with the Light Daffodil Delight Blend were added to the flower centres. I was tempted to add yellow smily faces at the centre of the flowers bud decided against it. What do you think???

Do you know someone who is celebrating their birthday and was born in the 1960s - check this out!

The card inner is very simple with Basic White card-stock mounted on Melon Mambo card-stock. A couple of extra Pierced Blooms were added. An off-cut strip from the Blends coloured panel was adhered to the side edge of a C6 Basic White Envelope to tie it in with the card it will carry.

Do you know someone who is celebrating their birthday and was born in the 1960s - check this out!

Thank you so much for dropping in and helping to celebrate Bron's coming birthday. It is such a pity that Bron wasn't able to celebrate with an overseas holiday, but it is so much fun to celebrate with monthly blog hops over the coming 4 months and past Blog Hops. We will be here again on the 3rd of June, with a theme of "Inky Blues" launching the hop at 7.00pm EST.

Hop over to the next blog, by the delightful Chantelle Randall and check out her gorgeous creation. Just click on Chantelle's name (above) or the coloured words below to be taken to her Blog.

Apart from the Blog Hop there is also an Instagram Hop starting with Bron at @addinktivedesigns. Check it out too - there is more creativity to find.

#bronsbdaybloghops #stampinup #stampinupsouthpacific #stampinupdemo  #handmadecards #makeacardsendacard #piercedblooms #stampinupdemonstrator #papercrafting


AWH Colour Creations Blog Hop #36 Moody Mauve
Moody Mauve with Beautiful Butterflies Hello. Welcome to  Valley Inspirations with Andrea  and the  Art with Heart Colour Creations Blog Hop...