Art with Heart Wow Tutorials

Wednesday, 11 January 2023

AWHT Colour Creations #35 Pale Papaya

Pale Papaya with Beautifully Happy

Hello. Welcome to Valley Inspirations with Andrea and the Art with Heart Colour Creations Blog Hop. We are continuing to work though the Stampin' Up! colours in alphabetical order, focussing on one colour each week.


This week’s Blog Hop is focussing on a soft golden colour called Pale Papaya. Pale Papaya is part of the 2021-2023 In Colour Family and unsurprisingly is the colour of papaya fruit. This colour is lovely when used for flowers, fruit, and the like. It coordinates with many colours. 


Pale Papaya is produced in Stampin' Up!'s card-stock, both A4 & 12"x12"Classic Stampin' inks (ink pads re-inkers); Stampin' Write Markers; Stampin' Blends Combo; In Colour Designer Series Paper as well as Lovely Linen, Delicate Desert, Flowers & More, Artfully Composed (Clearance Rack)and Heart & Home (Clearance Rack) DSPs; plus Kindness Cards & A Million Thanks Kits, Today is the Day Memories & More Card Packs, Loose Flower Flourishes, 2021-2023 In Colour Opal Rounds as well as Pale Papaya Open Weave Ribbon & Faux Velvet Trim. That’s certainly a good list demonstrating the colour's versatility.

Pale Papaya card-stock, ink, Stampin' Write Marker, Stampin' Blends Combo, Open Weave Ribbon and In Colour Opal Rounds have been used in this project plus a range of non-Pale Papaya bits and pieces. Here is my card:

Share your heart by creating a special birthday card for family or friends so they can be Beautifully Happy.

Stampin’ Up!s Jan-Feb 2023 Saleabration is underway. The stamp set I used for this card is Beautifully Happy - a set you can receive for free during Saleabration with a minimum purchase of $180. It is such a lovely set. The other inspiration for this card was the January 2023 Mini Slimline sketch from SheetLoad of Cards. Tina Gillespie used a range of SheetLoad of Cards layouts for her posted creations during the Heart of Christmas Blog Hops last year. I was intrigued and so undertook some research recently, finding this month’s mini slimline sketch. I loved it, so CASEd the layout with some lateral interpretations.

Share your heart by creating a special birthday card for family or friends so they can be Beautifully Happy.

I started with a piece of Basic White card-stock and stamped the large floral arrangement from the Beautifully Happy stamp set a couple of times in Gray Granite Classic Stampin’ ink. One image was coloured with Pale Papaya, Calypso Coral, Gray Granite & Soft Succulent Stampin’ Blends Combos together with the Colour Lifter. While the Colour Lifter is great at removing alcohol ink that is where you don’t want it - it is also brilliant for adding highlights and softening colours out to white. It is a great tool that is often forgotten.  A couple of the flowers on the second image were also coloured. The coloured floral arrangement and extra flowers were fussy cut.

Share your heart by creating a special birthday card for family or friends so they can be Beautifully Happy.

Two Basic White card-stock panels had some blending added. The background panel was blended using Pale Papaya ink from extremely light to a strong colour. Then some Calypso Coral ink was added to the darker end to make it even darker. The splatter stamp was used in opposite corners and the blended panel was embossed with the Stitched Greenery die before it was directly adhered to the Pale Papaya card base. The smaller top white panel had a little Pale Papaya ink blended on the left side. 

Share your heart by creating a special birthday card for family or friends so they can be Beautifully Happy.

A little stamped off splatter was added with the splatter stamp, however, when the card was almost finished, the top Basic White panel still looked a little too white so more splatter was added using a Pale Papaya Stampin’ Write Marker. Some Pale Papaya Open Weave Ribbon was wrapped around the white splattered panel before it was mounted onto a slightly larger piece of Pale Papaya card-stock. The fussy cut flowers were added to the top panel with Mini Dimensionals.

Share your heart by creating a special birthday card for family or friends so they can be Beautifully Happy.

A sentiment from the same stamp set was white embossed on Pale Papaya card-stock using Versamark ink, White Emboss Powder & a Heat Tool. Then is was fussy cut out. A bow tied with another piece of Open Weave Ribbon that had been cut in half lengthwise was added with Glue Dots. A number of Pale Papaya Opal Rounds were positioned for a touch of sparkle.

Share your heart by creating a special birthday card for family or friends so they can be Beautifully Happy.

A little Pale Papaya ink blending and a Gray Granite stamped floral image were added to the Basic White card inner. As this is a mini slimline card I thought about creating my own coordinating envelope from Designer Series Paper, however, given other demands I decided to use one of Stampin’ Up!s Slimline Envelopes and stamped it with the same floral image in Gray Granite ink. The pack of Slimline Envelopes contains White, Soft Succulent and Smoky Slate envelopes so I chose the Soft Succulent envelope as it coordinates beautifully with the coloured leaves.

Share your heart by creating a special birthday card for family or friends so they can be Beautifully Happy.

Thank you so much for dropping in. I do so appreciate you.

Share your heart by creating a special birthday card for family or friends so they can be Beautifully Happy.

There is more Pale Papaya creativity. To continue with the blog hop, click the  "onto the next" graphic below and be taken to the blog of my lovely friend Rachel Palmeiri
I always look forward to checking out Rachel's creations. I do love seeing everyones' projects - there is so much inspiration.

I hope to see you next week when we will feature Pear Pizazz as we continue the weekly 2022-2023 Colour Creations Blog Hops.  

I hope 2023 has started well for you. Stay well, stay safe and be kind to yourself and others.

Andrea 💕🐾


If you find a broken link or have come to this blog hop from a different entry point, you can view the full list of participants on Catherine Proctor’s blog @ What Cathy Made. Cathy is our  Art With Heart Team Colour Creations Coordinator.  She is an wonderful lady. Check out her delightful creation while you are there.

If you live in Australia, don't already have a Stampin' Up! demonstrator and would like your own copy of Stampin' Up's 2022-2023 Annual Catalogue and or the new January - April 2023 Mini Catalogue & Saleabration Brochue then let me know and I will be delighted to send them to you.  Please don't hesitate to make contact with any other queries about this project or Stampin' Up!. 

#colourcreationsbloghop  #stampinup #stampinupaustralia #stampinupsouthpacific #stampinupdemo  #handmadecards #makeacardsendacard #stampinupdemonstrator #papercrafting #artwithheartteam  #papercrafter  #stamper  #valleyinspirations   #beautifullyhappy #showusyoursheetload #suysjan2023 #stitchedgreenery

Wednesday, 4 January 2023

AWHT Colour Creations #34 Pacific Point

Pacific Point with New and Continuing Products

Hello. Welcome to Valley Inspirations with Andrea and the first Art with Heart Colour Creations Blog Hop for 2023. Happy New Year! We are continuing to work though the Stampin' Up! colours in alphabetical order, focussing on one colour each week.


This week’s Blog Hop is focussing on a a bright blue called Pacific Point. Pacific Point is part of the Brights Colour Family and is a great colour - intense, clean and bright. This colour is lovely when used for sea, dramatic skies and where a bright blue is required. 


Pacific Point is produced in Stampin' Up!'s card-stock, both A4 & 12"x12"Classic Stampin' inks (ink pads re-inkers); Stampin' Write Markers; Watercolor Pencils; Brights Designer Series Paper as well as Happy Forest Friends, Gingerbread & Peppermint and Beauty of the Earth DSPs; plus Old Olive & Sahara Sand Twill Ribbon Combo Pack, Glitter Washi Four Pack and Faux Sea Glass Shapes. 

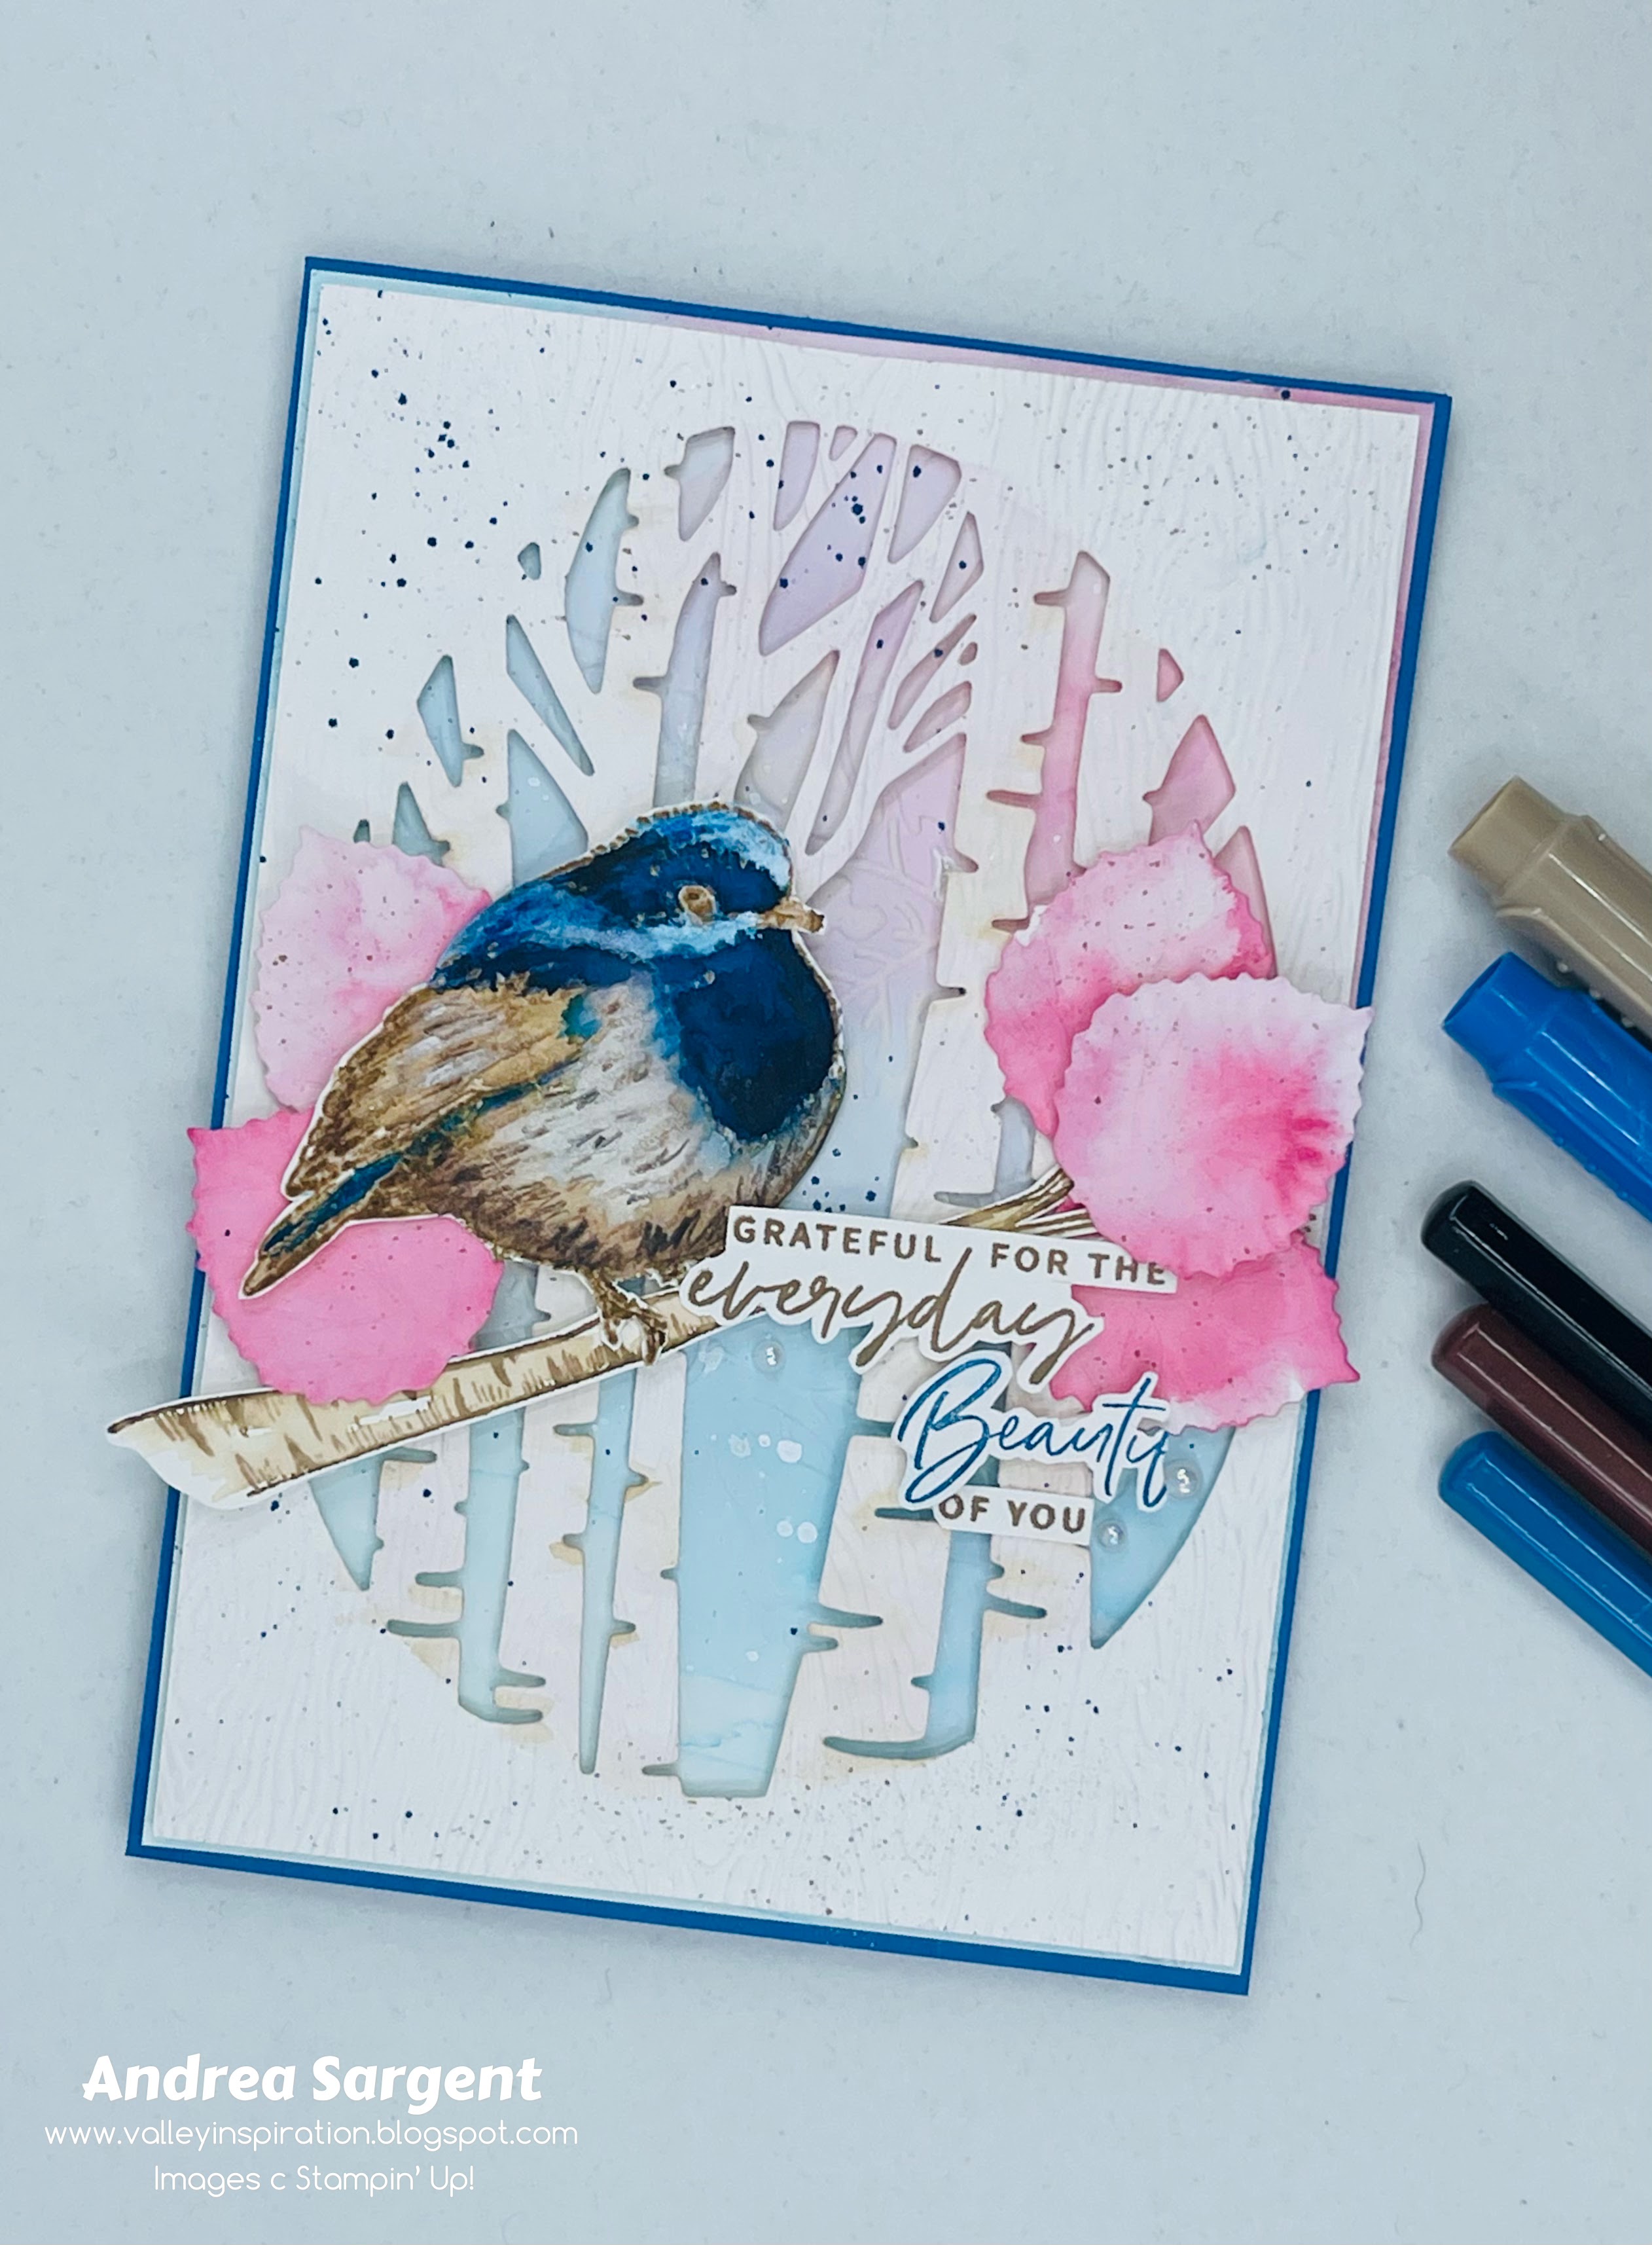
Pacific Point card-stock, ink, Stampin' Write Marker and Watercolor Pencil have been used in these projects plus a range of non-Pacific Point bits and pieces. Here are my cards:


I started playing with Pacific Point between Christmas and New Year, starting with some water-colouring and then some blending. As life was quiet, I ended up creating 3 different cards for this blog hop.

CARD 1:


A friend loves the Superb Fairy Wren that we have in our area, that has patches of bright blue. Pacific Point seemed perfect to colour our little fairy wren. Toni's birthday is later in the year so hopefully I must put it aside in the Birthday Book that Stampin' Up! has released in Kit form. Check it out - it is a great kit that also comes with cards to be made.


I started by creating the background on Shimmery White card-stock using Pacific Point & Polished Pink Classic  Stampin' inks with the wide-brushed Water painter. I only wanted a light background so it didn't compete with the focal images. Once the background had dried it was splattered with both a Pacific Point Stampin' Write Marker and White Craft ink with the fine tipped Water Painter.


The die cut card front (Shimmery White card-stock) was cut using the large Aspen ... die. I so love this die. As you can see it cuts out tree trunks in an oval shape hole. The tree trunks were very lightly water-coloured with Crumb Cake ink. When dry, the panel was embossed using the Woodgrain 3D Embossing Folder and splattered with both Pacific Point and Crumb Cake Stampin' Write Markers. 


The smaller leaf die from the Aspen Tree ... dies cut a number of leaves from Shimmery White card-stock. They were water-coloured with Polished Pink ink. The bird and branch from the Perched in a Tree stamp set were stamped in Crumb Cake ink, then Versamark ink and clear heat embossed using Clear Emboss Powder and a Heat Tool. My Stamperatus ensured the clear embossing was directly over the Crumb Cake ink. The bird and branch were water-coloured using Crumb Cake ink and touches of White Craft ink and the bird was also coloured with Pacific Point and Night of Navy inks. To add extra depth of colour I used Pacific Point, Early Expresso and Back Black Watercolor Pencils.


A couple of sentiments from the Something Fancy stamp set were stamped either in Crumb Cake or Pacific Point inks. Both sentiments were fussy cut and I combined part of a word from one sentiment into another sentiment. Don't forget that you can chop up sentiments and only use part of them or mix and match to get a sentiment that is perfect for the recipient. All the pieces were layered together onto a Pacific Point card-stock base and a few Iridescent Pearls add the finishing touch.


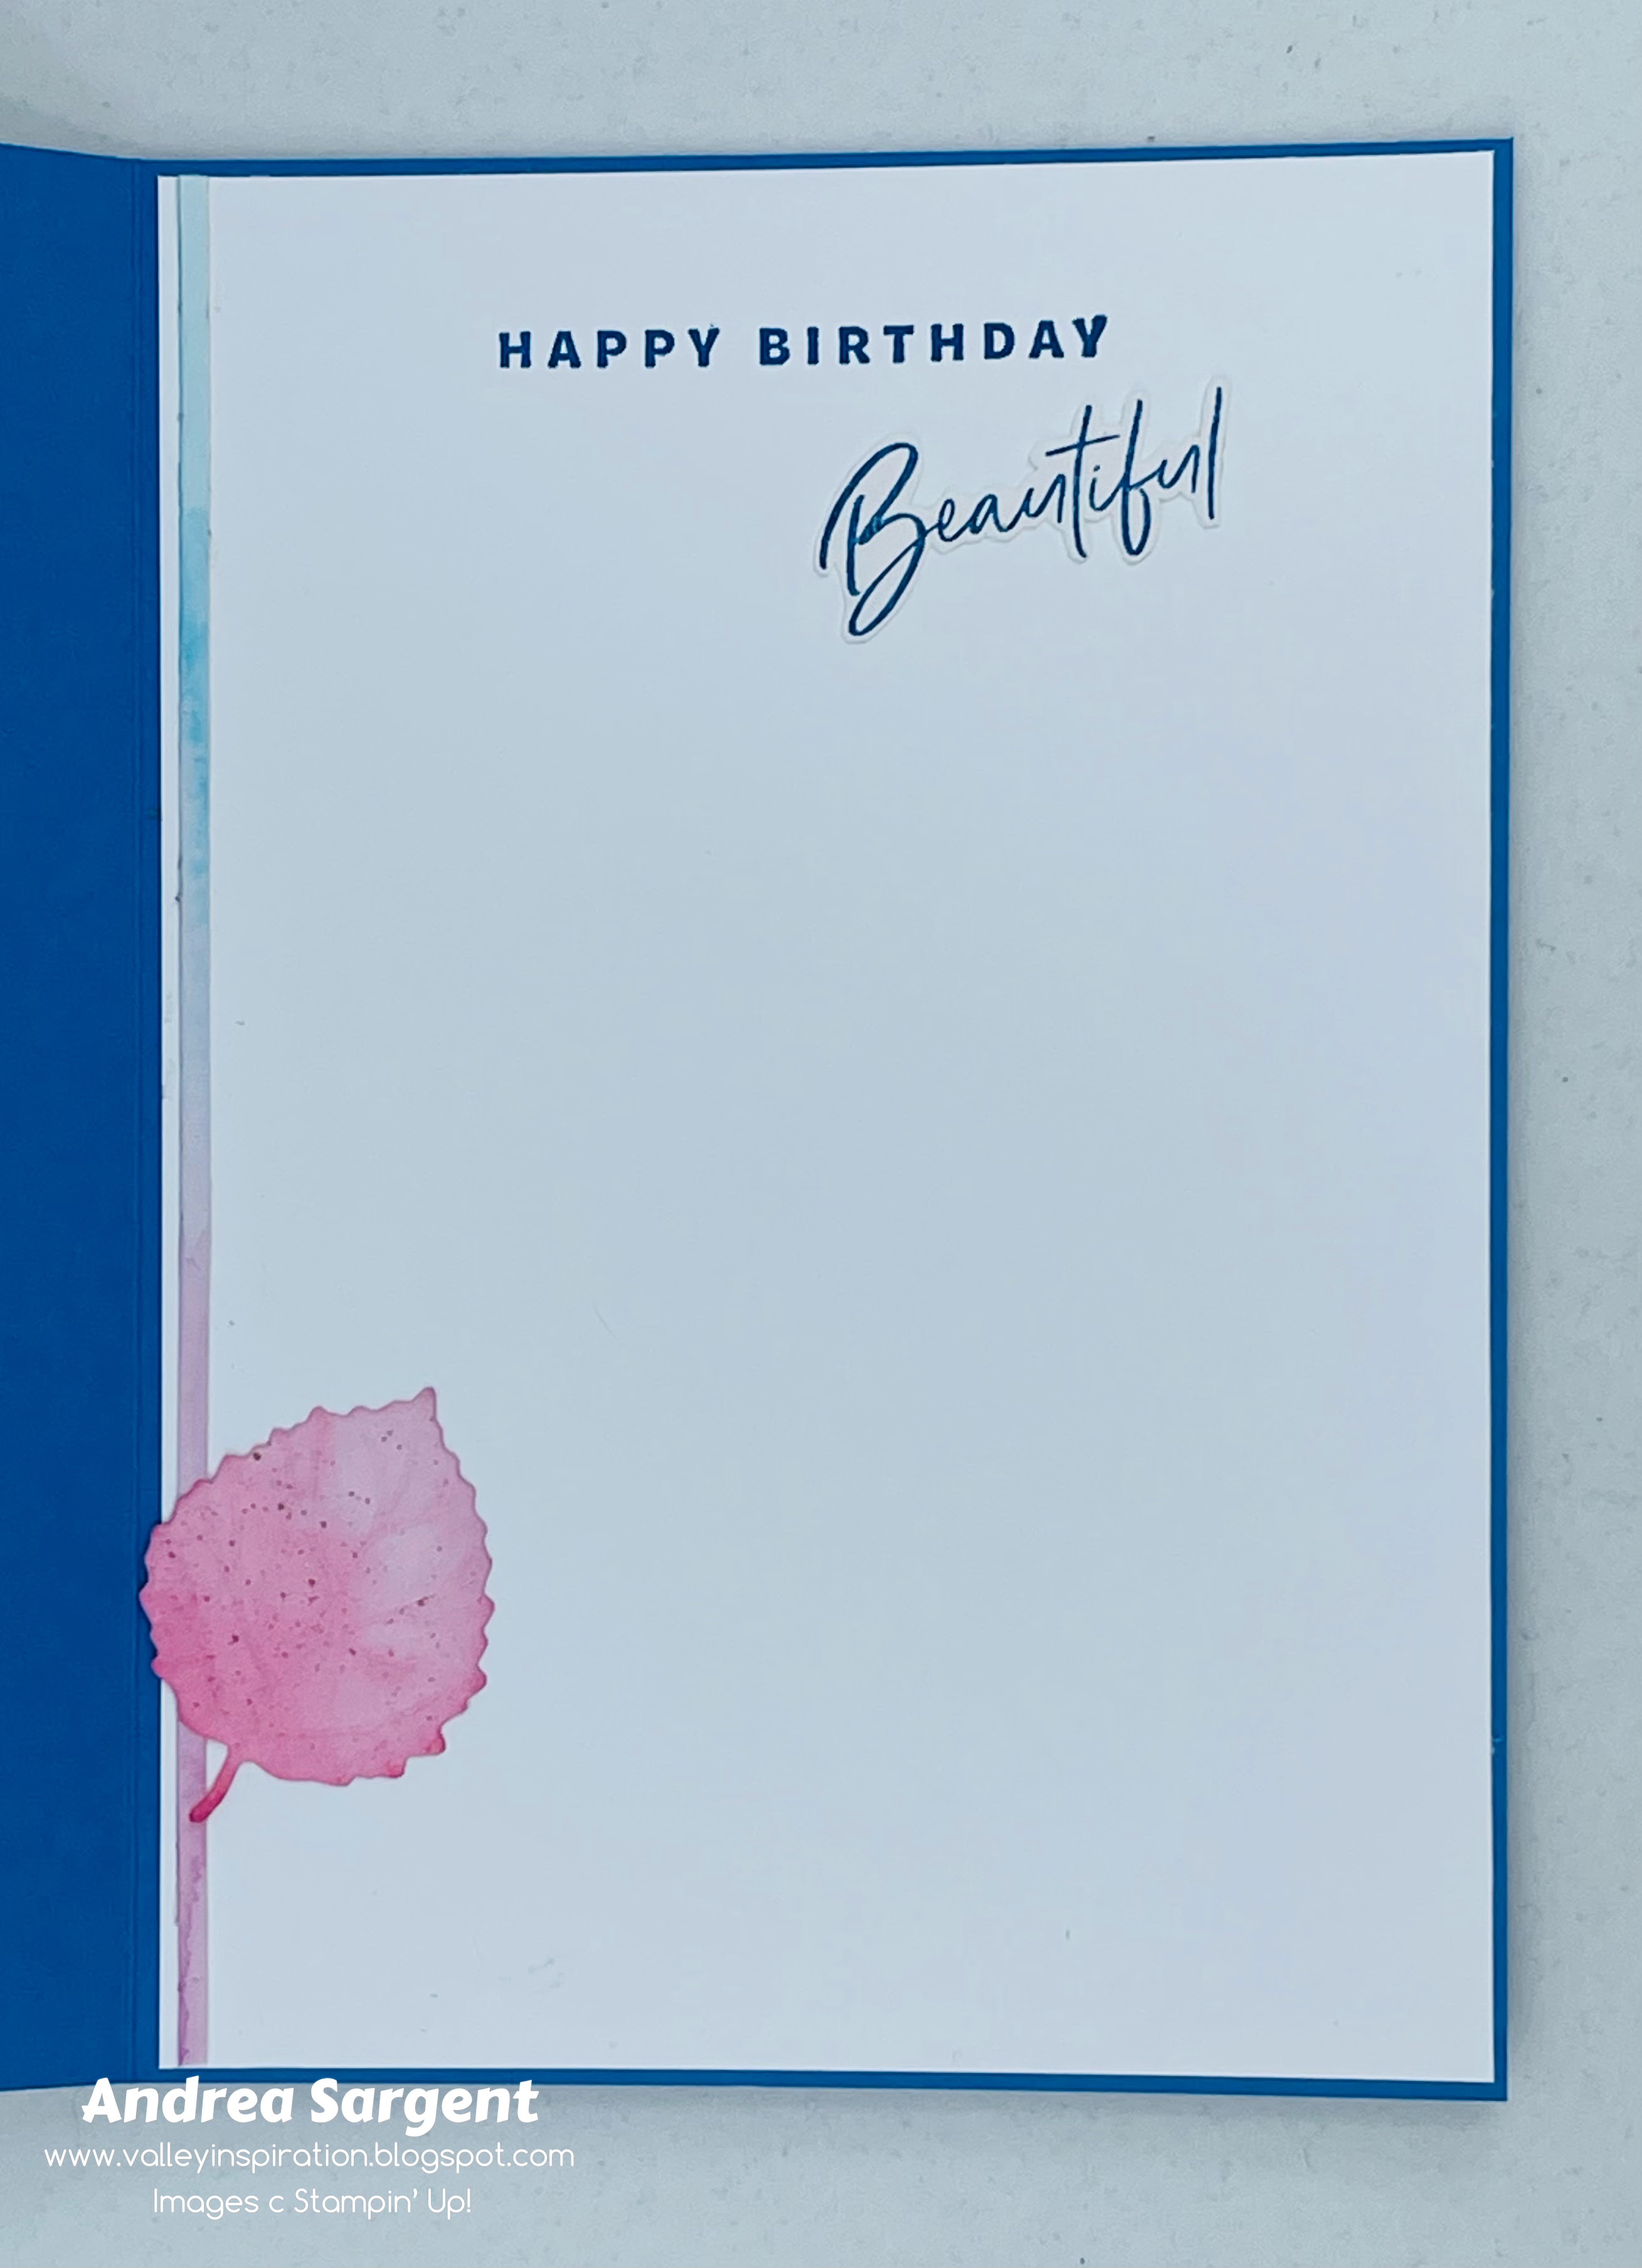
The card inner used a thin strip of the water-coloured background paned and an extra water-coloured leaf with another sentiment from the Something Fancy stamp set with an extra fussy cut word from another sentiment - all stamped in Pacific Point. A C6 Basic White Envelope was simply stamped with the bird in Crumb Cake ink.


I hope my friend likes her Birthday card.

CARD 2:


Adding colour directly to coloured card-stock changes the colour as you can see with this card. Pacific Point was blended directly onto Smoky Slate card-stock using one of Stampin' Up!s gorgeous Blending Brushes. A piece of Stampin' Up!s Masking Paper was die cut with a Stitched Rectangle from the ... set of dies. If you look closely you with see the stitched outline around the coloured rectangle. It is an extra touch of gorgeousness that happens with no extra effort. It's wonderful. A touch of White Craft ink and Night of Navy Classic ink was also added to give extra monochromatic range. 


A panel of Smoky Slate card-stock was embossed with the new Cane Weave 3D Embossing Folder and added to a Smoky Slate card base. The blended panel was trimmed down and splattered with water and then some White Craft ink. I love the effect of the different splatters. Some White Bakers Twine from the Basics Bakers Twine bundle was wrapped around the blended panel and tied in a bow.


The new Dainty Delight set of dies was used to cut some leaves and flowers from Basic White card-stock. They were arranged over the blended panel and adhered with either Multipurpose Liquid Glue or Mini Dimensionals. A panel of Basic White card-stock was adhered askew behind the front panel and then this card front was popped up onto the card base with Dimensionals.


A sentiment from the coordinating new Dainty Delight stamp set was white heat embossed onto Smoky Slate card-stock and the fussy cut out. A tad of blending was added to the edge of the sentiment before it was added to the card front with Dimensionals. The finishing touch was the addition of some Iridescent Pearls.


The card inner was simply a panel of Backs white card-stock that had been stamped with a stem of flowers from the Dainty Delight stamp set in Pacific Point ink. Similarly, A C6 Envelope was stamped with the same floral stem. I do love coordinating the card inner and envelope with the card design - it doesn't have to be involved or difficult.


This card started out with the idea of a sympathy card but the addition of a white panel behind the front panel lightened up the feel and I thought I would use it as a New Year's card.

CARD 3:


I created 2 water-coloured panels when I first stared playing with Pacific Point. I had a number of ideas of how I would use the panel on this card, but in the end decided to use it behind the ... large floral die cut from the new ... Isn't it beautiful. It was cut from a piece of basic White card-stock and adhered directly onto the water-coloured  


There is more Pacific Point creativity. To continue with the blog hop, click the  "onto the next" graphic below and be taken to the blog of my lovely friend Rachel Palmieri. I always look forward to checking out Rachel’s creations. I do love seeing everyones' projects - there is always inspiration.

I hope to see you next week when we will be featuring Pale Papaya, one of the 2021-2023 In Colour family as we continue our weekly 2022-2023 Colour Creations Blog Hops.  

Stay well, stay safe and be kind to yourself and others. May 2023 be a fantastic year for you and for those you love.

Andrea 💕🐾


If you find a broken link or have come to this blog hop from a different entry point, you can view the full list of participants on Catherine Proctor’s blog @ What Cathy Made. Cathy is our  Art With Heart Team Colour Creations Coordinator.  She is an wonderful lady. Check out her delightful creation while you are there.

If you live in Australia, don't already have a Stampin' Up! demonstrator and would like your own copy of Stampin' Up's 2022-2023 Annual Catalogue and or the new January - April 2023 Mini Catalogue then let me know and I will be delighted to send them to you.  Please don't hesitate to make contact with any other queries about this project or Stampin' Up!. 

#colourcreationsbloghop  #stampinup #stampinupaustralia #stampinupsouthpacific #stampinupdemo  #handmadecards #makeacardsendacard #stampinupdemonstrator #papercrafting #artwithheartteam  #papercrafter  #stamper  #valleyinspirations   #daintydelight #perchedinatree #somethingfancy #twotoneflora 

Wednesday, 14 December 2022

AWHT Colour Creations #33 Old Olive

Old Olive with a Nature’s Prints Wreath

Hello. Welcome to Valley Inspirations with Andrea and the Art with Heart Colour Creations Blog Hop. We are working though the Stampin' Up! colours in alphabetical order, focussing on one colour each week.


This week’s Blog Hop is focussing on a muted green called Old Olive. Old Olive is part of the Regals Colour Family and as the name suggests is a olive green colour. This colour is lovely when used for leaves, trees, etc and works with so many colours. 


Old Olive is produced in Stampin' Up!'s card-stock, both A4 & 12"x12"Classic Stampin' inks (ink pads re-inkers); Stampin' Write Markers; Stampin' Blends Combo; Watercolor Pencils; Regals Designer Series Paper as well as Happy Forest Friends, Design A Daydream, Artfully Composed, Gingerbread & Peppermint and Beauty of the Earth DSPs; plus Old Olive & Sahara Sand Twill Ribbon Combo Pack, Glitter Washi Four Pack and Faux Sea Glass Shapes. That’s a solid list demonstrating the colour's versatility.

Old Olive card-stock, ink, Stampin' Write Marker and Twill Ribbon have been used in this project plus a range of non-Old Olive bits and pieces. Here is my card:

Send a personally created wreath card to wish family or friends Christmas greetings.

I have created another Christmas card - as I am running low on cards and still a few more to send. Two wreaths were cut from Shimmery White card-stock using the wreath die from the Natural Prints dies. A number of smaller stems were also die cut. They were all water-coloured with Old Olive Classic Stampin’ ink, ensuring variation of colour. One wreath was coloured much lighter. All the pieces were put aside to dry naturally.

Send a personally created wreath card to wish family or friends Christmas greetings.

The flower from the Nature’s Prints stamp set was stamped a number of times and gold heat embossed on Shimmery White card-stock, using Versamark ink, Gold Emboss Powder and a Heat Tool. The flower was water-coloured. You may not easily guess the colour that was used - its Cherry Cobbler!  It has dried with a more orange tinge similar to Calypso Coral. I promise its not Calypso Coral but Cherry Cobbler. Once dry, the flowers were fussy cut.

Send a personally created wreath card to wish family or friends Christmas greetings.

A Basic White card-stock panel was embossed with the pine EF from the Wintry 3D Embossing Folder set. The same size panel was cut from Old Olive card-stock and they were layered onto a Thick Basic White card base. The various pieces of foliage and flowers were arranged. The lighter wreath was positioned first, then the 2nd wreath. Some of the stems were layered on top. Three of the flowers were arranged to one side and the other 2 flowers were tucked between foliage layers. 

Send a personally created wreath card to wish family or friends Christmas greetings.

A bow was tied with Old Olive Twill Ribbon that had been cut in half lengthwise and a second bow was tied with Gold Elegant Trim. They were tucked between the flowers. Gold Holy Leaves were added here and there and 2 Flat Jingle Bell Trinkets were adhered under the floral arrangement. A sentiment from the Brightest Glow stamp set was stamped in Old Olive ink on Shimmery White card-stock and fussy cut, before being adhered with Mini Dimensionals.


The inside of the card also layered Basic White card-stock over Old Olive card-stock. A gold embossed flower and a remaining water-coloured stem were added to link the theme of the card front to the inside. A C6 Basic White envelope was gold heat embossed using the flower stamp. Just a simple touch to tie the envelope to the card it will carry. 

Send a personally created wreath card to wish family or friends Christmas greetings.

Thank you for spending time with me on my blog. I have really enjoyed sharing projects for you during the year.  This is the last Colour Creations Blog Hop for 2022. After a short break we will be back in the New Year to continue this round of Stampin’ Up!s amazing colour range.

Send a personally created wreath card to wish family or friends Christmas greetings.

There is more Old Olive creativity. To continue with the blog hop, click the  "onto the next" graphic below and be taken to the blog of the lovely and talented Tina Gillespie
I always look forward to checking out Tina’s creations. I do love seeing everyones' projects - there is always inspiration.

I hope to see you early in 2023 when we will be featuring Pacific Point, one of the Brights Colour family as we continue the weekly 2022-2023 Colour Creations Blog Hops.  

Stay well, stay safe and be kind to yourself and others. I wish you the happiest of Christmases.

Andrea 💕🐾


If you find a broken link or have come to this blog hop from a different entry point, you can view the full list of participants on Catherine Proctor’s blog @ What Cathy Made. Cathy is our  Art With Heart Team Colour Creations Coordinator.  She is an wonderful lady. Check out her delightful creation while you are there.

If you live in Australia, don't already have a Stampin' Up! demonstrator and would like your own copy of Stampin' Up's 2022-2023 Annual Catalogue and or the new January - April 2023 Mini Catalogue then let me know and I will be delighted to send them to you.  Please don't hesitate to make contact with any other queries about this project or Stampin' Up!. 

#colourcreationsbloghop  #stampinup #stampinupaustralia #stampinupsouthpacific #stampinupdemo  #handmadecards #makeacardsendacard #stampinupdemonstrator #papercrafting #artwithheartteam  #papercrafter  #stamper  #valleyinspirations   #naturesprints #brightestglow 

Wednesday, 7 December 2022

AWHT Colour Creations #32 Night of Navy

Night of Navy with Sweet Candy Canes and Pretty Medallion

Hello. Welcome to Valley Inspirations with Andrea and the Art with Heart Colour Creations Blog Hop. We are working though the Stampin' Up! colours in alphabetical order, featuring one colour each week.


This week’s Blog Hop is focussing on a deep navy blue called Night of Navy. Night of Navy is part of the Neutrals Colour Family and is a beautiful colour that works with so many colours. This colour is lovely when used for dark skies or waters and so so much more. I love Night of Navy and at times have used it instead of black. 


Night of Navy 
is
 produced in Stampin' Up!'s card-stock, both A4 & 12"x12"Classic Stampin' inks (ink pads re-inkers); Stampin' Write Markers; Stampin' Blends Combo; Watercolor Pencils; Soft Pastels Assortment; Neutrals Designer Series Paper as well as Fitting Florets, Abstract Beauty, Beauty of the Earth, Storybook Gnomes, Lovely Linen, Sweet Symmetry, Brushstroke, Sun Prints, Hues of Happiness, Hey Sports Fan and Waves of the Ocean DSPs; Robot Buddies Kids and Light The Candles Card Kits; Love Santa Tag Kit; Ombre Specialty Paper, Abstract Beauty Ephemera Pack; plus Resin Stars, Fan Bakers Twine, Rhinestone Waves Basic Jewels and Solid Faceted Gems. Wow, that is quite a list demonstrating the colour's amazing versatility.

Night of Navy card-stock, ink, Stampin' Write Marker and Stampin' Blends Combo have been used in this project plus a range of non-Night of Navy bits and pieces. Here is my first card:

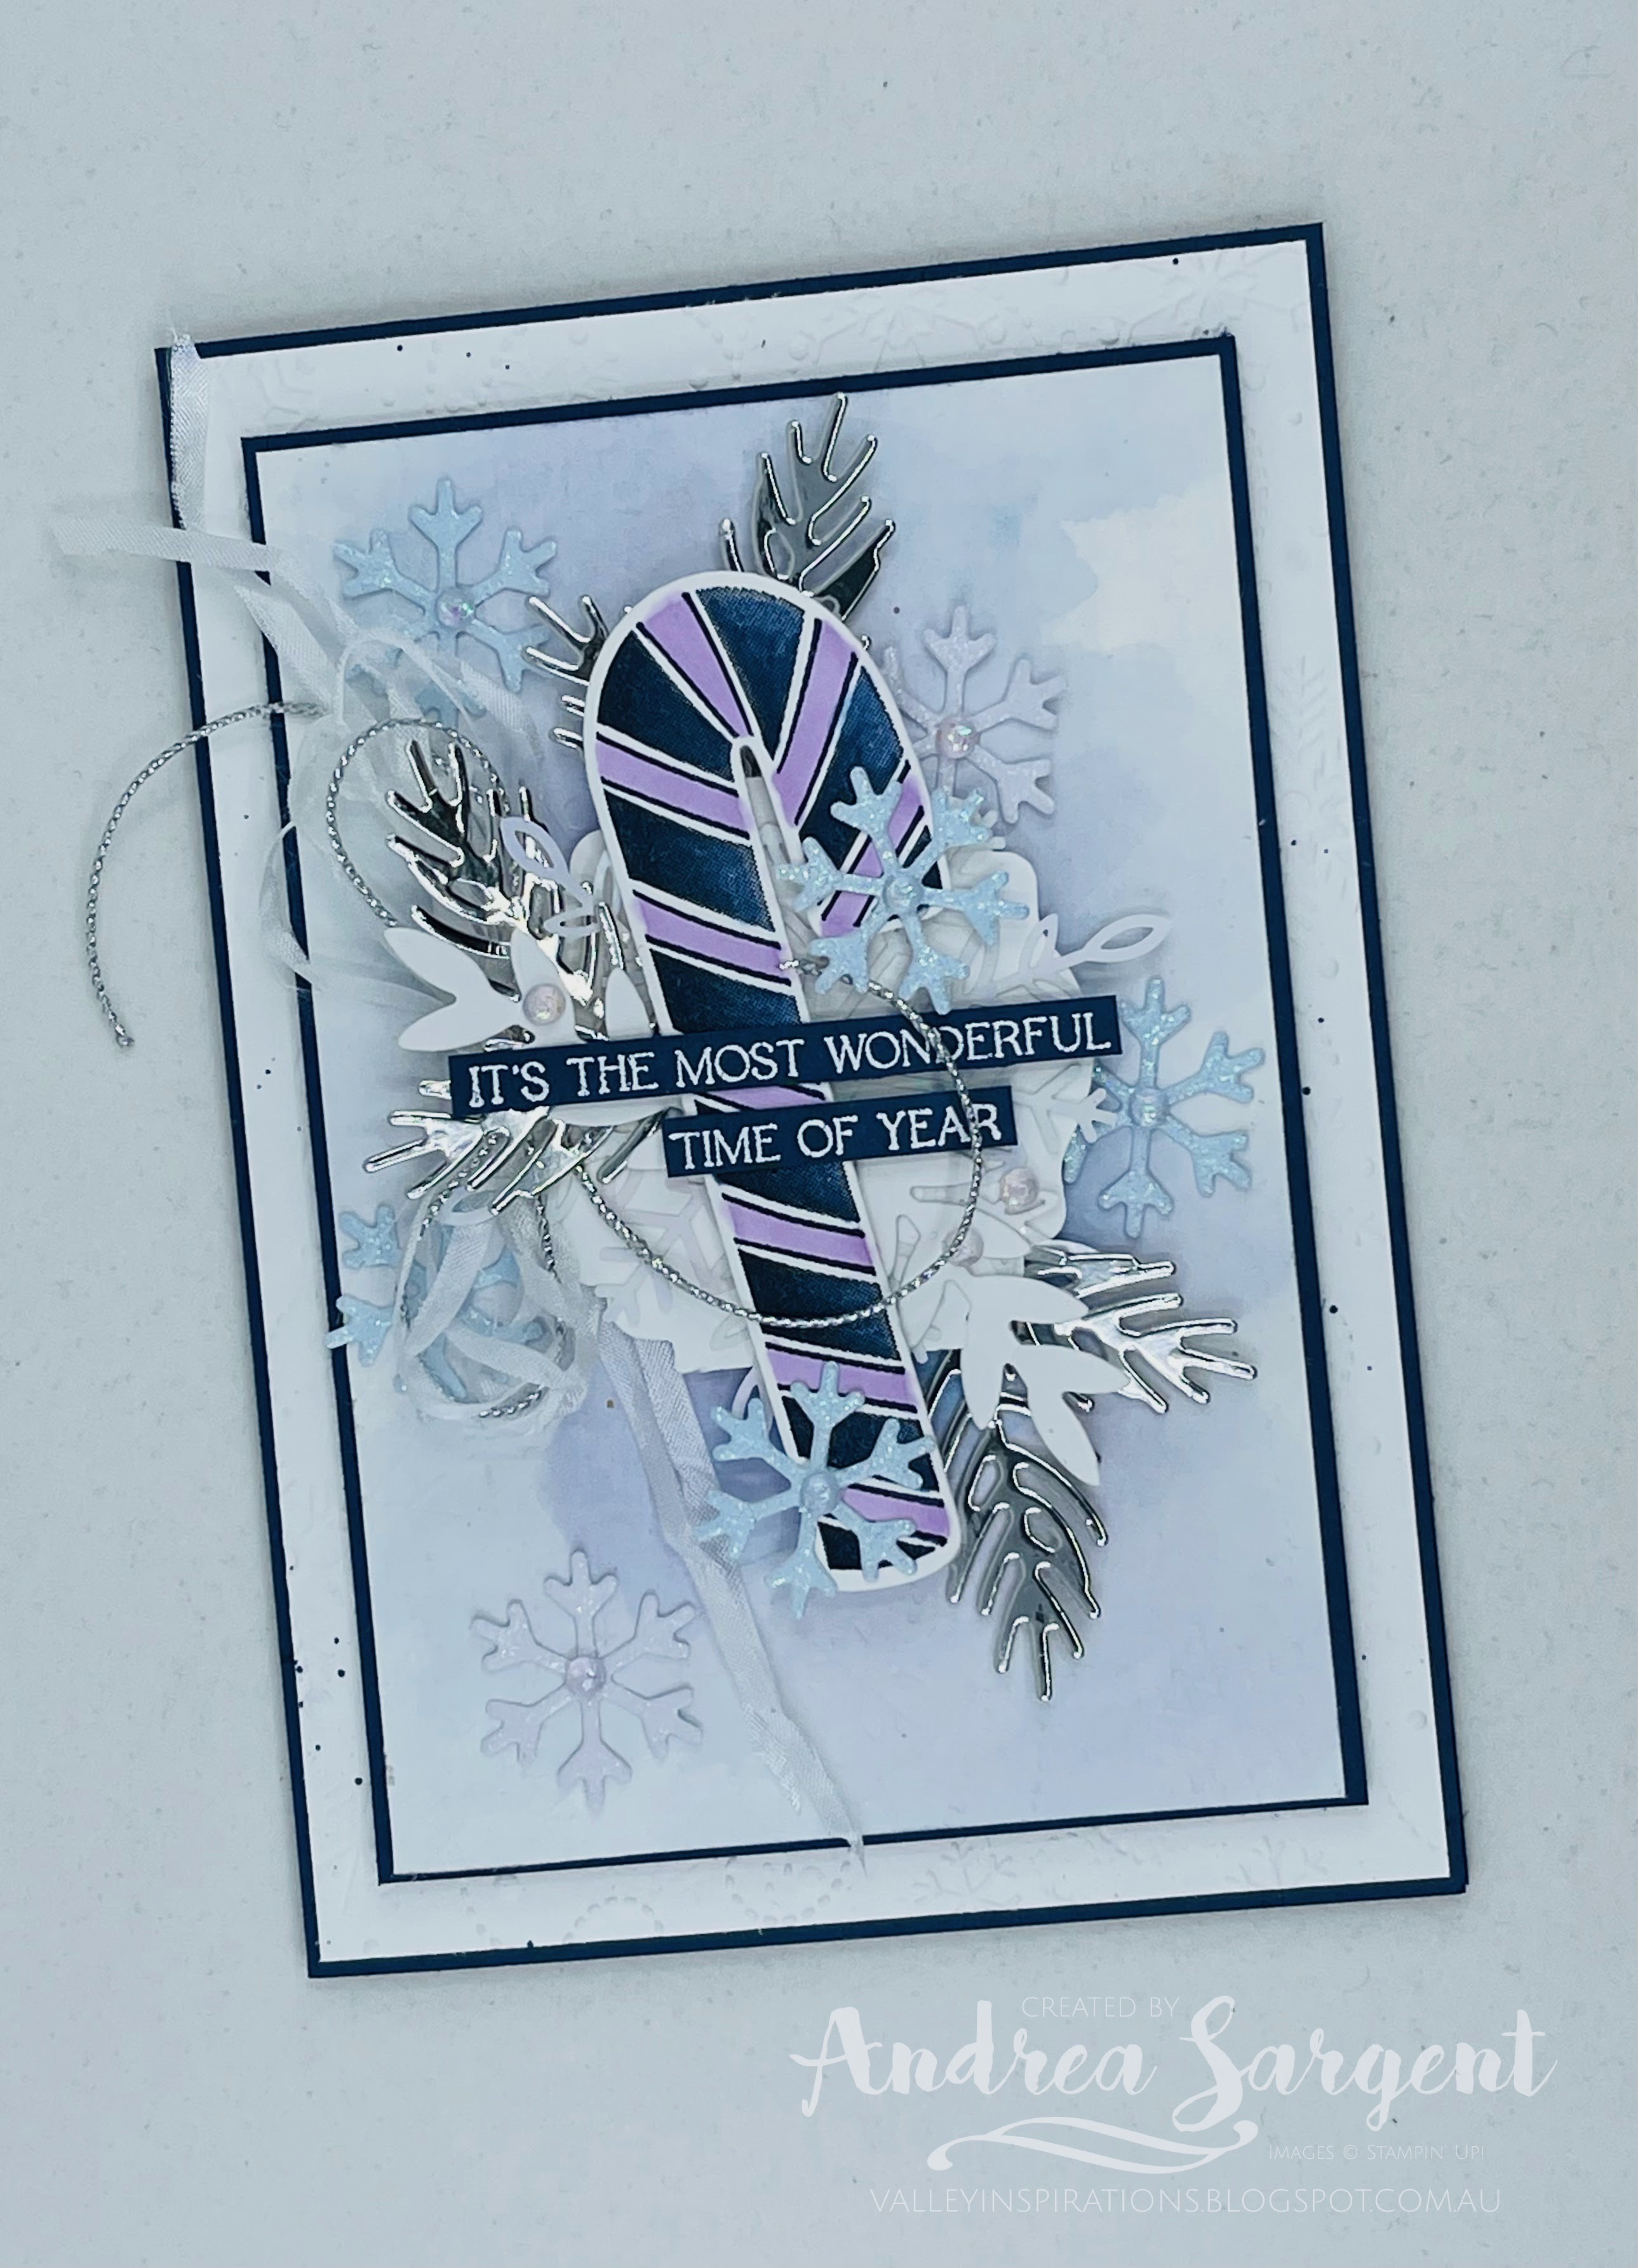
Christmas is the most wonderful time of year so share some joy with a personally crafted sweet candy cane card.

CARD 1:  
Night of Navy is a dark colour, however, I used a wet on wet water-colour technique and purposely endeavoured to create a light water-colour wash that would show the colour's base colour(s). Given the collation of elements centred over the background wash it is hard to see the beautiful effect of the water-colour purple and blue patches. The water-colour wash was created on a panel of Fluid 100 Watercolor paper using only Night of Navy Classic Stampin' ink and the large flat Water Painter. This panel was mounted onto a slightly larger piece of Night of Navy card-stock. A panel of Basic White card-stock was embossed with the snowflake embossing folder with Night of Navy splatters added using a Stampin Write Marker before it was added to the Night of Navy card base.

Christmas is the most wonderful time of year so share some joy with a personally crafted sweet candy cane card.

A couple of candy canes from the Sweet Candy Cane stamp set were stamped onto a piece of Basic White card-stock. Both were coloured with the Light Fresh Freesia Blend and one of them also had some Night of Navy Blend added to make the focal candy cane a darker navy on one edge. Must admit my NoN ink pad could do with a re-inking.

Christmas is the most wonderful time of year so share some joy with a personally crafted sweet candy cane card.

Dies from the Christmas Banners dies were used to cut some foliage out of either Silver foil or Basic White card-stock. Small snowflakes were cut using the Frosted Flurry dies from White Glimmer paper (Real Red & White Glimmer Paper) and the lighter end of the Tahitian Tide Glimmer Paper (2022-2024 In Colour Glimmer Paper). It may seem a strange combination but earlier in the week I wasn't well and needed a doze during the day. As I woke, I seemed to be dreaming of creating a project using the Sweet Candy Cane bundle with some foliage and  snowflakes for this week's project. My card started there. A Basic White label was cut using the Label Me Lovely Punch

Christmas is the most wonderful time of year so share some joy with a personally crafted sweet candy cane card.

All the pieces were arranged together with a Wonderful Snowflake and adhered with Dimensionals, Multipurpose Liquid Glue or Glue Dots. A bow was tied with White Crinkled Seam Binding ribbon and the Silver Simply Elegant Trim. A sentiment from the stamp set was white heat embossed on Night of Navy card-stock using Versamark, White Emboss Powder (Basics Stampin' Emboss Powders) and a Heat Tool. 2021-2023 in Colour Opal Rounds (Fresh Freesia) added that finishing touch.

Christmas is the most wonderful time of year so share some joy with a personally crafted sweet candy cane card.

The second stamped and coloured candy cane was added to a Basic White card-stock card centre with a remaining Tahitian Tide Glimmer snowflake. Another sentiment was stamped in Night of Navy ink. A C6 Basic White envelope was stamped with a couple of candy canes in Night of Navy ink so it coordinated with the card it will carry.

Christmas is the most wonderful time of year so share some joy with a personally crafted sweet candy cane card.

CARD 2:
I have had electricians and other trades people around all week, with work taking longer than  estimated and power outages at relevant times. All this absorbed time and which almost ran out, leaving minimal time to finish my second card. 


One of my ideas for a Christmas card was to use the Pretty Medallion stamp as a larger bauble. Having water-coloured with Night of Navy in the previous card I decided to continue the colour combo and combine blending of purples with blues, especially Night of Navy. I started with Balmy Blue card-stock and blended Balmy Blue and Fresh Freesia around a square piece of card-stock. I knew the impact would be minor but wanted to start softly. I then blended Highland Heather, Gorgeous Grape and Rich Razzelberry for a purple tinge before finishing with Night of Navy blending. The Pretty Medallion stamp was Silver heat embossed. As the medallion turned to silver under the Heat Tool I wondered why it had taken be so long to ink this gorgeous stamp. A splattering of water and White Craft ink was added over the panel.


The heat embossed and splattered panel was mounted to a slightly larger piece of Balmy Blue card-stock before being mounted to a Night of Navy card base. A bauble topper and some tiny lights were die cut using dies from the Spruced Up Outline dies in Silver foil. The final touch was the addition of numerous small Rhinestone Basic Jewels to key points of the medallion. There was no time for finishing the card inner and custom made envelope. That will happen in the next few days.

Thank you for spending time with me on my blog. I so appreciate you.

There is more Night of Navy creativity. To continue with the blog hop, click the "onto the next" graphic below and be taken to the blog of my lovely, talented fellow South Aussie, Tina GillespieI always look forward to checking out Tina's creations - she is amazing. I do love seeing everyones' projects - there is so much inspiration.

I hope to see you next week when we will be featuring Old Olive, a versatile green, as we continue the weekly 2022-2023 Colour Creations Blog Hops. After that we will have a break over Christmas/New Years before re-commencing in January 2023.

Stay well, stay safe and be kind to yourself and others. 

Andrea 💕🐾


If you find a broken link or have come to this blog hop from a different entry point, you can view the full list of participants on Catherine Proctor’s blog @ What Cathy Made. Cathy is our  Art With Heart Team Colour Creations Coordinator.  She is an special lady. Check out her delightful creation while you are there.

If you live in Australia, don't already have a Stampin' Up! demonstrator and would like your own copy of Stampin' Up's 2022-2023 Annual Catalogue, the July - December 2022 Mini Catalogue and or the January - April 2023 Mini Catalogue then let me know and I will be delighted to send them to you.  Please don't hesitate to make contact with any other queries about this project or Stampin' Up!. 

#colourcreationsbloghop  #stampinup #stampinupaustralia #stampinupsouthpacific #stampinupdemo  #handmadecards #makeacardsendacard #stampinupdemonstrator #papercrafting #artwithheartteam  #papercrafter  #stamper  #valleyinspirations   #sweetcandycanes #christmasbanners 

Be Inspired - July 2026 - Creating Backgrounds

Be Inspired Design Team Blog Hop CREATING BACKGROUNDS Welcome to Valley Inspirations with Andrea and the July  Be Inspired Blog Hop  where w...