Art with Heart Wow Tutorials

Wednesday, 10 November 2021

AWHT Colour Creations #24 Magenta Madness

Magenta Madness with Expressions in Ink & Brilliant Wings

Hello. Welcome to Valley Inspirations with Andrea and the Art with Heart 2021-2022 Colour Creations Blog Hop.


This week’s Blog Hop is focussing on a delightful bright pink called Magenta Madness. Magenta Madness is part of the In Colours for 2020-2022 and is a lovely colour for flowers. It is also a joyful colour and one I have fun working with.


Magenta Madness is produced in Stampin' Up!'s card-stock, both A4 & 12"x12"; Classic Stampin' inks (ink pads & re-inkers); Stampin' Write Markers; Stampin' Blends; the 2020-2022 In Colours & Expressions of Ink Designer Series Papers; Rainbow Glimmer Paper. The card below have used Magenta Madness Classic Stampin' ink, Card-stock, Stampin' Blends and the Expressions in Ink Speciality Designer Series Paper plus a range of other bits and pieces.

Here is my card heroing Magenta Madness:


I so love the Expressions in Ink Speciality Designer Series Paper - in fact I have loved it so much that until recently I haven't been able to cut it up. Magenta Madness is one of the colours in this delightful paper so in designing for this blog hop it was a great opportunity to share my love of it with you. The SDSP sheet used for the card front combines Magenta Madness with Polished Pink and Gold.


This delightful paper is part of the Expressions in Ink suite of products. The only stamping on the card is the sentiment which comes from the Artistically Inked stamp set. The focal die cut motif was cut using the Artistic Dies. 


The card is a Fancy Fold - its frustrating but I can't remember what its called. It folds at one side and on the other side both edges fold back on themselves. The card is held closed with a belly band. The belly band was created with a strip of Basic White card-stock that is folded to the front and the ends crossed one over the other and adhered together. 


A piece of White Glittered Organdy Ribbon was coloured with a Light Magenta Madness Blend and then tied around the belly band with a bow tied to the right. A die cut Basic White  card-stock circle, cut using the Layering Circles dies was adhered over the belly band join. A die cut detailed floral spray was cut using the large Artistic dies from Gold Metallic Speciality Paper and some In Color Jewels were added for further shimmer. 
A couple of tiny butterflies were added to the card front. They had been cut using the Brilliant Wings dies from Gold Metallic Speciality Paper.


Two designs from the SDSP were used on this card, one on the two main front panels and the second inside the card. The SDSP was adhered directly to a Basic White card base on the main front panels. Where Basic White card-stock was used inside the card it was layered on Magenta Madness card-stock leaving a thin boarder. 


The middle left panel is for the personal message. The centre right white panel was embossed with the Painted Textile 3D embossing folder, layered on a panel of Magenta Madness and then a strip of SDSP was adhered toto the left of the panel. Butterflies were cut using the Brilliant Wings dies from the SDSP and then detailed dies from the same set cut butterflies from the Gold Metallic Speciality paper. I think the detailed butterflies would have been sufficient without the back SDSP butterflies, but I did want to continue the SDSP through. 


Here is a photo of the other side of the card when it is fully open.


The SDSP was added to the envelope flap of a C6 Basic White envelope with the SDSP being carried over to the envelope front (as can be seen in one of the photos above).


I loved creating with this gorgeous SDSP and showcasing Magenta Madness at the same time. As I needed to work today, time was limited to provide a fuller description of the process. Do make contact if you have any queries.


Thank you so much for dropping by.

If you live in Australia, don't already have a Stampin' Up! demonstrator and would like your own copy of Stampin' Up's 2021-2022 Annual Catalogue and or the July - December 2021 Mini Catalogue then let me know and I will be delighted to send them to you. Please don't hesitate to make contact with any other queries about these projects or Stampin' Up!. 

There is more Just Jade creativity. To continue with the blog hop, click on the "next" graphic below to be taken to the blog of a talented lady, Caroline Manwaring. As always, I am looking forward to checking out Caroline's creation and everyone else's. I do love seeing everyones' projects - so many ideas and such great creations

Hope to see you next week when we will be featuring Mango Melody; and don't forget that the AWH Heart of Christmas Blog Hop is launched every Monday evening at 8pm AEST until the end of November.

Stay well, stay safe and be kind to yourself and others.

Andrea 💕🐾

If you find a broken link or have come to this blog hop from a different entry point, you can view the full list of participants on Catherine Proctor’s blog, our amazing AWHT Colour Creations Coordinator.  Check out her amazing creation while you are there.

#colourcreationsbloghop  #colourcreationsbloghop2021  #stampinup  #artwithheartteam #expressionsinink

Monday, 8 November 2021

AWH Heart of Christmas #19

 Christmas with Delicate Baubles

Hello. Welcome to Valley Inspirations with Andrea and the 19th Art with Heart Team 2021 Heart of Christmas Blog Hop. 


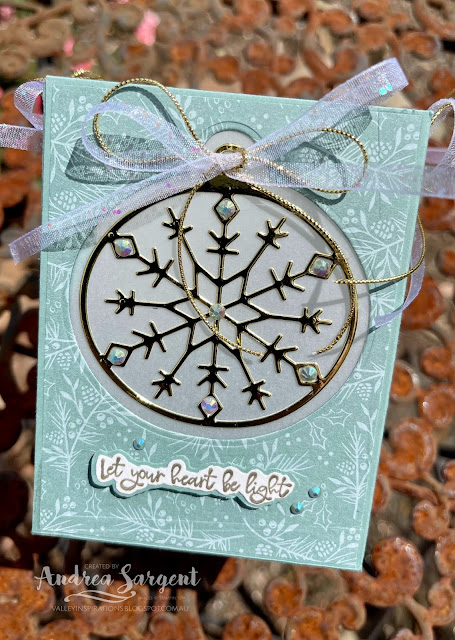
Its great you are joining us for this Heart of Christmas Blog Hop. I had quite a bit of fun  creating a luminary for this Christmas blog hop. I hope you like it:

Light up your Christmas with a Delicate Baubles Luminary, by Andrea Sargent, Australia

I'd been asked to run a class for a local Craft Group and create something different from a card for Christmas. I decided to design a Luminary or Votive and was told they hadn't done anything like that before. After deciding to use the Bright Baubles bundle and especially the Delicate Baubles dies, I started by measuring the dies to calculate the size of the panels that were to be cut. Having been caught previously by cutting the panels too small I wanted to have enough cardstock surrounding the die cut hole.

Light up your Christmas with a Delicate Baubles Luminary, by Andrea Sargent, Australia

I initially worked out dimensions with the 4 side panels, a fold back at the top and enough for a base, but...  It wasn't till I went to die cut the bauble shaped holes that I remembered that my Cut & Emboss Machine was only 6" wide and my card-stock was much wider. I then experimented with sizes till I worked out what was needed for a 4" x 4" cube. That was the size I made at class - see the Evening Evergreen Luminary in the first photo above.

Light up your Christmas with a Delicate Baubles Luminary, by Andrea Sargent, Australia

The Craft Group made the 4" x 4" x 4" but Christmas Designer Series Paper was added as an extra layer which gave more stability to the sides (not pictured). In creating a project for this blog hop I decided to change the dimensions to improve the overall design of the project.

Light up your Christmas with a Delicate Baubles Luminary, by Andrea Sargent, Australia

In this luminary, 2 pieces of Soft Succulent card-stock were cut, scored, burnished with the seams cut and notched. Coordinating pieces of Tidings of Christmas DSP was adhered to the relevant panels and then the two open baubles dies were used to cut holes in the side panels. (I'm hoping to create some decorations with all the bauble die cuts - stay tuned.)

Light up your Christmas with a Delicate Baubles Luminary, by Andrea Sargent, Australia

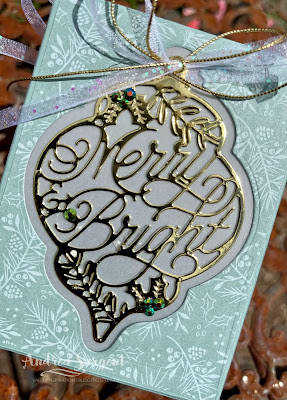
Vellum card-stock was adhered to the back of the panels over the bauble shaped holes. Each of the 4 detailed bauble die cuts were cut out of Gold Foil that had been backed Adhesive Sheets so each die cut bauble would become a sticker. After ensuring all the background die cut pieces were removed, the backing paper was removed and the detailed baubles were adhered to the Vellum.

Light up your Christmas with a Delicate Baubles Luminary, by Andrea Sargent, Australia

The two luminary pieces were adhered together to create a long flat piece. Then the remaining side seam was adhered to the other end, forming a tube. The top seam was adhered to the inside over the edge of the Vellum.  The base pieces were folded in across the bottom and adhered in place. Two square pieces of card-stock were then adhered on the base and inside the bottom of the luminary to neaten it off.

Light up your Christmas with a Delicate Baubles Luminary, by Andrea Sargent, Australia

The final touches were to add bows tied with Simply Elegant Gold Trim and the White Shimmer Organdy Ribbon. The ribbon had been cut in half lengthwise to give a daintier effect. Then the oh so gorgeous 2021-2023 In Colour Jewels were added to each bauble to add extra glimmer. I so so love these gems. A different colour jewel was used on the different baubles. 

Light up your Christmas with a Delicate Baubles Luminary, by Andrea Sargent, Australia

Here are some photos of the luminary at dusk to show you the impact of the light of a battery tea light shining though the vellum around the gold baubles. This tea light changes colour.


Thank you so much for spending time with me on my blog. I'm delighted you did.

If you are in Australia, don't already have a Stampin' Up! demonstrator and would like your own copy of Stampin' Up's 2021-2022 Annual Catalogue and or the July - December Mini Catalogue then let me know and I would love to send them to you. Pease don't hesitate to make contact with any other queries about these projects or Stampin' Up!. 

To continue with the blog hop, click on the "onto the next" graphic below to be taken to the blog of the lovely Rosa Leyden. I always look forward to checking out Rosa's creations together with everyone else's. 

Hope to see you next week for another AWHT Heart of Christmas Blog Hop. We only have 3 more Heart of Christmas Blog Hops this year, going up to the end of November

Also, don't forget the weekly Colour Creations Blog Hop by the Art with Heart Team that launches every Wednesday at 8.00pm AEST.

Stay well, stay safe and be kind to yourself and others.

Andrea XXX


As mentioned, it is always a delight to see everyone's creations and the way they each use the amazing Stampin' Up! products. I am sure there will be gorgeous Christmas projects on show so don't miss checking out each blog. 

If at any time you find a broken link and the next blog doesn’t come up or you started part way through, please head to the blog of this week’s host of the Heart of Christmas Blog Hop, very special Sharon Davern, and she will have the list of all Art With Heart Team members who are participating in this blog hop. Check out her beautiful creation while you are there.


#heartofchristmas #heartofchristmas2021 #awhtheartofchristmas #Stampin'Up! #brightbaubles

Wednesday, 3 November 2021

AWHT Colour Creations #23 Just Jade

Just Jade with Whimsical Trees & Expressions in Ink  

Hello. Welcome to Valley Inspirations with Andrea and the Art with Heart 2021-2022 Colour Creations Blog Hop.


This week’s Blog Hop is focussing on a delightful green called Just Jade. Just Jade is part of the In Colours for 2020-2022 and is a lovely colour for leaves, trees and sea themes to name a few. It is also a great green for Christmas. In working with this beautiful colour I kept wondering why I haven't been using it more. 


Just Jade is produced in Stampin' Up!'s card-stock, both A4 & 12"x12"; Classic Stampin' inks (ink pads & re-inkers); Stampin' Write Markers; Stampin' Blends; the 2020-2022 In Colours & Sweet Symmetry, Bloom Where You Planted, Expressions of Ink Designer Series Papers; Love Santa Tag Kit; Festive Felt Combo; Just Jade Gingham ribbon within the Flowers for Every Season Combo pack and Just Jade & Gold Braided Ribbon. The cards below have used Just Jade Classic ink, Just Jade Stampin' Blends and the Expressions in Ink Speciality Designer Series Paper plus a range of other bits and pieces.

Here are my cards heroing Just Jade:

Send Happy Christmas greetings to friends and family with much love coming through a personally created card designed by Andrea Sargent in Australia.

CARD 1:

The 1st card has water-coloured Just Jade Classic Stampin' Ink on Fluid 100 Watercolor Paper, which was then die cut with the squat tree die from the Christmas Tree dies.

Send Happy Christmas greetings to friends and family with much love coming through a personally created card designed by Andrea Sargent in Australia.

The little squat tree from the Whimsical Trees stamp set was also stamped on Basic White card-stock with Versamark ink and then heat embossed with Gold Emboss Powder and a Heat Gun. It was die cut with the same open die.

Send Happy Christmas greetings to friends and family with much love coming through a personally created card designed by Andrea Sargent in Australia.

The card front was dry embossed with the Painted Texture 3D embossing folder. As this slim-line card front was wider than the embossing folder, it needed to be passed through the Cut & Emboss machine a second time. I used a Bone Folder to soften the embossed line from the edge of the second pass of embossing. The line can still be noticed, but it isn't as obvious.

Send Happy Christmas greetings to friends and family with much love coming through a personally created card designed by Andrea Sargent in Australia.

A thin strip of Expressions in Ink SDSP was adhered to the LHS of the card front and a piece of Gold Simply Elegant Trim was tied around the card-front near the SDSP. The die cut trees were adhered with Dimensionals in a row just above the centre of the card front. I placed a strip of card-stock along the card front to help straight placement of the trees and then removed it.

Send Happy Christmas greetings to friends and family with much love coming through a personally created card designed by Andrea Sargent in Australia.

A sentiment from the Heartfelt Wishes stamp set was stamped in Just Jade ink on to some Basic White card-stock and fussy cut. The sentiment also was popped up on Dimensionals. Some Elegant Faceted Gems were coloured with a Light Just Jade Blend and added around the sentiment.

Send Happy Christmas greetings to friends and family with much love coming through a personally created card designed by Andrea Sargent in Australia.

The Basic White card inner has a thin strip of the Expressions in Ink SDSP to one side and a row of the little squat tree was stamped along the bottom. A custom made envelope with be created from DSP - but I ran out of time so that will be a task for tomorrow. 

CARD 2:

This second card is not a traditional Christmas card, but I so, so love the Expressions in Ink SDSP with the Just Jade, Evening Evergreen, Mint Macaron, Pear Pizzazz and Shaded Spruce and Gold colour combo. It is so rich and beautiful.

Send Happy Christmas greetings to friends and family with much love coming through a personally created card designed by Andrea Sargent in Australia.

The SDSP was cut to card front size and then die cut with the curved stitched die from the Basic Boarders dies. A piece of Basic White card-stock was also cut to size and adhered underneath so that this piece would hold itself flat when it was popped up on Dimensionals. A piece of Basic White card-stock was dry embossed with the Merry Melody 3D embossing folder (I needed to add something Christmassy). 

Send Happy Christmas greetings to friends and family with much love coming through a personally created card designed by Andrea Sargent in Australia.

The word "happy" was die cut 4 times from Basic White card-stock and then adhered one on top of the other. Layering of the gave the same level of dimension as using Dimensionals. The word "Christmas" from the coordinating Words of Cheer stamp set, was stamped in Just Jade ink and trimmed down with the Trimmer. It was adhered to part of the die cut happy.

Send Happy Christmas greetings to friends and family with much love coming through a personally created card designed by Andrea Sargent in Australia.

Rhinestone Basic Jewels were coloured with a Dark Just Jade Blend and added around the sentiment. As my brother is not into lots of Christmas trimmings I thought he may appreciate this card so I refrained from adding ribbon/trim, etc and thought I would leave it simple-ish - well simple for me. 

Send Happy Christmas greetings to friends and family with much love coming through a personally created card designed by Andrea Sargent in Australia.

I used the stitched concave section left from cutting the front section of SDSP for the card inner, but only just realised that I had forgotten to add a sentiment within the concave area - oops. That will be another task for tomorrow. Just as well I have a Stamparatus. It is ensure stamping a sentiment on a completed card will go well. I would hate to mess up the card at this point. I ran out of Basic White C6 envelopes so will add them to my next Stampin' Up! order. When the envelopes arrive I will add some coordinating SDSP to the flap.

Send Happy Christmas greetings to friends and family with much love coming through a personally created card designed by Andrea Sargent in Australia.

Thank you so much for dropping by.

If you live in Australia, don't already have a Stampin' Up! demonstrator and would like your own copy of Stampin' Up's 2021-2022 Annual Catalogue and or the July - December 2021 Mini Catalogue then let me know and I will be delighted to send them to you. Please don't hesitate to make contact with any other queries about these projects or Stampin' Up!. 

There is more Just Jade creativity. To continue with the blog hop, click on the "next" graphic below to be taken to the blog of a very talented lady, Michele Taylor. As always, I am looking forward to checking out Michele's creation and everyone else's. I do love seeing everyones' projects - so many ideas and such great creations

Hope to see you next week when we will be featuring Magenta Madness; and don't forget that the AWH Heart of Christmas Blog Hop is launched every Monday evening at 8pm AEST until the end of November.

Stay well, stay safe and be kind to yourself and others.

Andrea 💕🐾

If you find a broken link or have come to this blog hop from a different entry point, you can view the full list of participants on Catherine Proctor’s blog, our amazing AWHT Colour Creations Coordinator.  Check out her amazing creation while you are there.

#colourcreationsbloghop  #colourcreationsbloghop2021  #stampinup  #artwithheartteam #whimsicaltrees #wordsofcheer #expressionsinink

Monday, 1 November 2021

AWH Heart of Christmas #18

Christmas with Merry Moments

Hello. Welcome to Valley Inspirations with Andrea and the 18th Art with Heart Team 2021 Heart of Christmas Blog Hop. 


So glad you are joining us for this Heart of Christmas Blog Hop. After creating the first card I decided to create the second - more standard design - using the same colours and products. It wouldn't take as long as most of the decisions had been made. It was fun playing. I hope you like them:

Bring the merriest of moments for Christmas with these cards by Andrea Sargent, Australia.

These cards feature the Merriest Moments bundle which includes stamp set and coordinating dies as well as the Merriest Frame Hybrid Embossing Folder. This EF embosses a gorgeous design and also fits one of the dies so that card-stock can be embossed and die cut at the same time - its very clever and only the second of its kind produced by Stampin' Up!

Bring the merriest of moments for Christmas with these cards by Andrea Sargent, Australia.

CARD 1:

This card uses the die cut and embossed piece in a different way to the standard use of the bundle. Three Basic White card-stock pieces were cut with the more detailed die and each was embossed with the coordinating EF. A Stampin' Up! Blending Brush was used to apply Mint Macaron Classic Stampin' ink to the edges of the die cuts. The die cut leaf edges were cut away from the rest of the panel.

Bring the merriest of moments for Christmas with these cards by Andrea Sargent, Australia.

A piece of Mint Macaron card-stock also had some Mint Macaron ink blended over the edges. The frame edge pieces were arranged and adhered around the edges with the leaves facing inwards. A second partial layer of leaves also was added to cover some edge gaps and provide greater balance of design.

Bring the merriest of moments for Christmas with these cards by Andrea Sargent, Australia.

A mid sized flower from the Merriest Moments stamp set was stamped in Blushing Bride ink. While I fussy cut it out there is a coordinating die as well. The 3 smaller flowers were also die cut a couple of times with coordinating dies from Basic White card-stock and a few from Silver Foil from the Silver Foil Speciality pack. The white die cut flowers were coloured using a Sponge Dauber and either Polished Pink or Misty Moonlight inks.

Bring the merriest of moments for Christmas with these cards by Andrea Sargent, Australia.

The flowers were arranged and adhered in place with only the stamped flower popped up on a Dimensional. A sentiment from the stamp set was stamped in the centre of the card front in Evening Evergreen ink using a Stamparatus. (I didn't want the sentiment to go array after the work in the leaf boarder.) A piece of silver Simply Elegant Trim was tied in a bow and tucked under the larger flower with a Glue Dot. Rhinestone Basic Jewels were scattered around including as flower centres.

Bring the merriest of moments for Christmas with these cards by Andrea Sargent, Australia.

A Basic White card inner was decorated with 3 little die cut flowers and a Basic White C6 envelope was stamped in Blushing Bride ink with the larger of the stamped flowers.

Bring the merriest of moments for Christmas with these cards by Andrea Sargent, Australia.


CARD 2:

This second card used the same colours and products. As you can see the cards are similar but different.

Bring the merriest of moments for Christmas with these cards by Andrea Sargent, Australia.

The Merriest Frames Embossing Folder was used to emboss the background and a Basic White card-stock die cut and blended frame was placed directly on top with glue only on the centre section. A stitched rectangular label was cut with a stitched die from the same set.

Bring the merriest of moments for Christmas with these cards by Andrea Sargent, Australia.

A sentiment from the stamp set was stamped in Versamark ink on to the label and then it was heat embossed with Silver Emboss Powder and a Heat Gun. The label was popped up on Dimensionals.

Bring the merriest of moments for Christmas with these cards by Andrea Sargent, Australia.

The small stamped flower was stamped in Polished Pink ink, and to try something different, a piece of Basic White card-stock was heat embossed with Silver Emboss Powder and then die cut with the tiny floral dies. While I have used this technique previously, it is interesting to compare it in the same crafting session with the foil die cut flowers. The flowers and other products were added in a similar manner to Card 1. The card inner and envelope were also given a touch of coordinating bits and pieces.

Bring the merriest of moments for Christmas with these cards by Andrea Sargent, Australia.


Thank you so much for spending time with me on my blog. I'm so glad you called in.

If you are in Australia, don't already have a Stampin' Up! demonstrator and would like your own copy of Stampin' Up's 2021-2022 Annual Catalogue and or the July - December Mini Catalogue then let me know and I will be delighted to send them to you. Please don't hesitate to make contact regarding any other queries about these projects or Stampin' Up!. 

To continue with the blog hop, click on the "onto the next" graphic below to be taken to the blog of the lovely Rachel Woolard. I always look forward to checking out Rachel's creations together with everyone else's. 

Hope to see you next week for another AWHT Heart of Christmas Blog Hop. Also, don't forget the weekly Colour Creations Blog Hop by the Art with Heart Team that launches every Wednesday at 8.00pm AEST.

Stay well, stay safe and be kind to yourself and others.

Andrea XXX


If at any time you find a broken link and the next blog doesn’t come up or you started part way through, please head to the blog of this week’s host for the Heart of Christmas Blog Hop, Tina Gillespie, and she will have the list of all Art With Heart Team members who are participating in this blog hop. Check out her beautiful creation while you are there.


#heartofchristmas #heartofchristmas2021 #awhtheartofchristmas #stampinup #stampinupdemo #merrymoments


Be Inspired - October 2026 - Die Cutting

Be Inspired Design Team Blog Hop FEATURING DIE-CUTTING Welcome to Valley Inspirations with Andrea and the October  Be Inspired Blog Hop  whe...