Hello. Welcome to Valley Inspirations with Andrea and the Colour Creations Showcase by members of Stampin' Up!'s Art with Heart Team.
This week we are focussing on Flirty Flamingo, a pretty bright pink. It sits within Stampin' Up!'s Brights colour family. Flirty Flamingo can be found in Stampin' Up!s cardstock, Classic inks, Stampin' Write Markers, Watercolour Pencils, Stampin' Blends, some Designer Series Papers and sparkly Whale of a Time sequins.
I had hoped to present two cards to you in this blog, but at the time of going live there will be only one card. The other is in pieces on my desk. It needs something else and inspiration hadn't arrived at the time of writing the blog. I'm hoping that I will be able to upload the 2nd card tomorrow. Fingers crossed.
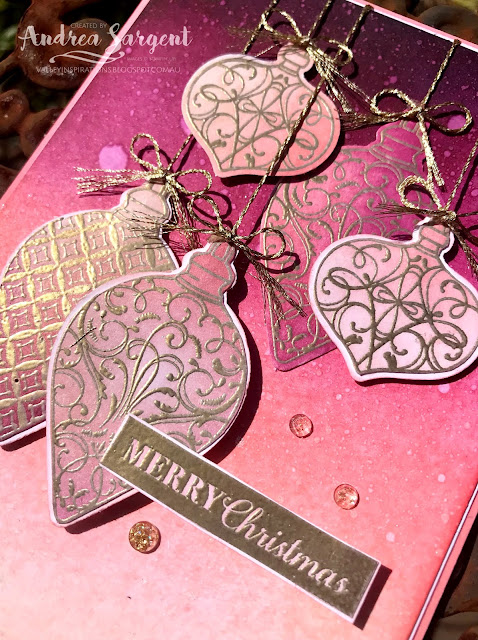
I've seen a couple of lovely sponged backgrounds of late and was reminded how beautiful this technique can be, so I decided to use the technique for one of my cards. I've also been reminded of how water reactive Stampin' Up!s Classic inks are - more of this in a later blog, but for this background splatters of water were added to give the background more character. Check out the various size splatters on this close-up.
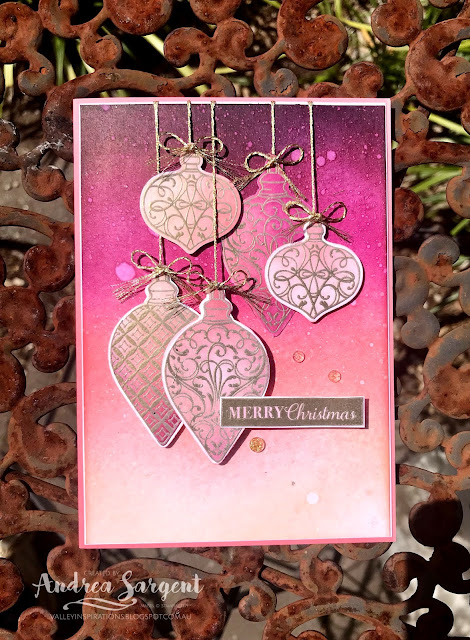
To create by background, I used sponges to apply Petal Pink, Flirty Flamingo, Rich Razzleberry, Blackberry Bliss and a touch of Night of Navy Classic ink on Whisper White card-stock to create this graded colour play. It is important when blending from one colour to the another to overlap the two colours so that there is an area where the colours mix. I usually apply one colour, then the second colour with an overlapped area and then go over the mixed area again with the first colour. This seems to soften the blending. We all apply techniques with our own twist - this is my approach.
After finishing my colour blending, I spritzed water over the background and then left the water to interact with the ink. Once dry, I sprinkled some Wink of Stella over the card background. In real life the background looks shimmery - but it isn't picked up in my photos. I mounted this card front with a very fine boarder of Whisper White card-stock.
The baubles from the Christmas Gleaming stamp set were stamped in Versamark ink on Whisper White card-stock and then heat embossed using Gold Emboss powder. They were coloured using the same range of inks as the background (apart from Blackberry Bliss and Night of Navy). A sentiment from the same set was similarly heat embossed. The embossing itself resisted the application of colour, and so the gold embossing shines through.
The baubles and sentiment were arranged. That sounds so simple, but ... I spent ages on the arrangement. Initially, I thought three baubles; hmm was it a bit sparse? So added another two - was it too crowded???? Took two off; hmm still not right. They were moved up and down; spread over the card base and then grouped together; the order was changed and then changed again; plus all sorts of combinations of the above. Must admit I'm still not 100% happy and am wondering whether it would have been better with White embossing and or lighter colouring on the baubles. What do you think?
To finish off the card front, Golden Twine from the Forest Greenery Trim Combo pack was laid from the top of each bauble to the top of the card front. All the threads were then adhered to the back with Tear n' Tape. Little bows were adhered in place with Glue Dots. The card front was then adhered onto the Flirty Flamingo card-stock base. Three Wonderful Gems were added to complete the card. The gems are wonderful - they have bits of gold within.
Catherine Proctor is our wonderful host of the Art with Heart Colour Creations Showcase. If you haven't finished visiting all of the team's colour creations, you can visit/revisit Catherine's page at What Cathy Made, where she hosts all the links to the other Showcase participants. I'm certainly looking forward to checking out everyone's Flirty Flamingo creations. It is always inspiring to see the amazing projects created by others and their interpretations of showcasing the specified colour.
I hope to see you again next week when members of the team will share projects that hero Garden Green.
Do look after yourself and your loved ones. Stay well, stay safe and be kind to yourself and others in these strange times.
Andrea 💕🐾


Andrea I think this would have looked great with just 3 baubles but the 5 baubles and the gold embossing really give it a luxurious feel. Your water colouring and blending are amazing! Thank you for inspiring us all with your Flirty flamingo card tonight xx
ReplyDeleteWow! Just wow!! No tweaking/change necessary, Andrea ... this is a stunning card. Who knew Flirty Flamingo could look so good, and play so nicely with all those other glorious colours? Your card is a real work of art.
ReplyDeleteWow, beautiful card Andrea, love everything about it!
ReplyDeleteWow Andrea your card is gorgeous. That sponged background with the splashes is just beautiful.
ReplyDeleteOh WOW, what a stunning masterpiece. Andrea, your background is totally amazing... no, everything is totally amazing, so inspiring!
ReplyDeleteI love your blended background!
ReplyDeleteWow!! Andrea, stunning!!! Your card is my favourite of all of our creations tonight - it is just so perfect!
ReplyDeleteOh my gosh - that is just a stunner. I'd frame that - so beautiful. Love the rich depth of the colours.
ReplyDeleteYour card is absolutely stunning Andrea. I love everything about it. Your sponged background is gorgeous. You made me laugh when you talked about it taking a long time to find the correct placement for your baubles. Sometimes I have to stop and laugh at myself when I realise that I have spent many more minutes than I would like to admit, finding the exact 'right' spot for a rhinestone.
ReplyDeleteAbsolutely gorgeous, Andrea. The time spent on arranging the baubles was well spent, as they look fantastic! The multicoloured background is just beautiful, and I love the water drops that have created such a lovely effect. I'm sure the sparkle from the Wink of Stella looks amazing IRL. Thanks for sharing your beautiful card with us all.
ReplyDeleteThis is so pretty - I love your gold embossed baubles on the pink background - gorgeous!!
ReplyDeleteThis card popped out to me on Pinterest. I love the amount of baubles you have there. It is perfect placement as far as I’m concerned.
ReplyDeleteWOW. Beautiful Card.
ReplyDeleteGrüße aus Germany
WOW. Beautiful Card.
ReplyDeleteGrüße aus Germany
It's a stunning card, Andrea - perfect just the way it is.
ReplyDelete