Daffodil Delight with Daffodil Dies
Hello. Welcome to Valley Inspirations with Andrea and the Art with Heart Colour Creations Blog Hop. We are working though the Stampin' Up! colours in alphabetical order.
This week’s Blog Hop is focussing on a bright yellow called Daffodil Delight. Daffodil Delight is part of the Brights Colour Family and is a happy clear yellow. This colour is lovely when used for flowers (including but not limited to daffodils) and so much more. It goes with different greens (including Pear Pizzazz) and with Pool Party, etc. It is also great with Gold.
Daffodil Delight is produced in Stampin' Up!'s card-stock, both A4 & 12"x12"; Classic Stampin' inks (ink pads, Classic spots & re-inkers); Stampin' Write Markers; Water-colour Pencils; Stampin' Blends; Soft Pastels, Brights Designer Series Paper as well as Hues of Happiness & Design a Daydream DSPs; plus Light the Candles & Kindness Card Kits; Glossy Dots Assortment; and Today is the Day Memories & More Card Pack.
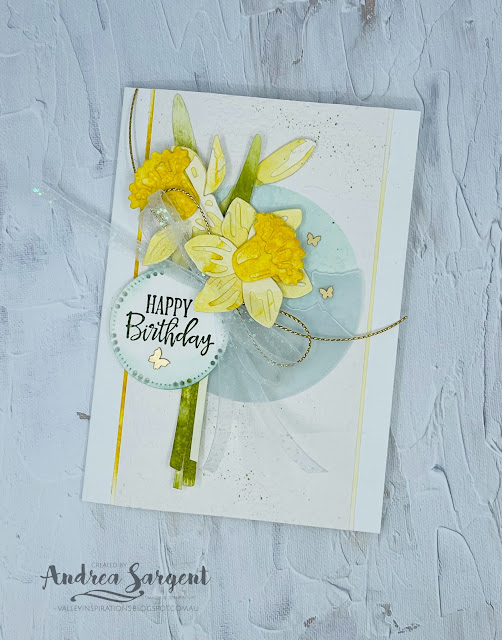
Here is my card showcasing Daffodil Delight:
As I was thinking about and designing this card I also watched Cindy Schuster of The Crafty Carrot Co during their free August series of Facebook Lives. Cindy designed a gorgeous card with the layout shown below. I so loved her card and have CASEd her layout while using completely different products and colours. The Crafty Carrot Co gals are all brilliant and share so many tips and tricks as well as delightful ways to use Stampin' Up! products.
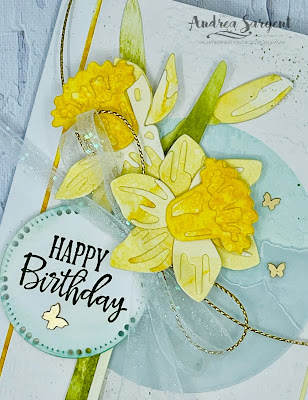
Seeing some daffodils when walking with Gemma (my fur family), I decided to use the obvious choice of daffodils to show the bright and happy Daffodil Delight. To apply ink to paper with a different method than used when previously creating with the Daffodil dies, I swiped my Daffodil Delight Classic ink pad over some Shimmery White card-stock. The coloured panel was sprinkled with water to add extra texture. Another piece of Shimmery White card-stock was coloured with Pear Pizzazz ink in the same way. Once the panels were dry, the various dies were used to create the bud, full daffodil and side-view daffodil plus coordinating leaves and stems. A small round label was cut from Basic White card-stock using the Labels Aglow dies in readiness for the sentiment.
A large circle die from the Stylish Shapes dies was used to cut a circular hole from a spare piece of card-stock. This was used as a mask over a piece of Shimmery White card-stock and Pool Party Classic ink was blended through the hole using Stampin' Up!s amazing Blending Brush. The panel was then passed through the gorgeous Timeworn Type 3D Embossing Folder before being splattered using a Pear Pizzazz Marker. Two thin strips of the Daffodil Delight coloured card-stock were adhered to each side of the embossed panel and then adhered directly to a Basic White Thick card-stock card base.
One of the special aspects of Cindy's creation was the large circle of layered torn coloured card-stock. It had a delightful scenic feel. While I added a blended circle rather than Cindy's torn layered scene I did add a couple of torn layers of Vellum card-stock. The daffodil and leaf pieces were arranged using either Multipurpose Liquid Glue or Dimensionals. As I need some specific birthday sentiments, a sentiment from the Peaceful Moments stamp set was stamped in Mossy Meadow ink onto the smaller die cut label. A little Pool Party ink was blended over the edges of the label.
A bow was tied with sliced (in half) White Glittered Organdy Ribbon and Gold Simply Elegant Trim and tucked between the daffodils and the label. A few Brushed Brass Butterflies were scattered around and a splattering of Wink Of Stella add a little shimmer.
Left over leaf/stem and bud were adhered to a Basic White card inner plus a couple of thin strips of the Daffodil Delight coloured paper were added on each side. A C6 Basic White envelope was stamped on one edge with daffodils in Daffodil Delight ink.
Thank you so much for dropping by. I do value the time you spent with me.There is more Daffodil Delight creativity. To continue with the blog hop, click the "onto the next" graphic below to be taken to the blog of the lovey Kate Morgan. I always look forward to checking out Kate's creations. I do love seeing everyones' projects - there is always so much inspiration.
Hope to see you next week when we will be featuring Early Expresso as we continue the weekly 2022-2023 Colour Creations blog hops. Also, don't forget that we are joining the Heart of Christmas Blog Hop on Monday evenings to share many delightful Christmas projects.
Stay well, stay safe and be kind to yourself and others.
Andrea 💕🐾
If you find a broken link or have come to this blog hop from a different entry point, you can view the full list of participants on Catherine Proctor’s blog @ What Cathy Made. Cathy is our wonderful Art With Heart Team Colour Creations Coordinator. She is an amazing lady. Check out her delightful creation while you are there.
If you live in Australia, don't already have a Stampin' Up! demonstrator and would like your own copy of Stampin' Up's 2022-2023 Annual Catalogue and or the July - December 2022 Mini Catalogue then let me know and I will be delighted to send them to you. Please don't hesitate to make contact with any other queries about this project or Stampin' Up!.
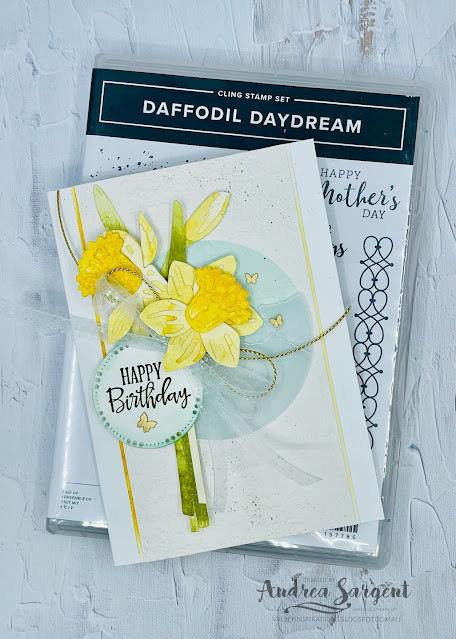
#colourcreationsbloghop #stampinup #stampinupaustralia #stampinupsouthpacific #stampinupdemo #handmadecards #makeacardsendacard #stampinupdemonstrator #papercrafting #artwithheartteam #papercrafter #stamper #valleyinspirations #daffodildaydream #thecraftycarrotco


Beautiful shimmery, Daffodil Delight daffodils Andrea. I really like your interpretation of the layout and those ting brass butterflies are gorgeous
ReplyDeleteThis is an exceptionally beautiful card, Andrea. I love how you applied ink to the Shimmery White cardstock, before die-cutting the "bits". The torn vellum in the circle is a very creative touch. The little brass butterflies finish your card off beautifully.
ReplyDeleteThis card makes me happy, Andrea! I love the composition, the colours, the bow, your blending – basically everything!
ReplyDeleteWhat a beautiful way to use the sketch, and how appropriate using daffodils to create your gorgeous card. Love the soft blue as a contrast to the bright yellow.
ReplyDeleteOh, how pretty! I love the variation in colour that you've achieved on the daffies, and the inked, torn circle in the background looks amazing.
ReplyDeleteStunning card Andrea and those daffodils and stems are beautiful inked. Love the yellow edges to the main panel and the large circle is lovely. Everything about your card is beautiful! Rosa
ReplyDeleteSuch a beautiful card Andrea and you didn't let me down I knew someone would have to use the Daffodil bundle. There is so much to love about this card from the daffodils to the bow to those cute little butterflies. Just beautiful.
ReplyDeleteOh wow, this is a fabulous take on Cindy's sketch. I loved what she made, but using the Daffodils is so gorgeous. Your water colouring again is perfection and I adore your torn vellum circle, stunning!
ReplyDelete