Art with Heart Wow Tutorials

Wednesday, 16 June 2021

AWH Colour Creations #3 Basic Gray

Basic Gray with Handsomely Suited

Hi. Welcome to Valley Inspirations with Andrea and the Art with Heart 2021-2022 Colour Creations Blog Hop. We are working our way through all the Stampin' Up! colours and focussing on one of the Stampin' Up! colours each week.  We are currently progressing through the colours starting with "B". With this new round we are using a more traditional Blog Hop style, where we move to the next participant on the list. Just click on the "next" graphic near the end of this blog to go to the next participant. At the end of the blog there is a list of all of the participants in this week's blog hop where clicking on a name will take you to their particular blog.

This week we are focusing on Basic Gray, that is described perfectly by its name. Basic Gray is one of the Neutral's Colour Family and is a strong 'true' grey, as you can see in the floral graphic below. Basic Gray seems to go with nearly every colour and can be used instead of Black if you want something a little more subtle or softer. 

Basic Gray has been produced in Stampin' Up!'s card-stock, both A4 & 12"x12"Classic Stampin' inks (ink pads & re-inkers); Stampin' Write Markers; Watercolour Pencils, & Simply Elegant, In Good Taste and Neutral's Designer Series Papers (DSP) as well as the soon to be retiring Well Suited Twine Combo and Well Suited DSP. Just before this blog went live I checked the Stampin' Up! Aussie website and found that the Well Suited DSP is sold out. I was going to say "get in quick if you want this discounted DSP" but it's too late! It's all gone.


I had numerous ideas when designing the Basic Gray projects. Is it quite a change, as I used to think of grey as an accompaniment to other colours but not a focal colour. More recently I have realised how lovely grey is to hero with another colour, for example yellow or pink. However, I decided to use some DSP incorporating Basic Gray with the Handsomely Suited bundle to create a gift bag/card and an easel card. I had been asked to incorporate a "male" card in one of next months card classes so decided to design it as part of this blog. Here are my projects:

The Suit and Tie Gift bag with single card, plus an Easel Card were created for that special fella in your life, by Andrea Sargent at Valley Inspirations. Copyright Stampin' Up!


PROJECT 1: GIFT BAG WITH CARD INCORPORATED

The Suit and Tie Gift bag with single card were created for that special fella in your life, by Andrea Sargent at Valley Inspirations. Copyright Stampin' Up!

The gift bag was designed around a standard card front size.  Two pieces of Basic Gray card-stock were cut with the addition of enough for the bag bottom. The bag sides (or gussets) were cut from a piece of the In Good Taste DSP that is reminiscent of woven fabric made with Basic Gray and a lighter brown. The DSP was cut wider than the needed gusset to include seams for adhering to the card-stock.

The Suit and Tie Gift bag with single card were created for that special fella in your life, by Andrea Sargent at Valley Inspirations. Copyright Stampin' Up!

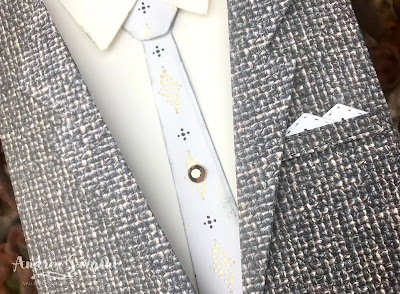
For the Bag/Card front, the DSP was cut with the dies from the Suit & Tie die set to form the suit and buttons were cut from Basic Gray card-stock. The card (Shirt front) was cut slightly smaller than the bag front from Very Vanilla card-stock and the collar was cut from the same card-stock. The tie was die cut from the Simply Elegant Speciality DSP and 2 tie ends were also cut from the same DSP to be reminiscent of coordinating hankies in the Jacket pocket.

The Suit and Tie Gift bag with single card were created for that special fella in your life, by Andrea Sargent at Valley Inspirations. Copyright Stampin' Up!

The jacket front was cut in 2 pieces so one side would fold over the other, however, I'm not sure if it was worth the extra calculations and effort to attempt to give the Jacket a more realistic look. It's not that visible in the photos. Seams were added to adhere the 'jacket' to the gift box and enable the seperate 'shirt' card to slide in and out. 

The Suit and Tie Gift bag with single card were created for that special fella in your life, by Andrea Sargent at Valley Inspirations. Copyright Stampin' Up!

The shirt collar, jacket lapels and pocket tab and the tie were adhered with a mix of Multipurpose Liquid Glue and Mini Dimensionals. Prior to adding the tie, a really light application of Basic Gray ink was added to the edge with a Sponge Dauber to give the tie greater definition. I think Smoky Slate ink would have been a better choice for sponging the edge. The buttons were popped up on small pieces of Dimensional

The Suit and Tie Gift bag with single card were created for that special fella in your life, by Andrea Sargent at Valley Inspirations. Copyright Stampin' Up!

The sentiment, that came from the Handsomely Suited stamp set was stamped in Basic Gray Classic Stampin' ink. Yes, the sentiment was die cut using one of the smallest Stitched Rectangle dies - this only was required as the sentiment was first stamped directly onto the Very Vanilla card-stock but ... you guessed it ... it wasn't quite straight (and really annoyed me) so the sentiment was stamped again on a scrap of card-stock, die cut and adhered directly to the card. A Gilded Gem was added to the tie as a "tie pin".

The Suit and Tie Gift bag with single card were created for that special fella in your life, by Andrea Sargent at Valley Inspirations. Copyright Stampin' Up!

Above is a close up of the jacket, showing some dimension achieved at the lapels and the pocket placard. I love the added touch, though oh so small, of the SDSP hankies.

The Suit and Tie Gift bag with single card were created for that special fella in your life, by Andrea Sargent at Valley Inspirations. Copyright Stampin' Up!

I had so much fun designing & creating this bag with slip in card (your message is to be written on the back). I used some retiring Clever Clasps to close the gift back at the top. They are discounted and will be discontinued, so get in before the end of the month, or even sooner if they sell out. Don't delay as there are no similar clasps in the 2021-2022 Annual Catalogue.


PROJECT 2: Handsomely Suited Easel Card

The Suit and Tie Easel Card was created for that special fella in your life, by Andrea Sargent at Valley Inspirations. Copyright Stampin' Up!

The card base and card front was cut from Basic Gray card-stock. The card base was scored in half and then the front section in half again. The folds were burnished with a Bone Folder. The seperate card front was adhered to the bottom half of the front of the card base - thus forming the the basic easel mechanism.

The Suit and Tie Easel Card was created for that special fella in your life, by Andrea Sargent at Valley Inspirations. Copyright Stampin' Up!

The suit jacket was die cut from a piece of Well Suited DSP (as mentioned, this has just sold out). I will need to re-create this card for my coming class and will use the In Good Taste DSP so participants are able to access more DSP if they so choose. I will use the twill design, which will work well for a suit jacket. The shirt was cut from Basic White card-stock and the tie and hanky from the Simply Elegant Speciality DSP.

The Suit and Tie Easel Card was created for that special fella in your life, by Andrea Sargent at Valley Inspirations. Copyright Stampin' Up!

The 'suit' DSP was adhered directly to the shirt card-front and then the shirt collar was adhered with liquid glue and Mini Dimensionals. The jacket lapel was similarly adhered and 2 die cut Basic Gray buttons were added with little pieces of Dimensionals. The tie was tucked under the shirt collar and also under the bottom of the suit jacket. I added it at that point so it would sit neatly and centralised - the trick was to not adhere the jacket in that area, so the tie could tuck in. The die cut pocket with the touch of the SDSP for the hanky was adhered in place.

The Suit and Tie Easel Card was created for that special fella in your life, by Andrea Sargent at Valley Inspirations. Copyright Stampin' Up!

The shirt card front was snipped at the neck along the inside collar to indicate the neck line and then this "Suit" card front was adhered to the Basic Gray card-stock easel front.

The Suit and Tie Easel Card was created for that special fella in your life, by Andrea Sargent at Valley Inspirations. Copyright Stampin' Up!

To enable the easel front to stand, a piece of the suit DSP was adhered to a strip of Basic White card-stock that was the width of the card base. A thin strip of the SDSP to match the tie was adhered to the top of the strip - this could be reminiscent of a cumber bun. A birthday sentiment from the Handsomely Suited stamp set was heat embossed to a piece of Basic Gray card-stock using Versamark, White Emboss Powder and a Heat Gun. This was die cut with a small Stitched Rectangle die. This label was adhered directly in the centre of the suited DSP. This whole panel was popped up on Dimensionals, which provides a great stopper for the easel section.

The Suit and Tie Easel Card was created for that special fella in your life, by Andrea Sargent at Valley Inspirations. Copyright Stampin' Up!

As a finishing touch a white Elegant Faceted Gem was added to the tie. Ties from the same stamp set were stamped in Basic Gray ink on a C6 Basic White Envelope. As you know by now, I love small touches of the design added to the envelope to coordinate with the card.

The Suit and Tie Easel Card was created for that special fella in your life, by Andrea Sargent at Valley Inspirations. Copyright Stampin' Up!


Thank you so much for visiting Valley Inspirations with Andrea. I really had fun creating these projects to share. I love the Suit Gift Bag with slip in card and the Easel card. As mentioned, a slight variation of this Easel card will be used in a coming card class in response to a request for a card for a fella. 
 
If you are in Australia, don't already have a Stampin' Up! demonstrator and would like your own copy of Stampin' Up's 2021-2022 Annual Catalogue then let me know and I will be delighted to send one to you.

There is more Basic Gray creativity. Click on the "next" graphic to be taken to the lovely Rosa Leyten's blog. I am looking forward to checking out Rosa's creation and everyone else's. If you started at the beginning with Michele Taylor you are getting close to the end of the hop but if you missed someone there is a list below with everyone who is part of tonight's Colour Creation Blog Hop.

Hope to see you next week when we will be featuring Bermuda Bay.

Stay well, stay safe and be kind to yourself and others.

Andrea 💕🐾


A big thank you to Catherine Proctor who is our dedicated host of the Art with Heart Colour Creations Blog Hop. She is an amazing lady and very good at keeping us in line.

Checking out everyone's creations and their interpretation of the amazing Stampin' Up! colours is always a treat and I am sure there will be inspiring Basic Gray projects on show. I feel so blessed to share with such talented Creatives.

Here are all the participants for the Colour Creations Blog Hop launching 16 June 2021:

Wednesday, 2 June 2021

AWH Colour Creations Showcase - In Colours

In Colours with Quiet Meadows

Hi. Welcome to a new year, well at least the first Art with Heart 2021-2022 Colour Creations Blog Hop. We have worked our way through all the Stampin' Up! colours and are now starting afresh as we continue to focus on each of the Stampin' Up! colours each week, working in alphabetical order. We are also changing the format of the Colour Creations Showcase to a more traditional Blog Hop style, where we move to the next participant on the list rather than follow the list of participants from the Coordinator's blog. I hope you feel comfortable with the change.

This week we are focusing on all 5 of the new In Colours for 2021-2023. Such gorgeous colours. They are Polished Pink, Pale Papaya, Evening Evergreen, Soft Succulent and Fresh Freesia. While we normally focus on one colour, to sync the Blog Hop timetable with the Stampin' Up! schedule, we are working with all 5 of the new In Colours this week.

My last few days have gone a bit haywire with an unscheduled work interview and other happenings, so I will be working up to the blog's go live time. My apologies if you check in and find its not all here. (Must admit, that matches my current frame of mind - ha ha.) Phew - just completed it in time for launch!

This week I created a set of Note Cards with a Note Card Holder. Taking photographs this morning before rushing off to help a friend, I didn't realise until a little while ago when I arrived home after a hectic day that quite a number of the photos taken have not transferred through. No time to check what's happened now. Will re-photograph the missing shots tomorrow

Here is a set of In Colour Note Cards featuring the Quiet Meadows bundle from Stampin' Up. There is a coordinating Note Card Holder, created without cutting or gluing, just scoring and folding. So cute.

I created a Note Card Holder using a piece of 12"x12" Hand Penned Designer Series Paper. There is no cutting and gluing, just scoring, burnishing and folding so you could say it was formed using Origami. My photos of the Note Card Holder have disappeared, so I will not go into a huge discussion here of how it was created, but I refer you to Rachel Tessman's U-Tube channel where late May (uploaded 6 days ago) she created a Note Card Holder and 3 Note-cards using the Bloom Where You Are Planted DSP. Rachel is a Stampin' Up Demonstrator from the USA who has recently reached the heights of 1 million dollars in sales. An amazing achievement.

The Hand Penned DSP was new to the 2021-2022 Annual Catalogue and is one of my favourites. It includes In Colours, like Pale Papaya.

Here is a set of In Colour Note Cards featuring the Quiet Meadows bundle from Stampin' Up. There is a coordinating Note Card Holder, created without cutting or gluing, just scoring and folding. So cute.

While the new In Colours go together well, I decided to create a set of Note Cards using Stampin' Up!'s note cards that come as a set of Note Cards and Envelopes (that's 20 cards and 20 envelopes in a pack). They are the perfect size for the Note Card Holder. I've used the Basic White Note Cards, but they also come in Very Vanilla. I need to say a big thank you to Kathryn Mangelsdorf who "saved my bacon" as when I went to create this project I could only find my stash of Very Vanilla Note Cards and no Basic White. What was I to do? It was Kathryn to the rescue. Thank you so much Kathryn.

Here is a set of In Colour Note Cards featuring the Quiet Meadows bundle from Stampin' Up. There is a coordinating Note Card Holder, created without cutting or gluing, just scoring and folding. So cute.

I started each note card by cutting a Basic White card front a tad smaller than the note card. Using a Blending Brush each of the In Colours was applied to the centre of the card front and then the splatters stamp from the Quiet Meadows stamp set was stamped over the blended background and then stamped a second time without re-inking (ie stamping off).

Here is a set of In Colour Note Cards featuring the Quiet Meadows bundle from Stampin' Up. There is a coordinating Note Card Holder, created without cutting or gluing, just scoring and folding. So cute.

Each of the flower and leaf dies from the Meadows dies were used with Basic White card-stock. Butterflies and 5 little labels were also die cut using dies from the same set. Aren't they delightful. The labels were each stamped with one of the In Colours. The sentiment also came from the coordinating Quiet Meadow stamp set.

Here is a set of In Colour Note Cards featuring the Quiet Meadows bundle from Stampin' Up. There is a coordinating Note Card Holder, created without cutting or gluing, just scoring and folding. So cute.

Each note card had a different flower or leaf adhered over the blended background and one of the two different butterflies was also added, ensuing each note card was unique.

Here is a set of In Colour Note Cards featuring the Quiet Meadows bundle from Stampin' Up. There is a coordinating Note Card Holder, created without cutting or gluing, just scoring and folding. So cute.

A piece of White twine from the Bakers Twine Essentials Pack was tied around the card front twice ending in a bow with the little tag tied through. The note card was finished with 3 coordinating 2021-2023 In Colour Jewels. These Jewels are just delightful. They twinkle beautifully and always add a special touch.

Here is a set of In Colour Note Cards featuring the Quiet Meadows bundle from Stampin' Up. There is a coordinating Note Card Holder, created without cutting or gluing, just scoring and folding. So cute.

The card front was then adhered directly to the front of the note card. The flowers from the coordinating stamp set was stamped on the coordinating envelope and inside the card with the matching colour of Classic Stampin' ink.  Sorry there is no photo of the note card inner. These photos were among those that didn't transfer, however, I am sure you get the drift.

Here is a set of In Colour Note Cards featuring the Quiet Meadows bundle from Stampin' Up. There is a coordinating Note Card Holder, created without cutting or gluing, just scoring and folding. So cute.

Thank you so much for visiting Valley Inspirations with Andrea. I had fun creating this project to share. I love the Note Card Holder and am sure I will be creating more. This pack will be gifted to a hostess who has asked me to hold a class at her home soon. 

As you may know, Stampin' Up's 2021-2022 Annual Catalogue was launched earlier this month. If you are in Australia, don't already have a Stampin' Up! demonstrator and would like your own copy of the Annual Catalogue then let me know and I will be delighted to send one to you.

There is more In Colour creativity. Click on the "next" graphic to be taken to the talented Ros Davidson. I am looking forward to checking out Ros's creation as well as everyone else's. There is a list below of everyone who is part of tonight's Colour Creation Blog Hop.

Hope to see you next week when we will be featuring Balmy Blue - a beautiful soft blue.

Stay well, stay safe and be kind to yourself and others.

Andrea 💕🐾

A big thank you to Catherine Proctor who is our dedicated host of the Art with Heart Colour Creations Blog Hop. I am so delighted that she is continuing to keep us all in line.

Checking out everyone's creations and their interpretation of the amazing Stampin' Up! colours is always a treat and I am sure there will be inspiring In Colour projects on show. I feel so blessed to share with such talented Creatives.

Here are all the participants for the Colour Creations Blog Hop for 2 June 2021:

Kate Morgan

Sharon Davern

Vicki Boucher

Caroline Manwaring

Tina Gillespie

Christine Blain

Rachel Woollard

Theresa Gerrard

Rachel Palmeri

Michelle Taylor

Diane Furniss

Andrea Sargent <You are here>

Ros Davidson

Cathy Proctor


#colourcreationsbloghop

Wednesday, 26 May 2021

Art with Heart Colour Creations Showcase - #50 Soft Suede

Soft Suede with Very Versailles

Hi. Welcome to Valley Inspirations with Andrea and the 50th 2020-21 Colour Creations Showcase by members of the Art with Heart Team. We have worked through all the Stampin' Up! colours, except the newly introduced In Colours for 2021-2023 and the basics, Basic White, Basic Black and Very Vanilla. the basics would have been used by us all over the past year potentially as the bases for our creations.

Firstly, my apologies to anyone who checked in last week only to find a post with nothing creative in it. I have been quite sick and was in zombie mode last week, forgetting to delete the draft blog. I am starting to feel like I will "survive" but am still wrung out. I didn't want to miss this week's blog.

This week we are showcasing a neutral colour, Soft Suede. It is a deep brown and is part of the Neutrals' Colour Family. It's not a colour I have used very much, but having worked with it this week, I have decided it's a lovely brown. Soft Suede has been produced in Stampin' Up!'s card-stock, both A4 & 12"x12"Classic Stampin' inks (ink pads & re-inkers); Stampin' Write Markers; Stampin' Blends, & the Neutral's Designer Series Paper.


Soft Suede has not been a go to colour. In fact, it has been used very little. However, as I thought about what I would create, numerous ideas came to mind. Initially, the projects would have been suitable for fellas, but in thinking about colour combinations I really liked Calypso Coral with Soft Suede so was thinking of using this combo, together with Very Vanilla and potentially either Crumb Cake or Petal Pink (as a lighter variant of Calypso Coral). I commenced work on a fancy fold, but this morning changed tack completely as friends of mine are grieving the loss of their 17 year old poodle and I wanted to create a sympathy card for them. Here is my Soft Suede sympathy card:


The card base is Soft Suede card-stock with a layer of Very Vanilla card-stock that had been embossed with a new die, Stitched Greenery die. This die punches tiny holes in an all over leaf design. It is a pity you can't see more of this delightful design.


Two Very Vanilla card-stock card fronts were stamped with the scripty stamp from the Very Versailles stamp set. This set is a continuing stamp set, and is so gorgeous. I love it. The script was stamped in Soft Suede Classic Stampin' ink on one card front and with Calypso Coral ink on the second piece. A Blending Brush applied a centre circle of Petal Pink Classic Stampin' ink with Calypso Coral ink around the outer area. This was die cut with the second largest circle from the continuing Layering Circles dies.


The blended die cut circle was layered directly over the Soft Suede script so that script flowed through. The card front was mounted on a slightly larger piece of Calypso Coral card-stock. The leaf spray stamp was stamped twice on Very Vanilla card-stock; once with Soft Suede ink and the other with Versamark ink. The latter was heat embossed with Gold Emboss powder. Both sets of leaves were fussy cut. The Soft Suede leaves were adhered directly to the card front, while the gold embossed leaves were adhered with Mini Dimensionals.


A double bow was tied with the Very Vanilla twine from the Bakers Twine Essentials Pack and the gold trim from the Simply Elegant Trim. A little heart trinket from the Pet Trinkets was tied into the bow - reminiscent of a beloved dog's tag. Glue Dots were brilliant to attach the bows & trinket. A sentiment from the Very Versailles stamp set was stamped in Soft Suede on Very Vanilla and fussy cut out.The sentiment was added with Mini Dimensionals. To complete the design some Champagne Rhinestone Basic Jewels were sprinkled around.


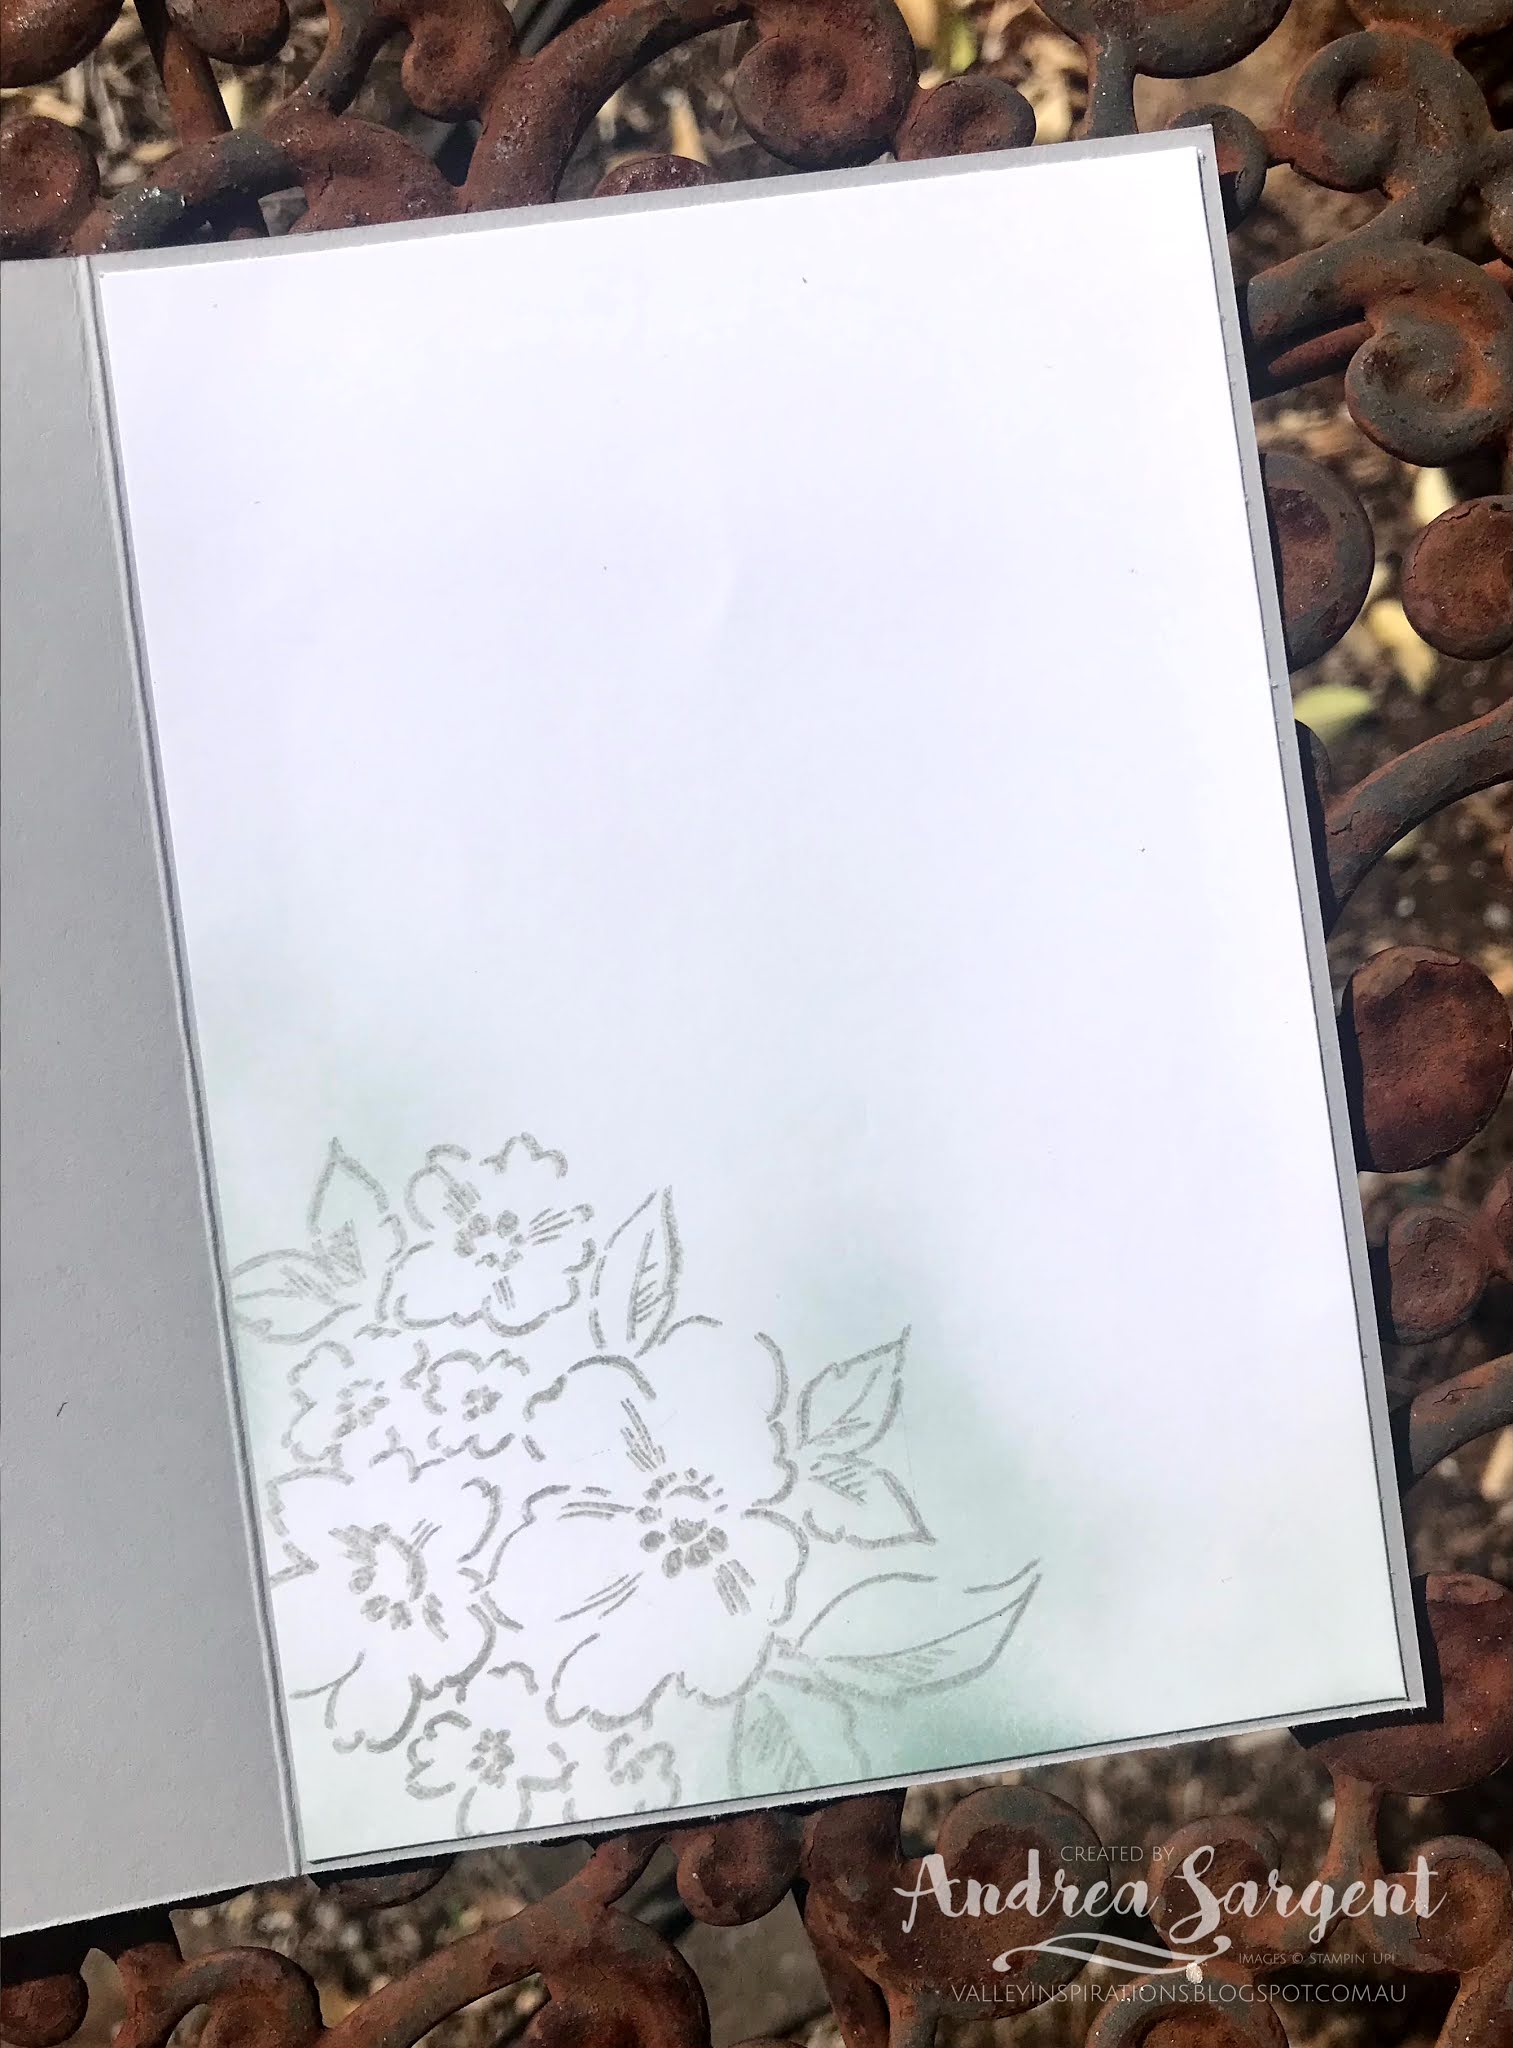
The leaf spray was stamped in Soft Suede Classic Stampin' ink on Very Vanilla card-stock to create the card inner. A sentiment from the Pampered Pets stamp set was also stamped in Soft Suede. A coordinating Very Vanilla C6 envelope was stamped with the leaves in Soft Suede ink and the script in Calypso Coral.

Thank you so much for visiting Valley Inspirations with Andrea. I loved creating this card to share with you, even though with a heavy heart for my friends. A second project, is underway. Given other commitments I won't guarantee to add photos & details of the fancy fold. It will be a surprise!

Stampin' Up's 2021-2022 Annual Catalogue was launched earlier this month. If you are in Australia, don't already have a Stampin' Up! demonstrator and would like your own copy of the Catalogue then let me know and I will be delighted to send one to you.

Catherine Proctor is our dedicated host of the Art with Heart Colour Creations Showcase. If you haven't finished visiting all of the team's colour creations, you can visit/revisit Catherine's page at What Cathy Madewhere she hosts the links to the participating blogs so you can find everyone's Soft Suede creations. Checking out everyone's creations and their interpretation of the amazing Stampin' Up! colours is always a treat and I am sure there will be inspiring Soft Suede projects on show.

I hope to see you again next week when members of the team share projects that hero the new 2021-2023 In Colours from Stampin' Up! The new In Colours are gorgeous so am looking forward to creating with them during the week.

Stay well, stay safe and be kind to yourself and others.

Andrea 💕🐾

Wednesday, 12 May 2021

Art with Heart Colour Creations Showcase - #48 So Saffron

So Saffron with Floating and Fluttering

Hi. Welcome to Valley Inspirations with Andrea and the 48th Colour Creations Showcase by members of the Art with Heart Team. Following this blog hop, we have 2 colours to complete our examination of the whole range of Stampin' Up! colours, except ... with the launch of the new 2021-2022 Annual Catalogue 5 new In Colours have also been launched - we will feature these gorgeous colours during June.


This week we are showcasing a soft colour, So Saffron. It is a pale yellow and is part of the Subtles Colour Family. While a light yellow, it still has enough body to stand on its own. So Saffron has been produced in Stampin' Up!'s card-stock, both A4 & 12"x12"Classic Stampin' inks (ink pads & re-inkers); Stampin' Write Markers; Stampin' Blends, Designer Series Paper including the Sand & Sea DSP and Seaside Shells.

As I mused over my project using So Saffron I was also aware that the current Mini Catalogue will be ending in a little while. It is so easy to be swept up in excitement for a new catalogue and forget the lovely products within continuing catalogues. When I first devoured the J-J Mini Catalogue and saw the Floating and Fluttering bundle I wanted to use it with the Floating Frame technique. So, to fulfil this desire I have combined the technique with a focus on So Saffron, and a few other colours. Here is my card:


The Floating Frame technique was all the rage a year or so ago - it is a lovely technique. The Floating & Fluttering bundle is perfect for this technique, with 3 butterflies and foliage all combined in a single stamp and can be die cut using coordinating dies. This stamp was used together with Crumb Cake Classic Stampin' ink to stamp multiple images. Stampin' Blends were used to colour these images, ie So Saffron, Mango Melody, Petal Pink, Flirty Flamingo, Soft Sea Foam and Sahara Sand Blends Combos. Once coloured, the images were die cut using dies from the Fluttering dies.


The die cut butterflies & foliage were arranged all over a card-front sized piece of card-stock and a layer of GLAD Press n Seal was laid on top to hold all the pieces in place. A centre rectangle was die cut using a mid-sized die from the Stitched Rectangle set (they are so versatile). The die cut centre section is pictured both in the first and last photos. This is to be used as the focal panel for another card which has not been finished in time for the blog hop.


Dimensionals & Mini Dimensionals were added to the back of each of the die cut pieces and then the piece of Press and Seal was carefully turned over and positioned over a piece of Sea & Sand DSP featuring a water-coloured look with So Saffron and Flirty Flamingo. This piece was mounted on a slightly larger piece of Very Vanilla card-stock, which in turn was mounted on to the So Saffron card base.


Basic Pearl Jewels were coloured with the Light So Saffron Stampin' Blend to enable them to subtly blend with the colour scheme. I so love the way Stampin' Up! coordinates its products. You can always trust its coordination. The coloured pearls were added to some of the bigger spaces within the floating frame section.


A small frame was cut from Very Vanilla card-stock using 2 smaller dies from the Stitched Rectangle dies. The frame was popped in place within the floating frame with Dimensionals. As the Floating & Fluttering stamp set doesn't include any sentiments, a sentiment was chosen from the Pretty Perennials stamp set. This is a great stamp set that isn't continuing past the J-J Mini Catalogue. If you are interested, don't leave adding it to your order before it is too late. Both "Sending lots of" and "happy" were stamped in Crumb Cake ink on scraps of Very Vanilla card-stock. The "Sending lots of" was cut with one of the smallest stitched rectangle dies and adhered directly to the card background, while "happy" was fussy cut and popped up on Dimensionals.


The card inner has a piece of Very Vanilla card-stock mounted on another section of the same DSP from the Sea & Sand DSP packet, which in turn was mounted inside the card on the So Saffron card base. A coloured butterfly and a couple of other partial pieces that had been trimmed off the front frame were added to the inner panel. The C6 Very Vanilla envelope isn't pictured here, but butterflies were stamped on the corner of the envelope using Crumb Cake Classic Stampin ink.


Thank you so much for visiting Valley Inspirations with Andrea. I loved creating this card to share with you. The second card, using the centre piece (pictured above), is underway. I had hoped to show both cards but unexpected work consumed my creative time.

Stampin' Up's 2021-2022 Annual Catalogue was launched earlier this month. If you are in Australia, don't already have a Stampin' Up! demonstrator and would like your own copy of the Catalogue then let me know and I will be delighted to send one to you.

Catherine Proctor is our dedicated host of the Art with Heart Colour Creations Showcase. If you haven't finished visiting all of the team's colour creations, you can visit/revisit Catherine's page at What Cathy Made, where she hosts the links to the participating blogs so you can find everyone's So Saffron creations. Checking out everyone's creations and their interpretation of the amazing Stampin' Up! colours is always a treat and I am sure there will be inspiring So Saffron projects on show.

I hope to see you again next week when members of the team share projects that hero Soft Sea Foam from the SU Subtles Colour family. I so love this colour so am looking forward to creating with it during the week.

Stay well, stay safe and be kind to yourself and others.

Andrea 💕🐾

Wednesday, 5 May 2021

Art with Heart Colour Creations Showcase - #47 Smoky Slate

Smoky Slate with Hand Penned Petals

Hello. Welcome to Valley Inspirations with Andrea and the 47th Colour Creations Showcase by members of the Art with Heart Team. After tonight, we have 3 colours plus the new In Colours to complete our showcase of Stampin' Up!s amazing collection of colours.


This week we are showcasing a versatile colour, Smoky Slate. It is a light grey and as one of the Neutrals Colour Family, it is able to be used with so many other colours and in various ways. I love grey with pink so have chosen this as my colour combination to showcase Smoky Slate.


Smoky Slate has been produced in Stampin' Up!'s card-stock, both A4 & 12"x12"Classic Stampin' inks (ink pads & re-inkers); Stampin' Write Markers; Stampin' Blends, Designer Series Paper including the In Good Taste DSP; and the new Smoky Slate Textured Ribbon.

A delicate Stampin' Up! Hand Penned floral card featuring Smoky Slate created by Andrea Sargent in Australia.

As I was planning for tonight's blog hop, I wanted to use one of the new bundles from the newly launched 2021-2022 Annual Catalogue. I so love the sketchy nature of the Hand Penned Petals stamp set and the coordinating dies are delightful. I also wanted to use one of the Scalloped Contour dies as I wasn't pleased with the project I blogged last week and felt I hadn't shown these dies well - I wanted to redress it this week. Having made a start, I separately watched a replay of Emma Goddard's Sunday night Facebook live. One of Emma's layouts was similar to what I had in mind. I'd like to say "great minds think alike" however, I don't put myself in Emma's league. I did think of changing tack but my week has gone somewhat haywire and time was limited so decided to CASE a couple of other elements of Emma's card by adding some blending and stamping to the background as well as the positioning of the ribbon. Thanks Emma for your inspiration. You are amazing.

A delicate Stampin' Up! Hand Penned floral card featuring Smoky Slate created by Andrea Sargent in Australia.

As mentioned, to create the background for the card front some Soft Succulent Classic Stampin' ink was applied with a Blending Brush to the centre of a piece of Basic White card-stock. A little stamping also was added using stamped-off Soft Succulent Classic Stampin' ink. This panel was then dry embossed using the Tasteful Textile 3D embossing folder. At the same time the top Basic White panel was similarly embossed.

A delicate Stampin' Up! Hand Penned floral card featuring Smoky Slate created by Andrea Sargent in Australia.

The Basic White background panel was adhered to the Smoky Slate card base. A mid size Scalloped Contour die was used to cut a Smoky Slate panel. The slightly smaller embossed white panel was adhered directly to the scalloped contour panel.

A delicate Stampin' Up! Hand Penned floral card featuring Smoky Slate created by Andrea Sargent in Australia.

The floral spray from the Hand Penned Petals stamp set was stamped twice onto Basic White card-stock in Smoky Slate Classic Stampin ink. The stamped floral sprays were coloured with Stampin' Up!s amazing Stampin' Blends. The colours used were: Smoky Slate, Soft Succulent & Petal Pink combos and a touch of Light Polished Pink. I am delighted that all of the new In Colours have coordinating Stampin' Blends - I can see more colouring in the future. The 3 larger flowers were fussy cut from one  spray while the other floral spray was cut out using the coordinating die.

A delicate Stampin' Up! Hand Penned floral card featuring Smoky Slate created by Andrea Sargent in Australia.

The 3 larger flowers were hand shaped and adhered to the full spray, with a little glue at the centre. A piece of gorgeous Soft Succulent Open Weave ribbon was tied around the centre panel ending in a bow. Then the coloured flower spray was adhered on top with Dimensionals. The whole panel was added to the centre of the card background with Dimensionals.

A delicate Stampin' Up! Hand Penned floral card featuring Smoky Slate created by Andrea Sargent in Australia.

To finish the card front design a sentiment from the same stamp set was stamped in Smoky Slate ink onto a scrap of Basic White card-stock. It was fussy cut into 2 pieces and adhered with a mix of tiny pieces of Dimensionals and Multipurpose Liquid Glue. My fingers felt HUGE as I tried to layer tiny pieces of Dimensionals - looking at the sentiment I had chosen I had to keep saying to myself "anything is possible"! Some In Colour Soft Succulent Jewels were the finishing touch. These jewels are amazing.

A delicate Stampin' Up! Hand Penned floral card featuring Smoky Slate created by Andrea Sargent in Australia.

To create the card inner, the floral spray was stamped in the corner in Smoky Slate ink and a little Soft Succulent ink was lightly blended at the edges. The C6 Basic White Envelope was decorated in the same way.

A delicate Stampin' Up! Hand Penned floral card featuring Smoky Slate created by Andrea Sargent in Australia.

Thank you so much for visiting Valley Inspirations with Andrea. I loved creating this card to share with you. I hope you like it too.

As mentioned, Stampin' Up's 2021-2022 Annual Catalogue was launched this week. If you are in Australia and don't already have a Stampin' Up! demonstrator and you would like your own copy of the Catalogue then let me know and I will be delighted to send one to you.

Catherine Proctor is our delightful host of the Art with Heart Colour Creations Showcase. If you haven't finished visiting all of the team's colour creations, you can visit/revisit Catherine's page at What Cathy Made, where she hosts the links to the participating blogs so you can find everyone's Smoky Slate creations. Checking out everyone's creations and their interpretation of the amazing Stampin' Up! colours is always a treat and I am sure there will be inspiring Smoky Slate projects on show.

I hope to see you again next week when members of the team share projects that hero So Saffron from the SU Subtles Colour family.

Stay well, stay safe and be kind to yourself and others.

Andrea 💕🐾

Be Inspired - July 2026 - Creating Backgrounds

Be Inspired Design Team Blog Hop CREATING BACKGROUNDS Welcome to Valley Inspirations with Andrea and the July  Be Inspired Blog Hop  where w...