Art with Heart Wow Tutorials

Wednesday, 30 September 2020

Art with Heart Colour Creations Showcase - #18 Gorgeous Grape

Gorgeous Grape with Dove of Hope

Hello. Welcome to Valley Inspirations with Andrea and the 18th Colour Creations Showcase by members of the Art with Heart Team.

Art with Heart Team

This week we are using another colour starting with "G". Our focus is on Gorgeous Grape, a rich purple that sits within Stampin' Up!s Brights family of colours. Gorgeous Grape can be found in Stampin' Up!s card-stockClassic Stampin' inks (ink pads, re-inkers & Classic Stampin' Spots); Stampin' Write Markers; Watercolour Pencils; a couple of Designer Series Papers; and the Tricolour Ribbon.


This week has been a struggle in different ways and with a number of unexpected happenings occurring when I had scheduled creative time, I have only been able to create one card to share with you in this Showcase. Watercolour is a technique that I want to learn more about and so need to experiment and recently seeing Emma Goddard play with this specific technique and colours I thought I would give it a go. The watercolour panel didn't turn out as I had envisaged so I am looking forward the having another play soon. 

Gorgeous Grape Dove of Hope Stampin Up card, Andrea Sargent, Independent Stampin' Up Demonstrator, Adelaide, South Australia, 2020

A piece of Fluid 100 Watercolor paper was heat embossed using Versamark ink and White Stampin' Emboss Powder using the small dove stamp from the Dove of Hope stamp set. Using both the wet on wet watercolour 
and emboss resist techniques, water was misted over the paper and then a Water Painter was used to drop both Gorgeous Grape and Melon Mambo Classic Stampin' inks onto the paper. The colours were moved around a little and then a paper towel was used to absorb excess liquid. I found Melon Mambo took over, dominating the colour blending, where as I was wanting Gorgeous Grape to stand out more. I had also hoped that dabbing up the excess liquids would also lighten the colours. This only had a small effect. I'm looking forward to trying the technique again and to understand more about colour interactions. It's all fun.

Gorgeous Grape Dove of Hope Stampin Up card, Andrea Sargent, Independent Stampin' Up Demonstrator, Adelaide, South Australia, 2020

While the watercolour panel was drying, all of the other bits and pieces were prepared. A Thick Whisper White card-stock base and a Gorgeous Grape card-stock mount were cut to size. A Whisper White label was die cut using the Stitched So Sweetly dies. The World Map dies were used to die cut a world (half) sphere.

Gorgeous Grape Dove of Hope Stampin Up card, Andrea Sargent, Independent Stampin' Up Demonstrator, Adelaide, South Australia, 2020

The watercolour panel was adhered directly on to the Gorgeous Grape mount and then both were popped up on Dimensionals on the Whisper White card base. A sentiment from the Dove of Hope stamp set was stamped to the left of the die cut label using Gorgeous Grape Classic Stampin' ink. While the ink pad was out, the small dove was also stamped in Gorgeous Grape onto a small piece of Whisper White card-stock. The dove was lightly coloured with Purple Posy and Highland Heather Stampin' Blends to add a little shading. It was die cut with the coordinating Detailed Dove dies.

Gorgeous Grape Dove of Hope Stampin Up card, Andrea Sargent, Independent Stampin' Up Demonstrator, Adelaide, South Australia, 2020

A piece of the glittering Snowflake Splendor ribbon was coloured with the light Melon Mambo Stampin' Blends. Once dry (it doesn't take long) this ribbon was tied around the label to the right of the sentiment. The dove and world die cuts were layered over the ribbon with the dove being raised on Mini Dimensionals. The decorated label was popped up on Dimensionals and centred on the card front. To finish off the card front three Blue Adhesive-backed Gems, which were also coloured with the Melon Mambo Stampin' Blends, were added to the label.

Gorgeous Grape Dove of Hope Stampin Up card, Andrea Sargent, Independent Stampin' Up Demonstrator, Adelaide, South Australia, 2020

A second die cut Gorgeous Grape dove was adhered directly to the card inner. (I had stamped an extra dove previously, in case I didn't like my colouring, so decided not to waste it.) Normally, the dove would be stamped directly on the card inner together with the second part of the sentiment. Also, a Gorgeous Grape dove was stamped in the left hand corner of the Whisper White C6 envelope. Its simple touch, but is enough to ensure coordination.

Gorgeous Grape Dove of Hope Stampin Up card, Andrea Sargent, Independent Stampin' Up Demonstrator, Adelaide, South Australia, 2020

Thank you for spending some time with me at my blog. 

Catherine Proctor is our brilliant host of the Art with Heart Colour Creations Showcase. If you haven't finished visiting all of the team's colour creations, you can visit/revisit Catherine's page at What Cathy Made, where she hosts all the links to the other Showcase participants. I'm looking forward to checking out everyone's Gorgeous Grape creations. It is always inspiring to see the amazing projects created by my colleagues and their interpretations of the specified colour.

I hope to see you again next week when members of the team will share projects that hero Granny Apple Green

Do look after yourself and your loved ones. Stay well, stay safe and be kind to yourself and others in these strange times. 

Andrea 💕🐾


Saturday, 26 September 2020

Social Stamping - #17 Baby

Baby with Wildly Happy

Hello. Welcome to Valley Inspirations with Andrea and the Social Stamping Blog Host for September 2020.


As I thought about creating a card for this month's theme, "Baby", I heard about Wang Wang and Funi coming into the brief annual opportunity when Funi could become pregnant. Wang Wang and Funi are two Giant Pandas that the Adelaide Zoo has on loan from China. There is no privacy for them as each year at this time our news always covers their exploits, and one year we followed Funi's condition through her phantom pregnancy. I am creating a baby card in the hope that Funi will become truly pregnant this time. I couldn't go past Stampin' Up!s stamp set, Wildly Happy.

Wildly Happy Stampin Up card, Andrea Sargent, Valley Inspirations Independent Stampin' Up! Demonstrator, Adelaide, South Australia

I have created a fancy fold similar to one Connie Stewart showed recently - I'm not sure what the fold is called but it makes me think of an off-centre Gate-fold.

Wildly Happy Stampin Up card, Andrea Sargent, Valley Inspirations Independent Stampin' Up! Demonstrator, Adelaide, South Australia

I started with half a standard A4 sheet of Thick Whisper White card-stock, scoring it at 6.5cm from one end and 4cm from the other end; folding both sides in and burnishing. A card background piece was cut from Whisper White card-stock, then cut into two pieces at a similar proportion to the folded card front and die cut with the Detailed Hearts dieThese pieces were adhered to the folded card fronts to add subtle interest to the background. As I couldn't find my newly purchased Adhesive Sheets (they must be stored in a "safe" place), I used Multipurpose Liquid Glue to attach the gorgeous array of hearts.  

Wildly Happy Stampin Up card, Andrea Sargent, Valley Inspirations Independent Stampin' Up! Demonstrator, Adelaide, South Australia

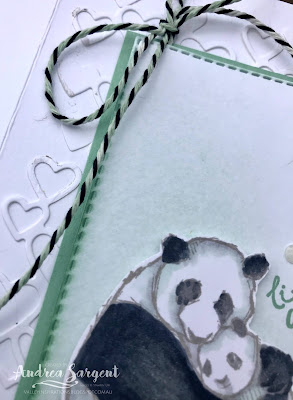
A piece of Whisper White card-stock was die cut using the fourth largest Stitched Rectangle die and some Mint Macaron card-stock was trimmed to be a little larger to allow a small boarder around the stitched die cut. Some sponging was added to the stitched die cut piece with Mint Macaron Classic ink and a sentiment from the Wildly Happy stamp set was stamped in Mint Macaron Classic ink. I'm using Mint Macaron as this is a gorgeous soft green that would be fine for either a male or female baby panda.

Wildly Happy Stampin Up card, Andrea Sargent, Valley Inspirations Independent Stampin' Up! Demonstrator, Adelaide, South Australia

The mother and baby panda stamp from the Wildly Happy stamp set was stamped in Gray Granite Classic ink onto a small piece of Whisper White card-stock. The panda's were coloured with Stampin Blends, that is Light and Dark Basic Black, Smokey Slate and Mint Macaron, with the Colour Lifter. The pandas were fussy cut and popped on Dimensionals onto the sponged stitched rectangle,

Wildly Happy Stampin Up card, Andrea Sargent, Valley Inspirations Independent Stampin' Up! Demonstrator, Adelaide, South Australia

The Mint Macaron card-stock centre mount was adhered to the Right Hand Side card front with the centre piece hanging over the edge so that when the card is closed it would be centred. A piece of twine from the Playful Pets Trim Combo pack, which had been coloured with the Light Mint Macaron Blend was tied around the card front. The central piece was adhered to the Mint Macaron mount and over the twine. Three of the oh so gorgeous Elegant Faceted Gems were added as a finishing touch.

Wildly Happy Stampin Up card, Andrea Sargent, Valley Inspirations Independent Stampin' Up! Demonstrator, Adelaide, South Australia

The card inner was stamped with the pandas and a sentiment in Gray Granite Classic ink and a little sponging in Mint Macaron Classic ink was added. Similar to the card inner, the C6 Whisper White envelope was also sponged and stamped with the pandas.

Wildly Happy Stampin Up card, Andrea Sargent, Valley Inspirations Independent Stampin' Up! Demonstrator, Adelaide, South Australia


Wildly Happy Stampin Up card, Andrea Sargent, Valley Inspirations Independent Stampin' Up! Demonstrator, Adelaide, South Australia

I hope you like my baby panda card. Thank you for taking time to visit the Valley Inspirations blog. Please contact me if you would like any further information about the card; or if you live in Australia and would like the 2020-2021 Annual Catalogue and or the new August-December 2020 Mini Catalogue posted to you; or if I can help in any other way.

Wildly Happy Stampin Up card, Andrea Sargent, Valley Inspirations Independent Stampin' Up! Demonstrator, Adelaide, South Australia

I hope you are enjoying this month's Social Stamping Blog Host that has focused on a "Baby" theme. If you started at the beginning with our amazing Social Stamping Host, Kelly Kent, then you can either click here to be transferred to Michelle Strazds at Stampin Strazds to see her gorgeous creation or click on the 'Next' graphic below; or if you would prefer to go to the full list of participants click on this link to be taken to Kelly Kent's Host Blog Post at My Papercraft Journey where you will find individual links that can take you to each person's blog.

Do look after yourself and your loved ones in these challenging times.  My heart is especially  with those of you in Victoria. Hopefully the lockdown will start to ease really soon.

Hope to see you again next month (Saturday, 31st October) when the Social Stamping Blog Host theme is "get better soon".

Take care. Stay safe and stay well.

Andrea 😘


Wednesday, 23 September 2020

Art with Heart Colour Creations Showcase - #17 Garden Green

Garden Green with Arrange a Wreath and Peaceful Boughs

Hello. Welcome to Valley Inspirations with Andrea and the seventeenth Colour Creations Showcase with members of the Art with Heart Team.


We are gradually working through the alphabet of Stampin' Up!s colours and this week we are starting on he colours with "G" and will be focussing on Garden Green, a rich green that sits within Stampin' Up!s Regals family of colours. 


Garden Green can be found in Stampin' Up!s card-stock; Classic inks (both ink pads and re-inkers); Stampin' Write Markers; Watercolour Pencils; a range of Designer Series Papers; Wonder of the Season Memories and More card pack; the Boho Indigo Product Medley; and a couple of Project/Card kits

Garden Green Arrange A Wreath & Peaceful Boughs Stampin Up cards, Andrea Sargent, Valley Inspirations, Independent Stampin' Up! Demonstrator, Adelaide, South Australia

I have created two cards this week - both wreaths, but the styles are different. I do love wreaths, so it has been fun to play with different expressions. I have used two of my favourite colouring techniques and tried a new one that I had seen Emma Goddard demonstrate.

Garden Green Arrange A Wreath & Peaceful Boughs Stampin Up cards, Andrea Sargent, Valley Inspirations, Independent Stampin' Up! Demonstrator, Adelaide, South Australia

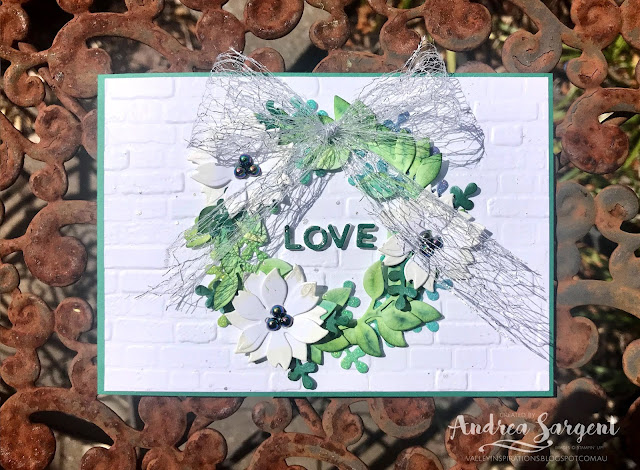
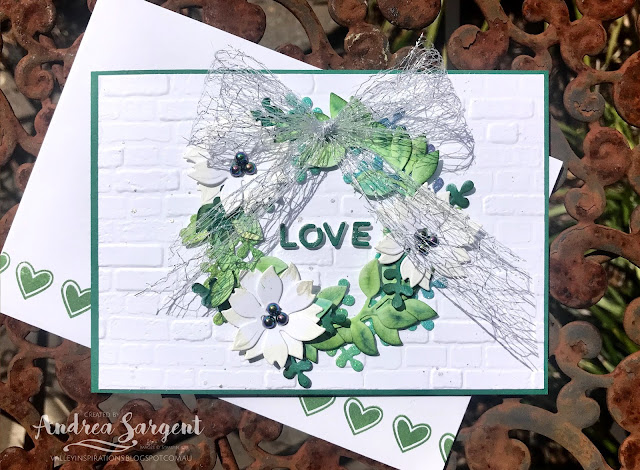
Card 1: I used the Arrange a Wreath bundle to create this card. It is a set that can be overlooked in Stampin' Up!s Annual Catalogue 2020-21 but it can create wreaths for a range of occasions and is just gorgeous. Using the Wreath Builder dies, one die was used to cut a wreath out of the Rainbow Glimmer paper. While this multicolour paper doesn't include Garden Green the colour combination coordinates very well with it. My exploration of the range of Stampin" Up!s colours through the Colour Creations Showcase has not only helped me better understand each colour, but also to learn more about colour coordination.

Garden Green Arrange A Wreath & Peaceful Boughs Stampin Up cards, Andrea Sargent, Valley Inspirations, Independent Stampin' Up! Demonstrator, Adelaide, South Australia

The leafy wreath die was used to cut two wreaths out of Shimmery White card-stock. These single wreaths were coloured with Garden Green, Granny Apple Green and Coastal Cabana Classic inks. Each of the ink pads were squished onto a block, which was then misted with water. Following Emma Goddard's instructions, I cut a finger off a thin glove and put this on my forefinger. The gloved finger dabbed into one of the inks and then onto parts of the die cut wreaths. The same process was used for each of the colours. I loved finger painting as a child, so the child within had a lot of fun, while the adult was happy that my finger remained "relatively" clean. The wet wreaths were left to dry. Colouring the wreaths in this manner allowed the wet ink to settle in the embossed leaf veins, which added to the colour effect.

Garden Green Arrange A Wreath & Peaceful Boughs Stampin Up cards, Andrea Sargent, Valley Inspirations, Independent Stampin' Up! Demonstrator, Adelaide, South Australia

Using the same die set the small poinsettia die cut a number of flowers from Whisper White card-stock; the twig die cut numerous twigs from Garden Green card-stock and Garden Green was also used to cut out the gorgeous heart with "Love" spelt within. Did you know that Stampin' Up! has Foam Adhesive Sheets? I also used one to cut out the heart die so I could add dimension to the "LOVE" letters. Check out the effect - isn't it great!

Garden Green Arrange A Wreath & Peaceful Boughs Stampin Up cards, Andrea Sargent, Valley Inspirations, Independent Stampin' Up! Demonstrator, Adelaide, South Australia

One of my favourite colouring techniques is to sponge die cut pieces to add shading or interest in some way. The tips of the poinsettia petals were sponged with Frost White Shimmer paint, while all the other die cuts were sponged with both Garden Green Classic ink and White Craft ink. With all the pieces ready the wreath was arranged onto a dry embossed Whisper White card front. The Brick & Morter 3D embossing folder was used for the embossing. 

Garden Green Arrange A Wreath & Peaceful Boughs Stampin Up cards, Andrea Sargent, Valley Inspirations, Independent Stampin' Up! Demonstrator, Adelaide, South Australia

The card front was adhered to a Garden Green card-stock base. To finish off the card design Wink of Stella was painted over the sentiment "Love" and then flicked over the card. A shimmery bow was tied with Metallic Mesh Ribbon and Iridescent Pearls were popped at the centre of the poinsettias.

Garden Green Arrange A Wreath & Peaceful Boughs Stampin Up cards, Andrea Sargent, Valley Inspirations, Independent Stampin' Up! Demonstrator, Adelaide, South Australia

The Garden Green die cut heart was adhered to a Whisper White card inner and as time was running out, I wrote in my own scrawl following the "love" within the heart, "came down at Christmas". If I had had more time I would has stamped the words using the Make a Difference stamp set. I will be writing in the card to give it away at Christmas, so at least the writing will match and not look as out of place as it does now. Little hearts were stamped along the base of the C6 Whisper White envelope in Garden Green Classic ink.

Garden Green Arrange A Wreath & Peaceful Boughs Stampin Up cards, Andrea Sargent, Valley Inspirations, Independent Stampin' Up! Demonstrator, Adelaide, South Australia

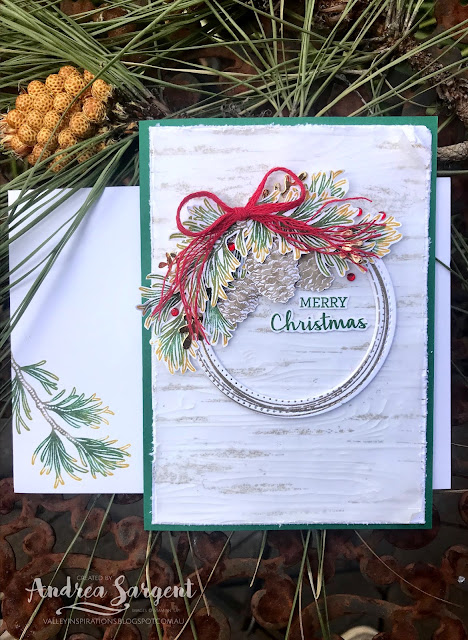
CARD 2: The next card has a bit of a rustic feel, although I couldn't resist some metallic shine and rhinestone sparkle. The background of the card was Whisper White card-stock stamped in Sahara Sand Classic ink with the Birch stamp. Even though I stamped off first, it was still darker than I wanted, so a piece of dry embossed Vellum card-stock was placed over the background piece. To reinforce the rustic look the card-stock edges were ruffed up and a corner was rubbed, divided and curled.

Garden Green Peaceful Boughs Stampin Up cards, Andrea Sargent, Valley Inspirations, Independent Stampin' Up! Demonstrator, Adelaide, South Australia

The largest circle stamp from the Swirly Frames set was stamped in Versamark ink on Whisper White card-stock and heat embossed with Gold Stampin' Emboss powder. The swirly circle was die cut with the largest two circle dies from the Stitched Shapes die set. Another three card-stock rings were also die cut and layered one on top of the other to give the gold embossed swirly circle a little stability and dimension.

Garden Green Peaceful Boughs Stampin Up cards, Andrea Sargent, Valley Inspirations, Independent Stampin' Up! Demonstrator, Adelaide, South Australia

Two of the pine sprigs from the Peaceful Boughs stamp set were coloured with Stampin' Write Markers and stamped on Whisper White card-stock. Colouring the stamps with markers is another of my colouring favs. I like to use my Stamparatus and build up the image in stages with a number of colours. I used Garden Green, Mossy Meadow and Crushed Curry on the pine spikes and Crumb Cake and Soft Suede Markers for the twigs. Two sets of two sprigs were coloured and then fussy cut as the coordinating dies didn't cut these out. Three small pine cones were stamped 
similarly. I already had a few pre-die cut brass metallic twigs on my desk that I decided to use.

Garden Green Peaceful Boughs Stampin Up cards, Andrea Sargent, Valley Inspirations, Independent Stampin' Up! Demonstrator, Adelaide, South Australia

The pieces were arranged near the top of the "wreath" and held in place with Multipurpose Liquid glue and Mini Dimensionals. Garden Green is one of the greens that works so well for Christmas and looks great with red, so a bow of the Real Red Braided Linen Trim was added with the ends unravelled.

Garden Green Peaceful Boughs Stampin Up cards, Andrea Sargent, Valley Inspirations, Independent Stampin' Up! Demonstrator, Adelaide, South Australia

As the red bow was the only red on the card, a number of Red Rhinestone Jewel Basics were added around the decorated part of the wreath. As a colleague of mine acknowledged last week, it is so easy to spend time on the placement of embellishments and in this case ... 3 didn't seem enough; would 5 be better; hmm, perhaps another 2; oh ... to many I think - remove 2; then to rearrange these touches of glimmer. And it looks so simple!

Garden Green Peaceful Boughs Stampin Up cards, Andrea Sargent, Valley Inspirations, Independent Stampin' Up! Demonstrator, Adelaide, South Australia

The sentiment came from the Arrange a Wreath stamp set and was stamped in Garden Green Classic ink on Whisper White card-stock. Not wanting to block the background from showing through the wreath, the sentiment was fussy cut. The card front was adhered directly to the Garden Green card-stock base.

Garden Green Peaceful Boughs Stampin Up cards, Andrea Sargent, Valley Inspirations, Independent Stampin' Up! Demonstrator, Adelaide, South Australia

A beautiful sentiment from the Peaceful Boughs stamp set was stamped in Garden Green Classic ink on the Whisper White card inner. A pine sprig was stamped near the bottom of the card inner and on the C6 Whisper White envelope. They were coloured in the same way of the pine sprigs on the front of the card.

Garden Green Peaceful Boughs Stampin Up cards, Andrea Sargent, Valley Inspirations, Independent Stampin' Up! Demonstrator, Adelaide, South Australia

Thank you so much for spending time with me. I do so appreciate you.

Garden Green Arrange A Wreath & Peaceful Boughs Stampin Up cards, Andrea Sargent, Valley Inspirations, Independent Stampin' Up! Demonstrator, Adelaide, South Australia

Catherine Proctor is our amazing host of the Art with Heart Colour Creations Showcase. If you haven't finished visiting all of the team's colour creations, you can visit/revisit Catherine's page at What Cathy Made, where she hosts all the links to the other Showcase participants. I'm certainly looking forward to checking out everyone's Garden Green creations. It is always inspiring to see the amazing projects created by others and their interpretations of showcasing the specified colour.

I hope to see you again next week when members of the team will share projects that hero Gorgeous Grape

Do look after yourself and your loved ones. Stay well, stay safe and be kind to yourself and others in these strange times. 

Andrea 💕🐾


Monday, 21 September 2020

Heart of Christmas 2020 - September

Art With Heart Team Heart of Christmas 2020 with Dove of Hope

Hello. Welcome to Valley Inspirations with Andrea and the Heart of Christmas 2020 Showcase by members of the Art with Heart Team


This year is speeding by. We are in September already and soon Christmas will be around the corner. A friend of mine has already created over 50 Christmas cards in readiness for writing and sending to friends. How are you going with Christmas preparations?

This month I have created two projects to share; a Christmas card and a Christmas Tree Ornament; both using the delightful Dove of Hope bundle.

Dove of Hope Christmas Stampin Up card, Andrea Sargent, Independent Stampin' Up! Demonstrator, South Australia, Australia

PROJECT 1: Stampin' Up!s August-December 2020 Mini Catalogue has a range of amazing bundles of coordinating stamps and dies, including the oh so gorgeous Dove of Hope bundle

Dove of Hope Christmas Stampin Up card, Andrea Sargent, Independent Stampin' Up! Demonstrator, South Australia, Australia

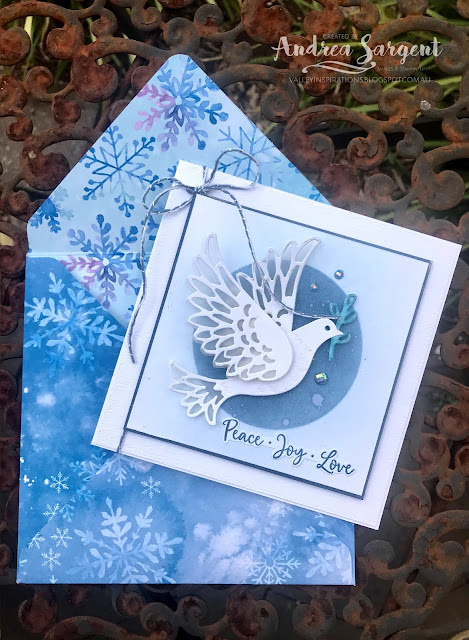
The card I created is a square card of 13cm x 13cm. To start, I die cut a circle from a scrap of card-stock with the aim of using the circular hole as a template. The largest circle from the Stitched Shapes dies was used to cut the hole. 

Dove of Hope Christmas Stampin Up card, Andrea Sargent, Independent Stampin' Up! Demonstrator, South Australia, Australia

This template was placed over a piece of Whisper White card-stock, and the area was sponged using Misty Moonlight Classic ink. It's important to build up the colour slowly and to regularly check how much colour has been applied, remembering that you can always add more colour but its really hard to remove it. Once I was satisfied with the sponged colour, the template was removed and some Seaside Spray Classic ink was sponged around the coloured circle to soften the edge and blend out to no colour. It's very subtle and adds a softness to the design. A little water was misted over the sponged ink to add further interest.

Dove of Hope Christmas Stampin Up card, Andrea Sargent, Independent Stampin' Up! Demonstrator, South Australia, Australia

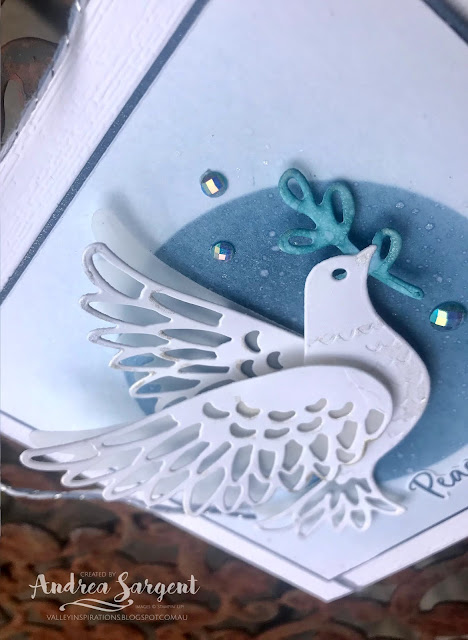
The Detailed Dove die set has a number of dies to cut the pieces that create this lovely dove. The detailed wings and body was die cut from Whisper White card-stock while the open dies were used to cut Vellum card-stock to go behind the feathered areas. The olive sprig also was cut from Whisper White card-stock and was lightly sponged with Pretty Peacock Classic ink.

Dove of Hope Christmas Stampin Up card, Andrea Sargent, Independent Stampin' Up! Demonstrator, South Australia, Australia

The white dove was adhered together with a combination of Multipurpose Liquid glue and Mini Dimensionals. To add a little shading and some shimmer, Champagne Mist Shimmer Paint was lightly added with a Water Painter. While you may be able to see a little of the metallic touches, the lovely shimmer hasn't been picked up by the camera.

Dove of Hope Christmas Stampin Up card, Andrea Sargent, Independent Stampin' Up! Demonstrator, South Australia, Australia

Before the dove was adhered to the card front with Mini Dimensionals the "feathers" were gently curved to add shape and interest. Also before attaching the dove, the card front was cut down to the appropriate size and mounted on a piece of Misty Moonlight card-stock allowing a small boarder to be seen.The finished card front was popped up on the card base with Dimensionals. 
The sentiment was stamped on a scrap of Whisper White card-stock in Misty Moonlight Classic ink. This was fussy cut and adhered directly to the card front. 

Dove of Hope Christmas Stampin Up card, Andrea Sargent, Independent Stampin' Up! Demonstrator, South Australia, Australia

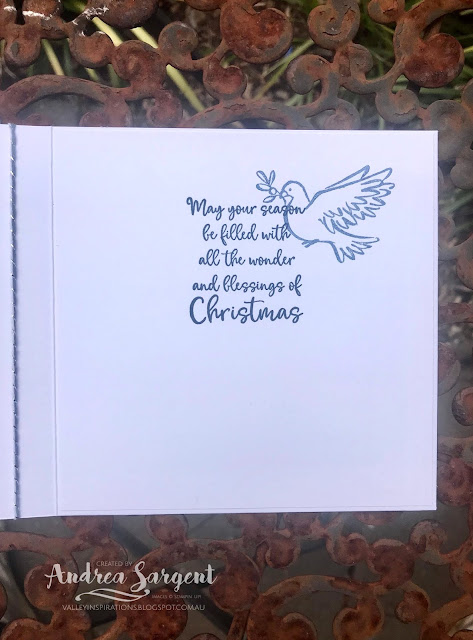
The card inner was stamped with a different sentiment from the same stamp set and the smaller dove was stamped off before stamping on the card inner. A custom created envelope was made out of a piece of the Snowflake Splendor Designer Series Paper with a Whisper White label cut with the Tasteful Labels dies, was adhered to the front of the envelope for writing the name and address of the recipient.

Dove of Hope Christmas Stampin Up card, Andrea Sargent, Independent Stampin' Up! Demonstrator, South Australia, Australia

To add finishing touches, a piece of twine from Flowers for Every Season Ribbon Combo pack was tied around the card front with a bow and three of the super delicious Blue Adhesive-backed Gems were added.

Dove of Hope Christmas Stampin Up card, Andrea Sargent, Independent Stampin' Up! Demonstrator, South Australia, Australia

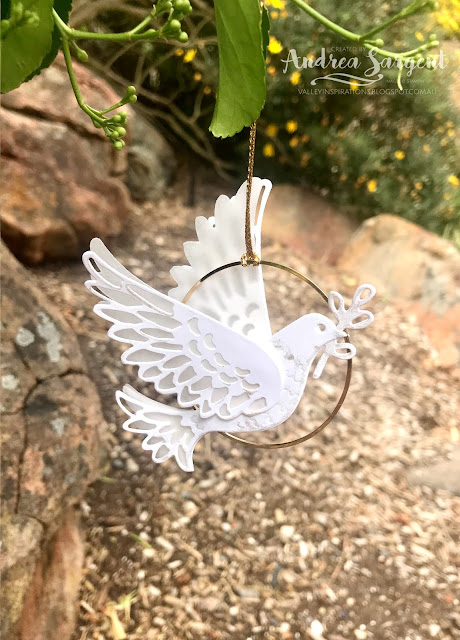
PROJECT 2: The second project uses the Detailed Dove dies set to create another dove, similar to the dove in Project 1. As above, the die cut pieces for the dove were cut out of Whisper White and Vellum card-stocks. The Whisper White pieces had touches of Champagne Mist Shimmer Paint added to add shading and shimmer. A second body piece and full set for a second wing was cut so the back of the dove is the same was the front so that as the ornament swings the back of the ornament is just as decorative.

Dove of Hope Christmas Stampin Up card, Andrea Sargent, Independent Stampin' Up! Demonstrator, South Australia, Australia

The pieces were adhered with a mix of Multipurpose Liquid glue and Mini Dimensionals to form the white dove. The tail end of the body and the beak were adhered over the Gold Hoop Embellishment to hold the dove's position. Pieces of the dove were gently shaped to add a sense of movement. A piece of Gold twine from the Wonder of the Season Ribbon Combo pack was tied over the gold hoop into a loop for hanging the ornament. Concepts for other ornaments came as I created this dove ornament. It is going to be fun to try experiment.

Dove of Hope Christmas Stampin Up card, Andrea Sargent, Independent Stampin' Up! Demonstrator, South Australia, Australia

Thank you for sharing the Heart of Christmas 2020 Showcase for September. I hope you are enjoying the blog hop and finding inspiration. We are always excited to see each others creations and always inspired by one another.


Judy May is our talented host this year for the Heart of Christmas 2020 Showcase each month as we head up to Christmas. If you haven't finished looking at all of the teams Christmas creations, you can visit/revisit Judy's page at Just Judy Designs, where she hosts all the links to the Showcase participants.

It is such a blessing to share with such talented people and so I am sure there will be wonderful projects to inspire in each blog, so do drop by.  I hope to see you again next month for our October Heart of Christmas 2020 Showcase

I really appreciate you dropping by and visiting Valley Inspirations.

Also, please don't hesitate to contact me if you are in Australia and would like a copy of the  Stampin' Up! 2020-2021 Annual Catalogue or the August - December 2020 Mini Catalogue; or if you have any queries that I could help with. If you are interested in buying Stampin' Up! products, I would privileged to help you.

I hope you are coping in these difficult times. Look after yourself and your loved ones. Stay safe, stay healthy and stay sane.

Andrea 😘

#awhtheartofchristmasshowcase

Wednesday, 16 September 2020

Art with Heart Colour Creations Showcase - #16 Flirty Flamingo

Flirty Flamingo with Christmas Gleaming

Hello. Welcome to Valley Inspirations with Andrea and the Colour Creations Showcase by members of Stampin' Up!'s Art with Heart Team.


This week we are focussing on Flirty Flamingo, a pretty bright pink. It sits within Stampin' Up!'s Brights colour familyFlirty Flamingo can be found in Stampin' Up!s cardstock, Classic inks, Stampin' Write Markers, Watercolour Pencils, Stampin' Blends, some Designer Series Papers and sparkly Whale of a Time sequins


I had hoped to present two cards to you in this blog, but at the time of going live there will be only one card. The other is in pieces on my desk. It needs something else and inspiration hadn't arrived at the time of writing the blog. I'm hoping that I will be able to upload the 2nd card tomorrow. Fingers crossed.

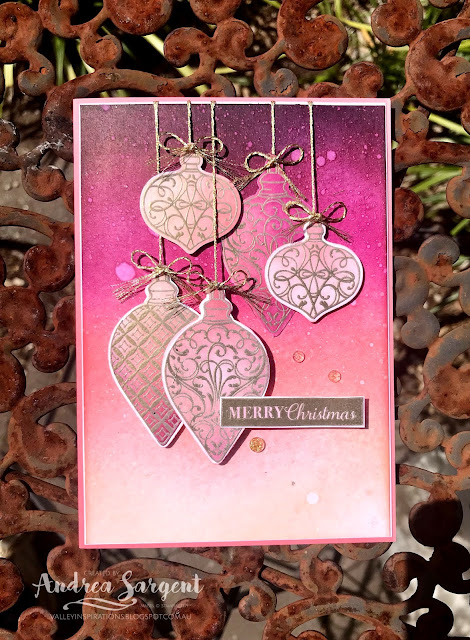
Flirty Flamingo Christmas Gleaming Stampin Up card; Andrea Sargent, Independent Stampin' Up! Demonstrator, South Australia

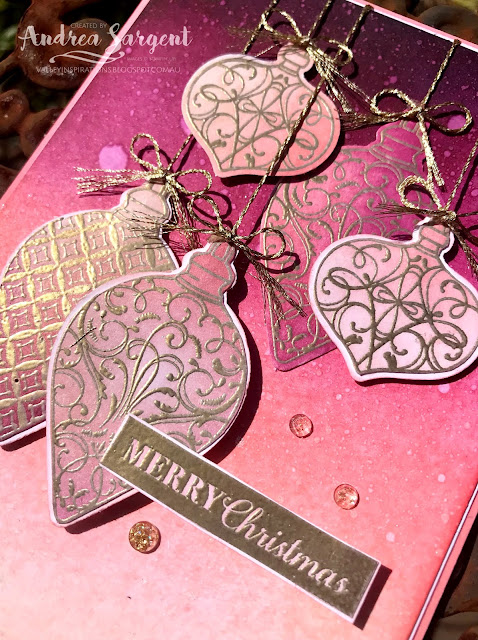
I've seen a couple of lovely sponged backgrounds of late and was reminded how beautiful this technique can be, so I decided to use the technique for one of my cards. I've also been reminded of how water reactive Stampin' Up!s Classic inks are - more of this in a later blog, but for this background splatters of water were added to give the background more character. Check out the various size splatters on this close-up.

Flirty Flamingo Christmas Gleaming Stampin Up card; Andrea Sargent, Independent Stampin' Up! Demonstrator, South Australia

To create by background, I used sponges to apply Petal Pink, Flirty Flamingo, Rich Razzleberry, Blackberry Bliss and a touch of Night of Navy Classic ink on Whisper White card-stock to create this graded colour play. It is important when blending from one colour to the another to overlap the two colours so that there is an area where the colours mix. I usually apply one colour, then the second colour with an overlapped area and then go over the mixed area again with the first colour. This seems to soften the blending. We all apply techniques with our own twist - this is my approach.

Flirty Flamingo Christmas Gleaming Stampin Up card; Andrea Sargent, Independent Stampin' Up! Demonstrator, South Australia

After finishing my colour blending, I spritzed water over the background and then left the water to interact with the ink. Once dry, I sprinkled some Wink of Stella over the card background. In real life the background looks shimmery - but it isn't picked up in my photos. I mounted this card front with a very fine boarder of Whisper White card-stock. 

Flirty Flamingo Christmas Gleaming Stampin Up card; Andrea Sargent, Independent Stampin' Up! Demonstrator, South Australia

The baubles from the Christmas Gleaming stamp set were stamped in Versamark ink on Whisper White card-stock and then heat embossed using Gold Emboss powder. They were coloured using the same range of inks as the background (apart from Blackberry Bliss and Night of Navy). A sentiment from the same set was similarly heat embossed. The embossing itself resisted the application of colour, and so the gold embossing shines through.

Flirty Flamingo Christmas Gleaming Stampin Up card; Andrea Sargent, Independent Stampin' Up! Demonstrator, South Australia

The baubles and sentiment were arranged. That sounds so simple, but ... I spent ages on the arrangement. Initially, I thought three baubles; hmm was it a bit sparse? So added another two - was it too crowded???? Took two off; hmm still not right. They were moved up and down; spread over the card base and then grouped together; the order was changed and then changed again; plus all sorts of combinations of the above. Must admit I'm still not 100% happy and am wondering whether it would have been better with White embossing and or lighter colouring on the baubles. What do you think?

Flirty Flamingo Christmas Gleaming Stampin Up card; Andrea Sargent, Independent Stampin' Up! Demonstrator, South Australia

The Whisper White card inner and a Whisper White C6 Envelope were stamped with baubles in Flirty Flamingo Classic ink.

To finish off the card front, Golden Twine from the Forest Greenery Trim Combo pack was laid from the top of each bauble to the top of the card front. All the threads were then adhered to the back with Tear n' Tape. Little bows were adhered in place with Glue Dots. The card front  was then adhered onto the Flirty Flamingo card-stock base. Three Wonderful Gems were added to complete the card. The gems are wonderful - they have bits of gold within.

Flirty Flamingo Christmas Gleaming Stampin Up card; Andrea Sargent, Independent Stampin' Up! Demonstrator, South Australia


Catherine Proctor is our wonderful host of the Art with Heart Colour Creations Showcase. If you haven't finished visiting all of the team's colour creations, you can visit/revisit Catherine's page at What Cathy Made, where she hosts all the links to the other Showcase participants. I'm certainly looking forward to checking out everyone's Flirty Flamingo creations. It is always inspiring to see the amazing projects created by others and their interpretations of showcasing the specified colour.

I hope to see you again next week when members of the team will share projects that hero Garden Green

Do look after yourself and your loved ones. Stay well, stay safe and be kind to yourself and others in these strange times. 

Andrea 💕🐾


AWH Colour Creations Blog Hop #34 Melon Mambo

Melon Mambo with Memorable Blooms Hello. Welcome to  Valley Inspirations with Andrea  and the  Art with Heart Colour Creations Blog Hop.  We...