Art with Heart Wow Tutorials

Monday, 11 October 2021

AWH Heart of Christmas #15

Christmas with Snowflake Wishes & Words of Cheer

Hello. Welcome to Valley Inspirations with Andrea and the Art with Heart Team 2021 Heart of Christmas Blog Hop. 


It's wonderful that you are joining us for this Heart of Christmas Blog Hop. Creating  Christmas cards is a happy experience, especially with the fabulous Stampin' Up products. I had some ideas for this week's card, but ran out of time and so I am sharing a couple of cards I created after recently watching Emma Goddard during one of her Card & a Cuppa sessions, where she demonstrated the masking technique with blending and stamping.  I have a 3rd card part created, but it didn't fall neatly into place and requires some fiddling with placement etc. I will try to upload it here over the next few days. Here are my two completed cards - I hope you like them:


As my time has completely disappeared with today's commitments extending longer than planned, I won't be going into all the details of how the cards were created and with what, but will just summarise key aspects. Please contact me if you have any queries.


Both cards used the masking technique where a piece of paper was torn in half and then placed over the card front with a space in-between. One of Stampin' Up!s gorgeous Blending Brushes was used to colour the Basic White card-stock in-between the torn edges. The first card used a mix of Fresh Freesia, Pool Party and Balmy Blue Classic Stampin' inks. 


Before lifting the masking paper some snowflakes from the Snowflake Wishes stamp set were stamped in the same colours was the blended background, but as they were stamped the colours are more intense.


A sentiment from the same stamp set was stamped in Balmy Blue Classic ink. A large snowflake from the Wonderful Snowflakes embellishment pack was positioned with other die cut snowflakes, cut using the So Many Snowflakes die set from the paper used for the snowflake embellishments. The snowflakes were finished with Blue Adhesive-backed Gems at the centre.


Both the card inner and a C6 Basic White envelope were stamped with flurries of small snowflakes using the same ink colours as listed above.


Card 2: The second card used the same masking and stamping technique, but a different stamp set, ink colours and embellishments. 


The blended coloured panel was created using Cherry Cobbler Classic Stampin ink and the poinsettia arrangement from the Words of Cheer stamp set was stamped in Cherry Cobbler ink over the masked and blended area.


The sentiment came from the same stamp set and was also stamped in Cherry Cobbler. I love the richness of this colour for Christmas. The same poinsettia arrangement was stamped twice more on a seperate piece of Basic White card-stock and holly leaves were stamped in Garden Green Classic Stampin' ink. There was an infill stamp for the leaves that was stamped in second generation stamping, ie stamping off first.


The poinsettias on the seperate piece of card-stock were coloured with Stampin' Blends, ie Flirty Flamingo, Cherry Cobbler and the Colour Lifter. The poinsettias were fussy cut, as was the tiny holly leaves. Some gold threads that came from a piece of disassembled Cherry Cobbler & Gold ribbon were adhered to the card front and the poinsettias and holly leaves were arranged over it. Champagne Basic Rhinestone Jewels were added to the centre of each layered poinsettia.


Both the card inner and a C6 Basic White Envelope were masked and the same blending and stamping were added to an edge of each to tie them in with the card front design.


Thank you so much for spending time with me on my blog.

If you are in Australia, don't already have a Stampin' Up! demonstrator and would like your own copy of Stampin' Up's 2021-2022 Annual Catalogue and or the July - December Mini Catalogue then let me know and I will be delighted to send them to you. Also, please don't hesitate to make contact with any other queries about these projects or Stampin' Up!. 

To continue with the blog hop, click on the "onto the next" graphic below to be taken to the blog of the very special Kate Morgan. I always look forward to checking out Kate's creations together with everyone else's. 

Hope to see you next week for another AWHT Heart of Christmas Blog Hop. There is so much Christmas inspiration to share using Stampin' Up!'s products and preparing early for  Christmas will minimize some of the stresses of the silly season. Also, don't forget the weekly Colour Creations Blog Hop by the Art with Heart Team that launches every Wednesday at 8.00pm AEST.

Stay well, stay safe and be kind to yourself and others.

Andrea XXX


As mentioned, it is always a delight to see everyone's creations and the way they each use the amazing Stampin' Up! products. I am sure there will be gorgeous Christmas projects on show. Don't miss checking out each blog. 

If at any time you find a broken link and the next blog doesn’t come up or you started part way through, please head to the blog of this week’s delightful host for the Heart of Christmas Blog Hop, Sharon Davern, and she will have the list of all Art With Heart Team members who are participating in this blog hop. Check out her beautiful creation while you are there.


#heartofchristmas #heartofchristmas2021 #awhtheartofchristmas

Wednesday, 6 October 2021

AWHT Colour Creations #19 Gorgeous Grape

Gorgeous Grape with Soft Pastels Assortment and Angels of Peace & So Many Snowflakes   

Hello. Welcome to Valley Inspirations with Andrea and the Art with Heart 2021-2022 Colour Creations Blog Hop.


This week’s Blog Hop is focussing on an intense purple called Gorgeous Grape. Gorgeous Grape is part of the Stampin' Up! Brights Colour Family and is a great colour, even if its one I haven't used regularly. I would have said that I'm not a purple person, however, of late I have enjoyed creating with purple in it's various SU shades. This week's projects started with a decision to use the Soft Pastels Assortment as hadn't used them since they arrived. Focussing on Gorgeous Grape was a great opportunity to experiment with techniques using the pastels.

Share Christmas joy, having explored the soft pastel colouring of angels and snowflakes, by Andrea Sargent, Australia.

Gorgeous Grape is produced in Stampin' Up!'s card-stock, both A4 & 12"x12"; Classic Stampin' inks (ink pads, re-inkers & ink spots); Stampin' Write Markers; Watercolor Pencils; Soft Pastels Assortment; the Brights Designer Series Papers; Ombre Speciality Paper; Sheer Ribbon; Pastel Pearls and Sheer Ribbon. The cards have used Gorgeous Grape card-stock, Classic ink, Soft Pastels Assortment and Gorgeous Grape Sheer Ribbon plus a range of other bits and pieces.


Background Techniques with Soft Pastels: 

I started by experimenting with 2 background techniques. I remembered seeing one technique, I think by one of the Artisans; the second - I hadn't seen anyone try. 


Starting with a container of water, I sprinkled fine scrapings from the Gorgeous Grape pastel stick on top of the water. I also sprinkled some Night of Navy and Coastal Cabana scrapings on top of the water and gave a little swirl. Then a piece of Fluid 100 Watercolor paper was laid on top of the water. When I lifted the paper, some pastel ink had transferred to the paper. I did notice that the powdered ink didn't lay on top of the water for very long but dropped to the bottom of the container, as such the colouring is fairly light. Next time it may be worth testing out transferring one colour at a time to the paper - layering one colour on top of another.


With another piece of Fluid 100 Watercolor Paper, I wet the paper with water from a Stampin' Up! Mister and then sprinkled scrapings from Gorgeous Grape, Night of Navy and Coastal Cabana pastels onto the damp paper. The powdered pastel dissolved a little, but generally didn't do that much, so I misted more water over the powdered pastels on the paper. This spread the colour, with some colour blending. As you can see the colour is more intense but there are some lumps of congealed powder. It will be interesting to experiment further at another time.

CARD 1:

Share Christmas joy, having explored the soft pastel colouring of angels, by Andrea Sargent, Australia.

Once the background panel had dried following being coloured using the first technique described above, it was embossed with the Merry Melody 3D embossing folder.

Share Christmas joy, having explored the soft pastel colouring of angels, by Andrea Sargent, Australia.

The larger angel from the Angels of Peace stamp set was stamped in Versamark ink onto Shimmery White card-stock and heat embossed with White Emboss Powder and a Heat Gun. Using the finest Water Painter the angel was coloured using the Soft Pastels Assortment. With remaining scrapings from the Gorgeous Grape pastel stick, plus some scrapings from the Real Red and Daffodil Delight pastels, the wet tip of the fine Water Painter was dipped into the pastel powder, dissolving some of the powder and then colouring the angel. This was similar to water-colouring using our re-inkers. As there isn't a brown pastel stick, I mixed a little Real Red and Coastal Cabana dampened pastel powder to create a brown for colouring her hair. I'm so glad for the colour theory I studied many many years ago.

Share Christmas joy, having explored the soft pastel colouring of angels, by Andrea Sargent, Australia.

The angel was fussy cut and layered over a couple of Wonderful Snowflakes on top of the embossed coloured background. The angel needed something else to ground her so I cut a side piece of Fresh Freesia card-stock using the pointed stitched die from the Basic Borders die set. Some gorgeous White Glittery Organdy ribbon 
also was added with the snowflakes and angel layered on top. The whole card front was mounted on a slightly larger piece of Gorgeous Grape card-stock. This was popped up on Dimensionals onto a Fresh Freesia card base.

Share Christmas joy, having explored the soft pastel colouring of angels, by Andrea Sargent, Australia.

The White Glittered Organdy ribbon and the Gorgeous Grape Sheer ribbon were both cut in half length-wise and a piece of each were tied into bows and tucked under the top snowflake,  adhering them with Glue Dots. A sentiment from the same stamp set was stamped in Versamark ink and heat embossed with White Emboss Powder. The top line of the sentiment was fussy cut and adhered in place with Mini Dimensionals. A number of Subtle Shimmer Sequins were added to add some extra shimmer.

Share Christmas joy, having explored the soft pastel colouring of angels, by Andrea Sargent, Australia.

The card inner was decorated with the angle and a different sentiment stamped with Gorgeous Grape on Basic White card-stock. This panel was mounted on a slightly larger piece of Gorgeous Grape card-stock. A Basic White C6 envelope was also stamped with the angel in Gorgeous Grape Classic Stampin ink.

Share Christmas joy, having explored the soft pastel colouring of angels, by Andrea Sargent, Australia.


CARD 2:

Share Christmas joy, having explored the soft pastel colouring of snowflakes, by Andrea Sargent, Australia.

The second pastel coloured panel was used as a background for a Snowflake Shaker card. A centre hexagon shaped hole was cut in a piece of Snowy White Velvet Sheet. It doesn't show in the photo, but it feels so soft and velvety. This die cut piece was embossed with the snowflake embossing folder from the Wintery Embossing Folder set. It creates a delightful embossed image.

Share Christmas joy, having explored the soft pastel colouring of snowflakes, by Andrea Sargent, Australia.

A shaker window was created with a piece of Window Sheet, Foam Adhesive Strips, the delightful Subtle Shimmer Sequins with the background piece layered behind. The whole shaker window was mounted on a slightly larger piece of Gorgeous Grape card-stock and in turn adhered to a Fresh Freesia card base. The shimmer of the white and silver sequins is delightful over the pastel coloured base.

Share Christmas joy, having explored the soft pastel colouring of snowflakes, by Andrea Sargent, Australia.

Three snowflakes from the So Many Snowflakes dies were cut from Fluid 100 Watercolor paper. These snowflakes (plus another 2 for decorating the card inner) were water-coloured using some remaining Gorgeous Grape, Night of Navy and Coastal Cabana soft pastel powder and the fine Water Painter. Once dry, the snowflakes were adhered with a little Multipurpose Liquid Glue and finished with Blue Adhesive-backed Gems. (The formal name may sound boring but they are anything but boring. Their shimmer and colour is scrumptious.)

Share Christmas joy, having explored the soft pastel colouring of snowflakes, by Andrea Sargent, Australia.

A sentiment from the coordinating Snowflake Wishes stamp set was stamped in Smoky Slate Classic ink on Basic White card-stock. The sentiment was stamped again in Gorgeous Grape ink and the words "Merry Christmas" cut out. This piece was layered over the Smoky Slate sentiment with Dimensionals.

Share Christmas joy, having explored the soft pastel colouring of snowflakes, by Andrea Sargent, Australia.

A left over piece of the coloured background and a very fine strip of Gorgeous Grape card-stock were added to the RHS of a piece of Basic White card-stock. The two extra water coloured snowflakes were layered on top. A Basic White C6 Envelope was stamped with one of the small snowflake flurry stamps using Fresh Freesia ink with a little Gorgeous Grape ink partially daubered on the stamp (using a Sponge Dauber). The stamping went all around the front edge of the envelope.

Share Christmas joy, having explored the soft pastel colouring of snowflakes, by Andrea Sargent, Australia.

Thank you for spending some time with me. I had a lot of fun playing with techniques using the Soft Pastel Assortment. I would like to further explore the techniques used on these cards and refine my use of the techniques. There are many other techniques that I would like to try as well. You never know - they may turn up in more Colour Creations projects.

Share Christmas joy, having explored the soft pastel colouring of angels and snowflakes, by Andrea Sargent, Australia.


If you live in Australia, don't already have a Stampin' Up! demonstrator and would like your own copy of Stampin' Up's 2021-2022 Annual Catalogue and or the July - December 2021 Mini Catalogue, then let me know and I will be delighted to send them to you. Please don't hesitate to make contact with any other queries about this project or Stampin' Up!. 

There is more Gorgeous Grape creativity. To continue with the blog hop, click on the "next" graphic below to be taken to the blog of a lovely lady, Ros Davidson. As always, I am looking forward to checking out Ros's creation and everyone else's. I do love seeing everyones' projects - so many ideas and such great creations

Hope to see you next week when we will be featuring Granny Apple Green; and don't forget that the AWHT Heart of Christmas Blog Hop is launched every Monday evening at 8pm AEDT until mid-December.

Stay well, stay safe and be kind to yourself and others.

Andrea 💕🐾


If you find a broken link or have come to this blog hop from a different entry point, you can view the full list of participants on Catherine Proctor’s blog, our amazing AWHT Colour Creations Coordinator.  Check out her amazing creation while you are there.

#colourcreationsbloghop  #colourcreationsbloghop2021 

Monday, 4 October 2021

AWH Heart of Christmas #14

Christmas with Sweet Stockings and Penguin Place

Hello. Welcome to Valley Inspirations with Andrea and the Art with Heart Team 2021 Heart of Christmas Blog Hop. 


So glad you are joining us for this Heart of Christmas Blog Hop. I love creating for Christmas, however, the week seemed to disappear given various commitments and time was limited for creating plus I was experiencing some health difficulties. As such, I used bits and pieces previously prepared and laying around my crafting space and CASEd layouts as my inspiration was waining.

CHRISTMAS CARD 1:

While staying overnight with a friend, Kathryn Mangelsdorf, who was holidaying at Middleton, I took the Sweet Stockings DSP with me and a pair of snips and relaxed with some fussy cutting in the evening. A range of cats, dogs, mouse & bird had been fussy cut - so were ready and waiting. I also had the Basic White slimline card base sitting on my desk. 


I thank Emma Goddard, a UK Demonstrator, for inspiration for this card. I attended one of Emma's fabulous classes by Zoom over the weekend where the Penguins Place bundle was the focus. It was a fun time with great projects. 

With a spare slimline card base and a number of fussy cut critters, I CASEd one of Emma's project layouts to create this card, using a range of different products.


The background had some blending with Pool Party Classic Stampin' ink and a Blending Brush; then some little stars from the Sweet Little Stockings stamp set were stamped in Pool Party ink. The fussy cut critters were arranged and were either adhered with Multipurpose Liquid Glue or popped up on Dimensionals. I certainly had fun arranging the animals, trying to align expressions with  placement, ie a cat checking out the mouse with the present and another cat eyeing off the fishbowl. I know, I have a pixie-ish sense of humour sometimes.


A sentiment from the same stamp set was stamped in Cherry Cobbler Classic ink onto Basic White card-stock and then fussy cut with my trusty Snips. The sentiment was layered on Dimensionals and a fussy cut bird added on a Dimensional as well.


The Basic White card front was adhered directly to a Thick Basic White slimline card-stock base with liquid glue. A few of the Matte Decorative Dots were added near the sentiment and some Wink of Stella flicked over (although this isn't picked up by the camera).


The card inner was created with some of the stars stamped in Pool Party ink on the Basic White card inner. "Sending lots of love" also from the Sweet Little Stockings stamp set was stamped in Cherry Cobbler ink and a strip of DSP that was also used to create an envelope, was added at the bottom of the card inner. The DSP used for the custom made envelope came from the Sweet Stockings DSP.  A pre-cut label (cut using the Stitched So Sweetly dies) was adhered to the fronton the envelope for writing the address. 


CHRISTMAS CARD 2:

My second card is a slightly stepped up version of a card that was made in one of my classes about 6 weeks ago. I had a few kits left over from the class and as the sample card was misplaced at the class, I used one of the kits to create this card.


The card front was embossed with the Evergreen Forrest 3D Embossing Folder and some Just Jade from the Dark Just Jade Stampin' Blend was splattered over the trees. The largest circle from the Layering Circle dies cut a "sky" circle of DSP from the Beauty of the Earth DSP. This was popped up on Dimensionals.


I had a little stamped penguin sitting on my desk that had been stamped using the Penguins Place bundle with Momento ink, Mango Melody and Highland Heather Classic ink. The sunglasses were created with Basic Black card-stock and the Penguin punch. The Penguin was popped up on a Wobbler so that when he is touched he will wobble. It makes me smile.


Balloons were stamped in Cherry Cobbler, Garden Green and Highland Heather, with the strings stamped in Momento. They were fussy cut and then adhered with liquid glue except the Highland Heather balloon that was popped up on a Dimensional. I realised as I was taking the photos that I had adhered the clouds upside down - that's me at the moment, a bit upside down!  I also realised that the clouds had been cut using the Sheep dies, that are now a retired Sale-a-bration product - oops.


To finish off the card, a sentiment from the Penguin Place stamp set had been stamped in Misty Moonlight ink, fussy cut and was added with Dimensionals. Some gorgeous Subtle Shimmer Sequins were added and a little Wink of Stella was flicked over the card.


I ran out of time to add a card inner (a job for the next few days as I don't like to leave naked inners), but a couple of stamped balloons were added to a C6 Basic White envelope.


Thank you so much for spending time with me on my blog. I'm so glad you dropped in.

If you are in Australia, don't already have a Stampin' Up! demonstrator and would like your own copy of Stampin' Up's 2021-2022 Annual Catalogue and or the July - December Mini Catalogue then let me know and I will be delighted to send them to you. Also, please don't hesitate to make contact with any other queries about this project or Stampin' Up!. 

To continue with the blog hop, click on the "onto the next" graphic below to be taken to the blog of the delightful Ros Davidson. I always look forward to checking out Ros's creations plus everyone else's. 

Hope to see you next week for another AWHT Heart of Christmas Blog Hop. I heard we only have 12 weeks to Christmas - it will be here before we know it. I hope you have started creating. There is so much Christmas inspiration to share using Stampin' Up!'s products. Even though I have been Christmas card making since July I think i need to step it up so I can send cards overseas and have sufficient for my Aussie friends. 

Also, don't forget the weekly Colour Creations Blog Hop by the Art with Heart Team that launches every Wednesday at 8.00pm AEST.

Stay well, stay safe and be kind to yourself and others.

Andrea XXX


As mentioned, it is always a delight to see everyone's creations and the way they each use the amazing Stampin' Up! products. I am sure there will be gorgeous Christmas projects on show. Don't miss checking out each blog. 

If at any time you find a broken link and the next blog doesn’t come up or you started part way through, please head to the blog of this week’s host for the Heart of Christmas Blog Hop, Tina Gillespie, and she will have the list of all Art With Heart Team members who are participating in this blog hop. Check out her beautiful creation while you are there.


#heartofchristmas #heartofchristmas2021 #awhtheartofchristmas


Wednesday, 29 September 2021

AWHT Colour Creations #18 Garden Green

Garden Green with Poinsettias and Hand Penned Petals

Hello. Welcome to Valley Inspirations with Andrea and the Art with Heart 2021-2022 Colour Creations Blog Hop.


This week’s Blog Hop is focussing on a strong and rich green called Garden Green. Garden Green is part of the Regals Colour Family and is a wonderful colour for a range of leaves, grasses & the like.  This week's project was inspired by a wreath I created for the recent Heart of Christmas Blog Hop that went live a couple of days ago. Also, an amazing crafter, Emma Goddard inspired the use of the fancy fold. Emma demonstrated this particular fold at last Friday's Card and a Cuppa session.


Garden Green is produced in Stampin' Up!'s card-stock, both A4 & 12"x12"; Classic Stampin' inks (ink pads & re-inkers); Stampin' Write Markers; Watercolor Pencils; the Regals & Painted Christmas, Hand-penned and Bloom Where You Are Planted Designer Series Papers; and the Hand-penned Memories & More Card pack. The cards below have used a mix of Garden Green card-stock and Classic Stampin' ink, Painted Christmas and Hand-penned DSPs together with a range of other bits and pieces.


These Double Diamond Fancy Folds are fun to create and actually quite addictive - hence my 2 cards for this Blog Hop. 

As I was creating the Poinsettia Wreath for my last Heart of Christmas blog post I was also thinking of the fold that I saw a couple of days prior. As the wreath used Garden Green card-stock to die cut pine fronds, I pondered how I could create a card using the same Garden Green pine fronds. With a large poinsettia and 2 minis left over from the wreath, the Double Diamond Poinsettia card became a reality.


As I already had the Real Red and Cherry Cobbler card-stock poinsettias left over from my previous project, I started by cutting pine fronds from Garden Green card-stock using one of the pine dies from the Pinecone dies set. Some leaves and bud stems were die cut out of Silver foil from the Silver Foil Speciality Pack.


The card base was made from half an A4 sheet of Garden Green card-stock. One of the designs from the Painted Christmas DSP was cut into small squares and mounted onto Basic White card-stock for each of the outer squares. The larger inner square was cut from Basic White card-stock and mounted on a slightly larger piece of Garden Green card-stock. This was adhered to the card base on the lower triangular half of this piece.

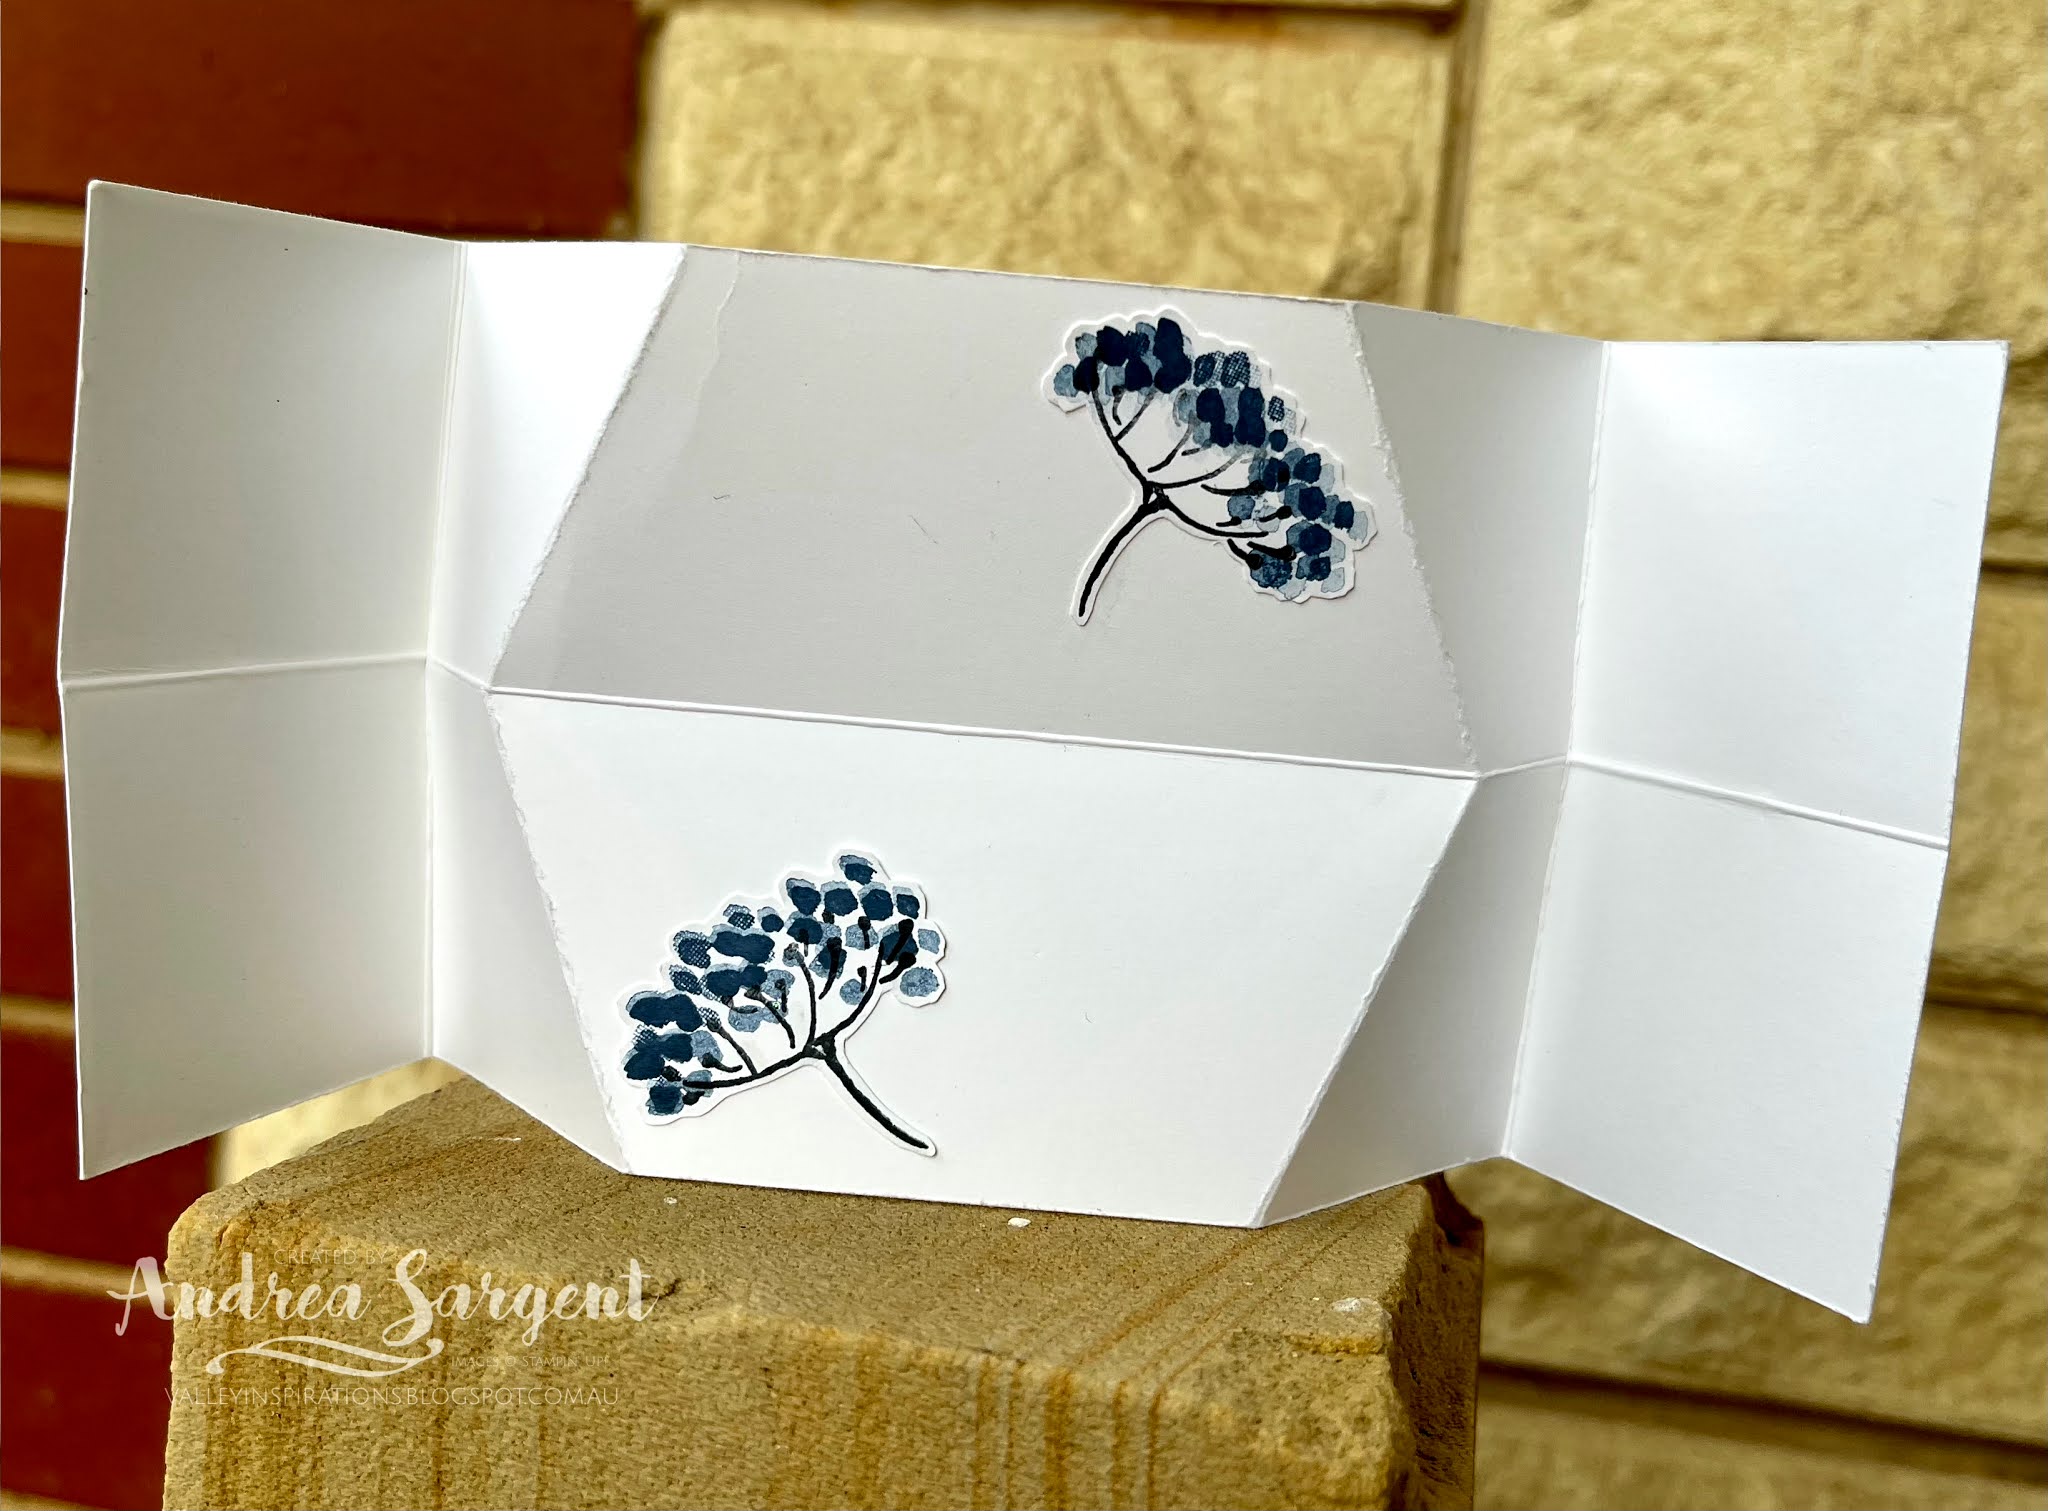
Shimmery White Embossing paste was added to the tips of the pine fronds and tips of the poinsettia flowers. All the die cut pieces were arranged and adhered with a mix of Dimensionals and Multipurpose Liquid Glue on to the central focal panel and the 2 front smaller DSP diamonds. Here is a closer look from both sides. 

The "Happy Christmas" sentiment was stamped in Merry Merlot ink on Basic White card-stock. This sentiment was trimmed from a larger sentiment from the Words of Cheer stamp set. (I need to tidy up my work station as products are still out from previous projects, however it was useful to have stamps, etc that could be easily grabbed for this project.)


Some Basic White card-stock was added underneath the card for a place to write a personal message. The full sentiment from the Words of Cheer stamp set was stamped in Merry Merlot. As you can see from the photo below the card is simply folded from the half sheet of card-stock and no glue holds the fold together - it holds itself once folded and standing up.


Project 2: The second card features the same fancy fold and a different DSP, which includes Garden Green as one of the colours, that is the Hand-penned DSP. I really love this DSP design - well, actually I adore the whole suite. I love the colour combinations and the sketchy water-colour effect.


The Basic White card-base was scored and folded and 4 x DSP squares were cut from one of the Hand-penned DSP designs. The DSP pieces were mounted on larger Garden Green pieces and then adhered to the outer diamonds of the folded card.


The larger focal square was cut from Basic White card-stock and mounted onto Garden Green. Before the white piece was mounted, it was dry embossed using the Hello embossing folder from the Thanks & Hello Embossing Folder set. A Blending Brush and some Soft Sea Foam ink was lightly blended over the embossed panel.


Floral stamps and a sentiment from the Hand-penned Petals stamp set were stamped in Momento ink onto Basic White card-stock. The flowers were stamped with the coordinating stamps from the stamp set using colours to match the DSP, ie Pale Papaya and Misty Moonlight. The leaves were coloured with Garden Green ink and a Blender Pen. Some extra Pale Papaya also was added with the Blender Pen. As I wanted to include some of the colouring that intentionally went outside of the line, the flowers, leaves and sentiment were fussy cut.


The flowers and sentiment were arranged and adhered with Dimensionals. A bow was tied using White Bakers Twine and the Gold Elegant Trim and some of the delightful 2021-2023 In Colour Jewels were added to give some gorgeous sparkle.


Two remaining flowers were adhered to the reverse side to add some coordinating "pretty" to decorate the personal message space.

I did have a lot of fun creating these Double Diamond cards and am really enamoured with this fold. Garden Green is a great green to work with when illustrating natures foliage. (My apologies for the photo backgrounds as it was raining and I couldn't use my usual spot; as such I set up on my front porch to use the natural light. I hope to re-photograph tomorrow - weather permitting.)


If you live in Australia, don't already have a Stampin' Up! demonstrator and would like your own copy of Stampin' Up's 2021-2022 Annual Catalogue and or the July - December 2021 Mini Catalogue, then let me know and I will be delighted to send them to you. Please don't hesitate to make contact with any other queries about this project or Stampin' Up!. 

There is more Garden Green creativity. To continue with the blog hop, click on the "next" graphic below to be taken to the blog of a very special and talented friend, Rachel Palmieri. As always, I am looking forward to checking out Rachel's creation along with everyone else's. I do love seeing everyones' projects - so many ideas and such inspiring creations

Hope to see you next week when we will be featuring Gorgeous Grape. Also, don't forget that the AWH Heart of Christmas Blog Hop goes live with another blog hop every Monday evening at 8pm AEST until mid-December.

Stay well, stay safe and be kind to yourself and others.

Andrea 💕🐾


If you find a broken link or have come to this blog hop from a different entry point, you can view the full list of participants on Catherine Proctor’s blog, our amazing AWHT Colour Creations Coordinator.  Check out her amazing creation while you are there.

#colourcreationsbloghop  #colourcreationsbloghop2021

AWH Heart of Christmas - #7

Christmas with Shining Stars  Hello. Welcome to  Valley Inspirations with Andrea  and the seventh  Art with Heart Team Heart of Christmas Bl...